Introduction
This is the latest article in the series that shows you how to install Linux for Windows XP users.
In the first article I showed you how to
create a bootable Linux DVD. I also showed
how to create a bootable Linux USB drive in case you don't have a DVD drive.
After that I showed how to backup your files to DVDs, USB drives, external hard drives and Dropbox so that you can copy it back to the Linux partition at a later stage. I also demonstrated how to create a system image and recovery media.
This article is all about preparing your drive to install WIndows XP alongside Linux.
I will guide you through cleaning your disk, defragmenting your disk and shrinking your disk.
Disk Cleanup
Firstly press "Alt" and "E" together to bring up an explorer window.
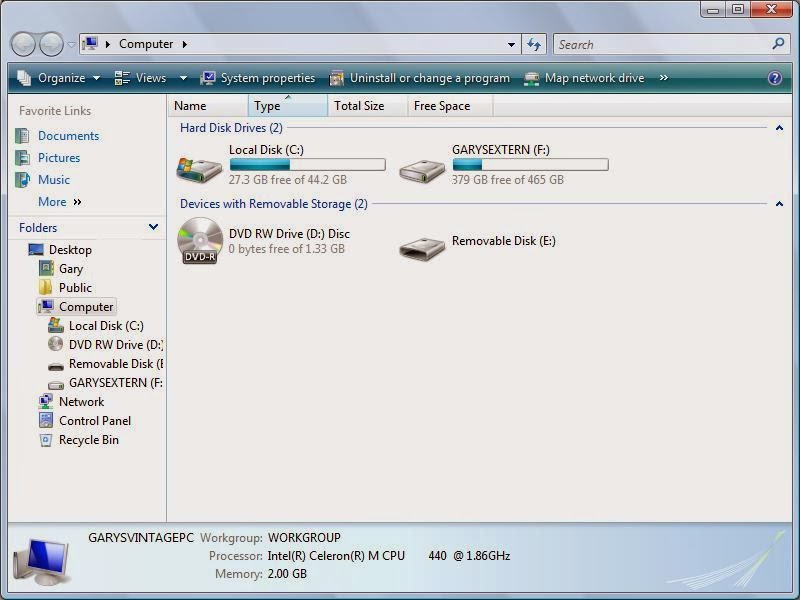
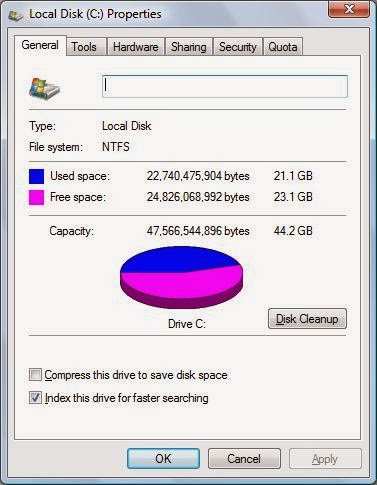
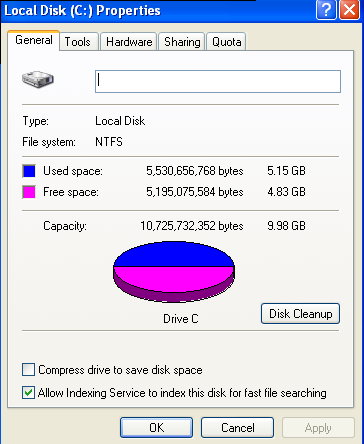
Right click on the drive called "Local Disk (C:)" and choose "Properties".
This screen shows you useful information about your drive such as how big the drive is and how much free space there is.
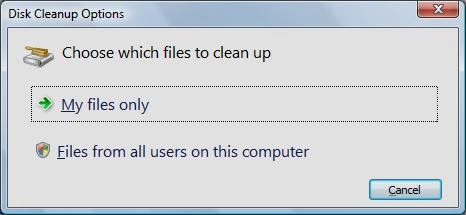
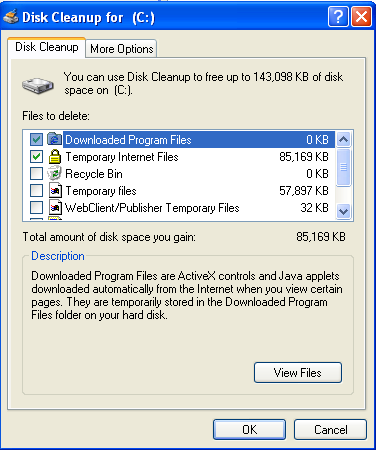
Click on "Disk Cleanup".
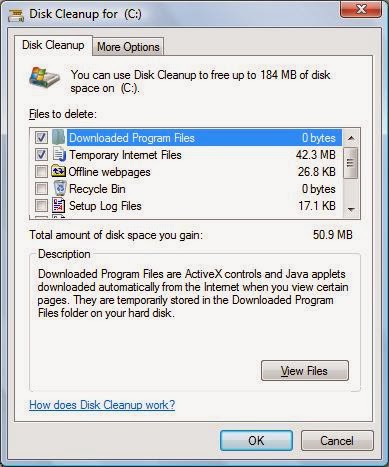
After a short while after your disk has been analysed the above screen will be displayed.
You will notice that there is a label that says "Total amount of disk space you will gain". If you accept the default options you can reclaim the amount of space shown.
You can claim more space though by checking the boxes of other items as well.
So what are they?
- Downloaded program files
- Temporary Internet Files - When you open a webpage the page is copied from the server to your local disk including images. These are all temporary internet files. After a while this can take a fair amount of space. You can delete these files because to get them again all you have to do is visit the sites again.
- Recycle bin - Every time you delete a file it goes into the recycle bin. If you are sure you want to delete the files you can check the recycle bin option.
- Temporary Files - A bit like temporary internet files. Every time you open a program it will open files to help them work. After a while these files can take up a fair amount of space. It is generally safe to delete these temporary files.
- Webclient/Publisher files are used to make it quicker to access files locally. You can check this option.
- Compress old files - If you haven't accessed certain files for a while but still need them then you can compress them which takes up less space. The downside is that next time you need to access the file it will need to be expanded again.
- Catalog files for the catalog indexer - To make disk access faster a catalog is made of all the files on your disk. When sorting them there are temporary index files created that get left behind. They can be safely removed.
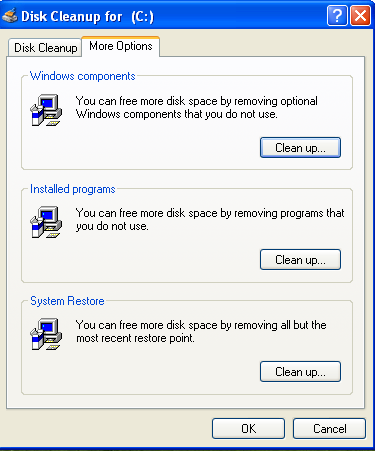
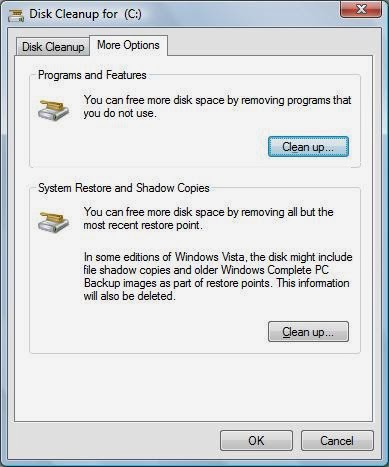
The "More Options" tab gives you further ways of cleaning up your disk.
First up are the "Windows components".
The Windows Components window lists all the components that are installed by default including Internet Explorer, Windows Media Player, Outlook Express etc.
If there are some items checked that you don't use uncheck them and click "Next".
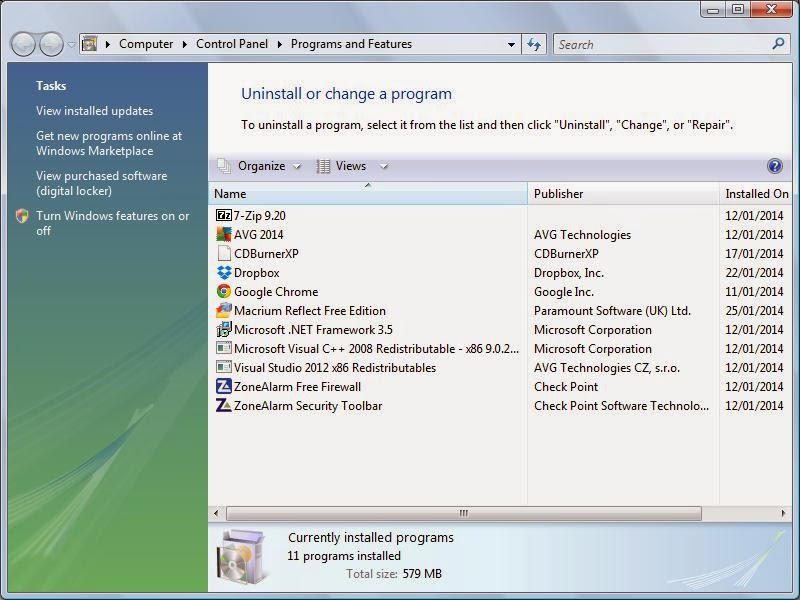
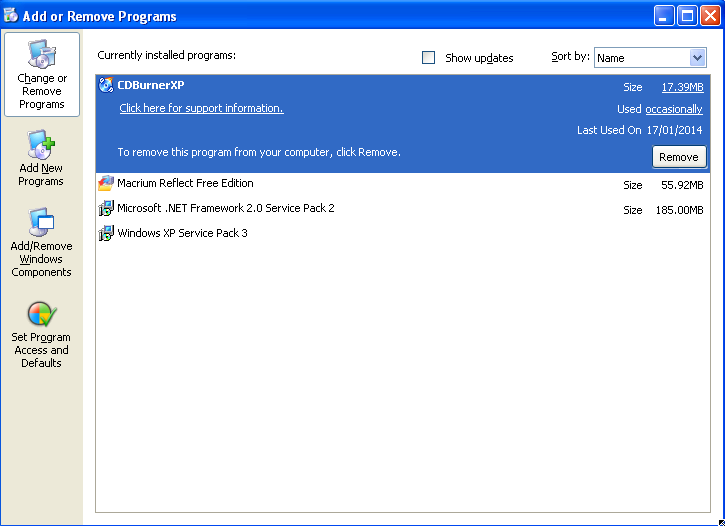
The "Installed Programs" clean up option brings up the "Add or Remove Programs" wizard.
If there are applications you don't use remove them.
Finally there are the "System Restore Points".
If you are happy with the way the system is currently running then by cleaning up the restore points you delete all the restore points except for the current one.
This means you won't be able to restore from anything except for the current point in time but it does recover a lot of space.
The amount of cleaning up you do is up to you but it will recover space if you are limited.
Defragmenting your hard drive
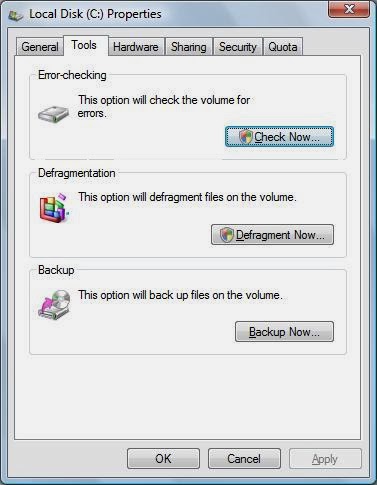
Following on from the previous section all you have to do to defragment your drive is click on the tools tab.
There are three options available:
- Check Now
- Defragment Now
- Backup Now
In this tutorial I focus on checking the disk and defragmenting the disk.
Note: This can take a large amount of time.
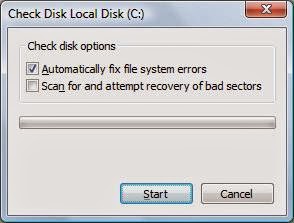
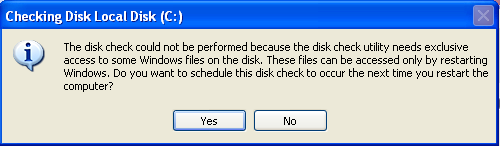
To check the disk click "Check Now".
Check the two boxes and then click "Start" to check the disk.
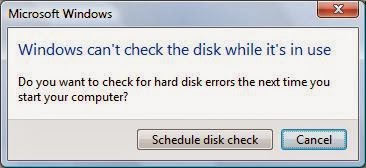
If you see the message above it is recommended that you click "Yes" and then reboot your computer.
The disk check has 3 stages and will fix any errors as it goes.
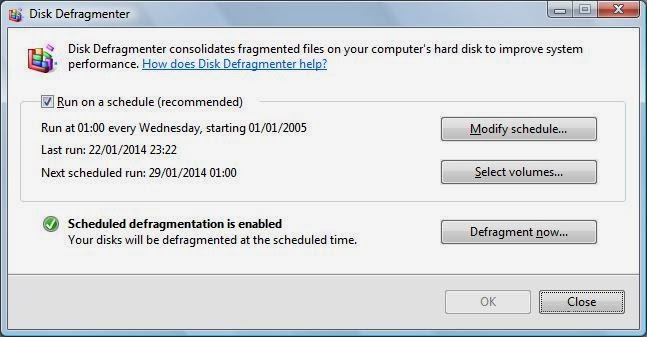
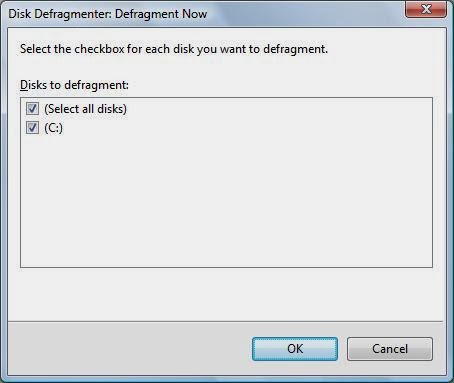
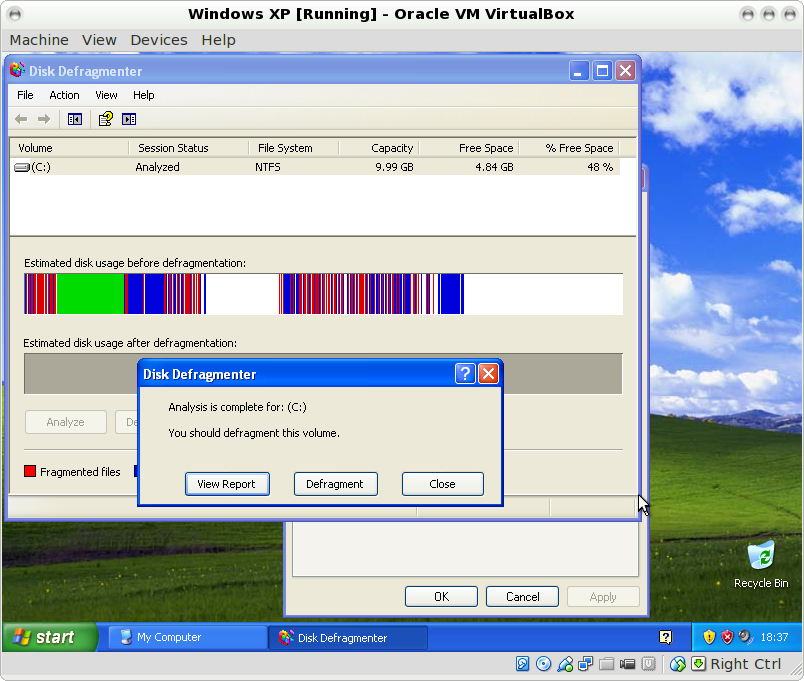
To defragment your drive click "Defragment Now" from the tools tab.
The above screen will appear.
The "Analyze" option will check your current disk and will show you how fragmented the drive is.
It is worth choosing this option because if your drive is only slightly fragmented then you don't need to defragment.
If there is a lot of fragmentation then you should defragment before going any further with installing Linux alongside Windows XP.
If you want to think about what fragmentation is consider a telephone book. You put all the people with the surname "A" under the letter "A" and all the people with the surname "B" under the letter "B" and so on. After a while the page for "A" becomes full and so you start a blank sheet of paper and start adding new names to it.
To search for the name of someone beginning with "A" now you will have to look in two places. First of all you will check under the "A" section of your phone book and then on the blank sheet of paper. Your phone book is now fragmented.
The same happens to a disk, especially in versions of Windows prior to version 7.
All the files start off in the same section of the disk and the file table used to find the files knows where to get the files. Gradually though files get deleted and that leaves space on the disk and eventually files are all over the place and this has the effect of slowing your computer down.
The defragment facility copies all the files into a more logical order which will speed up the performance of your computer. However it takes a long time to do this, especially if you have a lot of fragmentation and a large drive.
As you can see from the image above I have a lot of white space between files. Windows is recommending that I defragment the drive. All I need to do is click "Defragment" and either go and get some coffee or put the computer down somewhere and come back in a few hours.
Shrinking the Windows partition
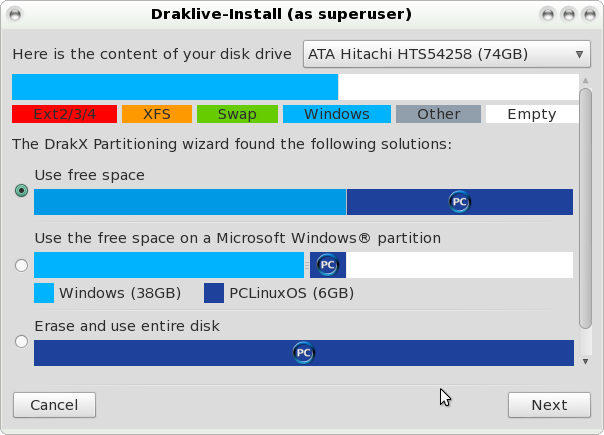
When you installed Windows (or more than likely when you bought your computer with Windows pre-installed), it will have been set up to use the entire hard drive.
If you only have one disk in your computer you will need to make space for installing Linux.
By running the file cleanup utilities above, you will have freed up some disk space.
Now you will want to make disk space available for other operating systems.
The shrink functionality isn't installed by default in Windows XP so you have to use an external tool.
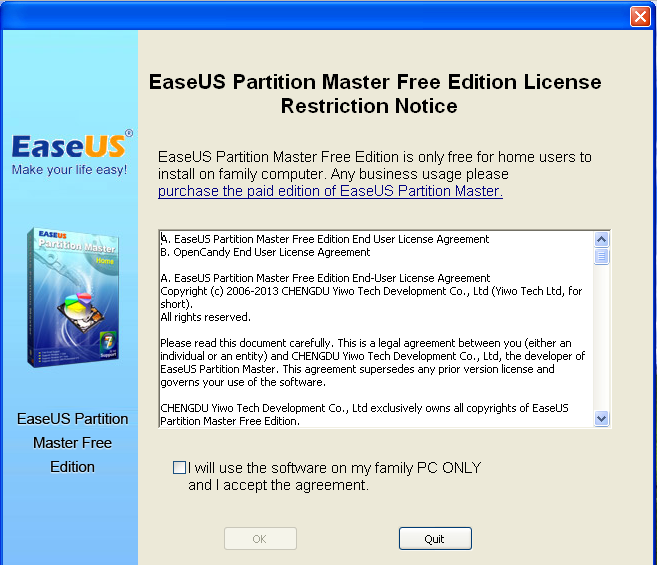
The tool I am going to show you is called EaseUS Partition Master Free and it is free for personal use.
Visit
http://www.partition-tool.com/personal.htm to download the software.
Double click on the downloaded file to start the installer. The first screen is just a license agreement. Check the box to accept the agreement and click "OK".
Select where you want the software to be installed. Take notice of the three check boxes at the bottom. One of them asks for you to join the customer experience improvement program. You might want to uncheck this box. Click "Next" to continue.
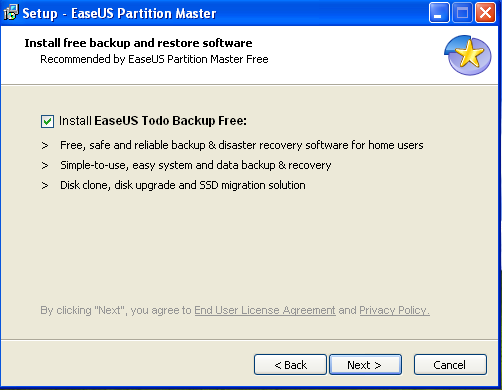
The next screen asks whether you want to install another piece of free software. This is a common trait with Windows programs. You want to install a piece of software but you are automatically asked whether you want to install other software as well. If you want it leave it checked otherwise uncheck it. Click "Next" to continue.
The next tool you are asked to install is "Search Protect". In this instance I chose the custom option and unchecked the option to install "Search Protect". Click "Next" to continue.
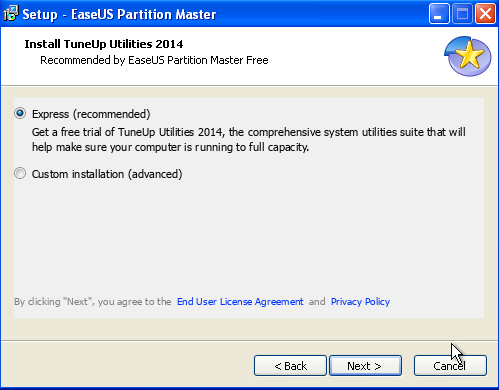
You are now given the option to install "TuneUp Utilities" as well. Again, I chose the custom installation option and then unchecked the option to install "TuneUp Utilities". Click "Next" to continue.
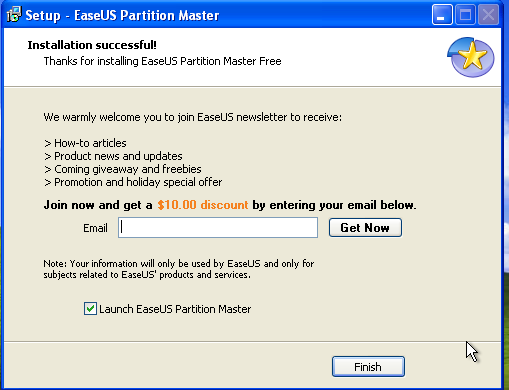
Finally you are asked whether you want to sign up to the newsletter. It is voluntary so you can just click "Finish" if you want to.
The EaseUs application starts straight after the installation. Click "Partition Manager".
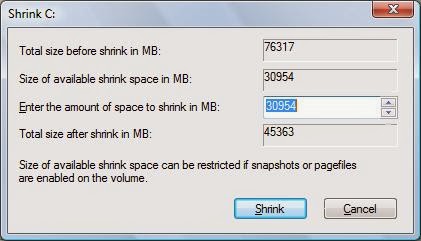
Click on the C: drive in the upper pane and then click the "Resize/Move" button on the toolbar.
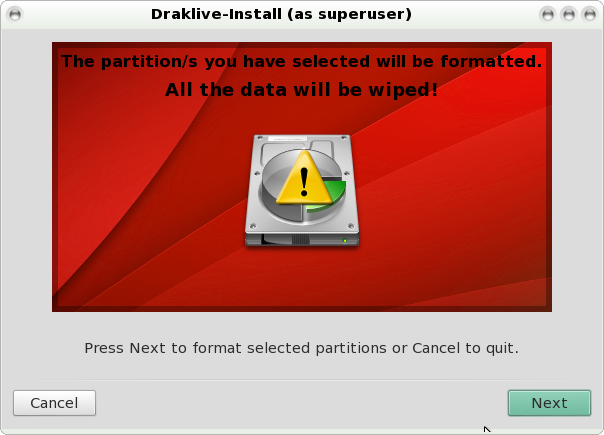
The main bar at the top takes up the whole disk. To shrink the disk to leave unallocated space for other operating systems, select the right hand edge and drag in. Don't go over the dark blue area otherwise you will lose data. You should leave enough space to the right of the dark area for more files to be added within Windows.
When you press "OK" it will mark the resize as an action to be applied. To actually apply the changes click the "Apply" button on the toolbar.
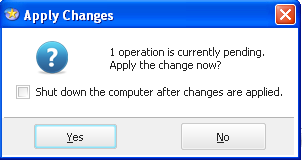
A message will appear stating how many changes there are to apply. Click "Yes" to continue or "No" to cancel.
As you are resizing disks your machine will need to reboot in order to allow this to happen.
Click "Yes" when the above message appears.
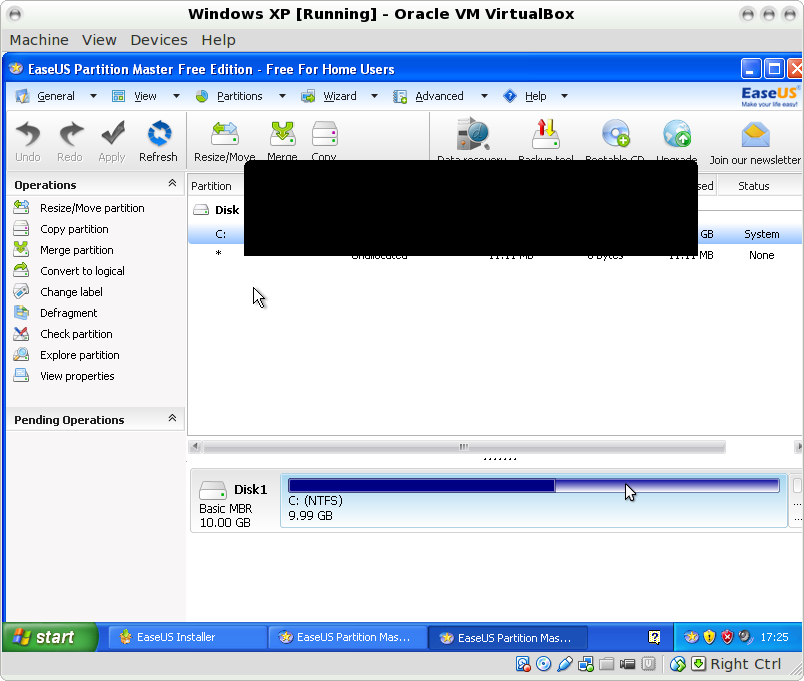
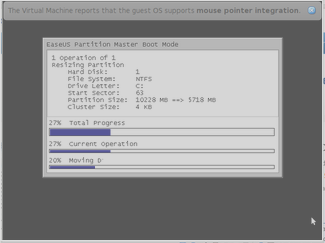
When your computer reboots the above screen will appear and the disk will start resizing. If you are using a laptop make sure it is plugged in because you don't want the battery to die whilst this is taking place.
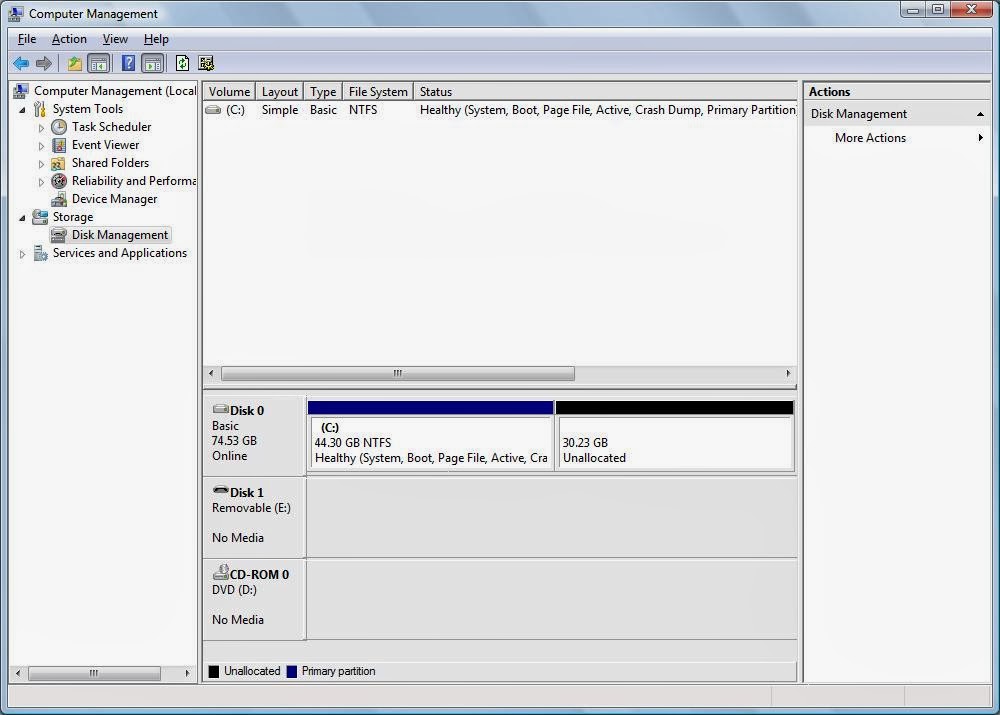
As you can see the disk will now be split in two. In the image above I haven't really got a very big disk so I might struggle with disk space in the future. I was using a virtual machine for this demo. Ideally you will have more space than a 10 gigabyte drive.
Summary
You are now in a position to install Linux alongside Windows XP. This will be covered in a future tutorial.
Thankyou for reading.
Introduction
This is the latest article in the series that shows you how to install Linux for Windows XP users.
In the first article I showed you how to
create a bootable Linux DVD. I also showed
how to create a bootable Linux USB drive in case you don't have a DVD drive.
After that I showed how to backup your files to DVDs, USB drives, external hard drives and Dropbox so that you can copy it back to the Linux partition at a later stage. I also demonstrated how to create a system image and recovery media.
This article is all about preparing your drive to install WIndows XP alongside Linux.
I will guide you through cleaning your disk, defragmenting your disk and shrinking your disk.
Disk Cleanup
Firstly press "Alt" and "E" together to bring up an explorer window.
Right click on the drive called "Local Disk (C:)" and choose "Properties".
This screen shows you useful information about your drive such as how big the drive is and how much free space there is.
Click on "Disk Cleanup".
After a short while after your disk has been analysed the above screen will be displayed.
You will notice that there is a label that says "Total amount of disk space you will gain". If you accept the default options you can reclaim the amount of space shown.
You can claim more space though by checking the boxes of other items as well.
So what are they?
- Downloaded program files
- Temporary Internet Files - When you open a webpage the page is copied from the server to your local disk including images. These are all temporary internet files. After a while this can take a fair amount of space. You can delete these files because to get them again all you have to do is visit the sites again.
- Recycle bin - Every time you delete a file it goes into the recycle bin. If you are sure you want to delete the files you can check the recycle bin option.
- Temporary Files - A bit like temporary internet files. Every time you open a program it will open files to help them work. After a while these files can take up a fair amount of space. It is generally safe to delete these temporary files.
- Webclient/Publisher files are used to make it quicker to access files locally. You can check this option.
- Compress old files - If you haven't accessed certain files for a while but still need them then you can compress them which takes up less space. The downside is that next time you need to access the file it will need to be expanded again.
- Catalog files for the catalog indexer - To make disk access faster a catalog is made of all the files on your disk. When sorting them there are temporary index files created that get left behind. They can be safely removed.
The "More Options" tab gives you further ways of cleaning up your disk.
First up are the "Windows components".
The Windows Components window lists all the components that are installed by default including Internet Explorer, Windows Media Player, Outlook Express etc.
If there are some items checked that you don't use uncheck them and click "Next".
The "Installed Programs" clean up option brings up the "Add or Remove Programs" wizard.
If there are applications you don't use remove them.
Finally there are the "System Restore Points".
If you are happy with the way the system is currently running then by cleaning up the restore points you delete all the restore points except for the current one.
This means you won't be able to restore from anything except for the current point in time but it does recover a lot of space.
The amount of cleaning up you do is up to you but it will recover space if you are limited.
Defragmenting your hard drive
Following on from the previous section all you have to do to defragment your drive is click on the tools tab.
There are three options available:
- Check Now
- Defragment Now
- Backup Now
In this tutorial I focus on checking the disk and defragmenting the disk.
Note: This can take a large amount of time.
To check the disk click "Check Now".
Check the two boxes and then click "Start" to check the disk.
If you see the message above it is recommended that you click "Yes" and then reboot your computer.
The disk check has 3 stages and will fix any errors as it goes.
To defragment your drive click "Defragment Now" from the tools tab.
The above screen will appear.
The "Analyze" option will check your current disk and will show you how fragmented the drive is.
It is worth choosing this option because if your drive is only slightly fragmented then you don't need to defragment.
If there is a lot of fragmentation then you should defragment before going any further with installing Linux alongside Windows XP.
If you want to think about what fragmentation is consider a telephone book. You put all the people with the surname "A" under the letter "A" and all the people with the surname "B" under the letter "B" and so on. After a while the page for "A" becomes full and so you start a blank sheet of paper and start adding new names to it.
To search for the name of someone beginning with "A" now you will have to look in two places. First of all you will check under the "A" section of your phone book and then on the blank sheet of paper. Your phone book is now fragmented.
The same happens to a disk, especially in versions of Windows prior to version 7.
All the files start off in the same section of the disk and the file table used to find the files knows where to get the files. Gradually though files get deleted and that leaves space on the disk and eventually files are all over the place and this has the effect of slowing your computer down.
The defragment facility copies all the files into a more logical order which will speed up the performance of your computer. However it takes a long time to do this, especially if you have a lot of fragmentation and a large drive.
As you can see from the image above I have a lot of white space between files. Windows is recommending that I defragment the drive. All I need to do is click "Defragment" and either go and get some coffee or put the computer down somewhere and come back in a few hours.
Shrinking the Windows partition
When you installed Windows (or more than likely when you bought your computer with Windows pre-installed), it will have been set up to use the entire hard drive.
If you only have one disk in your computer you will need to make space for installing Linux.
By running the file cleanup utilities above, you will have freed up some disk space.
Now you will want to make disk space available for other operating systems.
The shrink functionality isn't installed by default in Windows XP so you have to use an external tool.
The tool I am going to show you is called EaseUS Partition Master Free and it is free for personal use.
Visit
http://www.partition-tool.com/personal.htm to download the software.
Double click on the downloaded file to start the installer. The first screen is just a license agreement. Check the box to accept the agreement and click "OK".
Select where you want the software to be installed. Take notice of the three check boxes at the bottom. One of them asks for you to join the customer experience improvement program. You might want to uncheck this box. Click "Next" to continue.
The next screen asks whether you want to install another piece of free software. This is a common trait with Windows programs. You want to install a piece of software but you are automatically asked whether you want to install other software as well. If you want it leave it checked otherwise uncheck it. Click "Next" to continue.
The next tool you are asked to install is "Search Protect". In this instance I chose the custom option and unchecked the option to install "Search Protect". Click "Next" to continue.
You are now given the option to install "TuneUp Utilities" as well. Again, I chose the custom installation option and then unchecked the option to install "TuneUp Utilities". Click "Next" to continue.
Finally you are asked whether you want to sign up to the newsletter. It is voluntary so you can just click "Finish" if you want to.
The EaseUs application starts straight after the installation. Click "Partition Manager".
Click on the C: drive in the upper pane and then click the "Resize/Move" button on the toolbar.
The main bar at the top takes up the whole disk. To shrink the disk to leave unallocated space for other operating systems, select the right hand edge and drag in. Don't go over the dark blue area otherwise you will lose data. You should leave enough space to the right of the dark area for more files to be added within Windows.
When you press "OK" it will mark the resize as an action to be applied. To actually apply the changes click the "Apply" button on the toolbar.
A message will appear stating how many changes there are to apply. Click "Yes" to continue or "No" to cancel.
As you are resizing disks your machine will need to reboot in order to allow this to happen.
Click "Yes" when the above message appears.
When your computer reboots the above screen will appear and the disk will start resizing. If you are using a laptop make sure it is plugged in because you don't want the battery to die whilst this is taking place.
As you can see the disk will now be split in two. In the image above I haven't really got a very big disk so I might struggle with disk space in the future. I was using a virtual machine for this demo. Ideally you will have more space than a 10 gigabyte drive.
Summary
You are now in a position to install Linux alongside Windows XP. This will be covered in a future tutorial.
Thankyou for reading.
Posted at 20:30 | by
Gary Newell