Introduction
Elementary OS is an interesting Linux distribution. Everything about it screams look at me, look how good I look. The user interface is so very welcoming and enticing but when I tried Elementary Freya (version 0.3) I felt that when you scratched at the surface what was underneath wasn't particularly endearing for the Everyday Linux User.
I have spent the first couple of weeks of 2017 looking at Elementary OS to judge its suitability for the average home computer user.

The
Elementary OS website has the following tag line underneath the logo:
"A fast and open replacement for Windows and macOS"
When I read that I think "great, I should therefore be able to do all of the things with Elementary OS that I can do with Windows". What does that mean? Well I like to play games so Steam should be available, there needs to be an office suite, I need to be able to watch Amazon Prime and/or Netflix. I should be able to set up all my hardware with the minimum of effort and it should be fairly easy to use.
At the bottom of the Elementary OS homepage the following text is displayed which basically tells you what it is about:
"elementary OS ships with a carefully curated selection of apps that cater to every day needs so you can spend more time using your computer and less time cleaning up bloatware."
What this tells me is that I should expect to get a set of applications to get started. If this is the case then any extra software I need should be easily found and I shouldn't have an issue installing it.
Is this the case? Read on to find out.
How To Get Elementary OS
The developers of Elementary OS make a point of asking for a payment for their operating system. The amount you pay is up to you although the $10 option is the default.
If you plan to try Elementary OS out before making a purchase you can click on "Custom" and enter the amount you desire such as 0.
If you enter 0 into the custom box then the "Purchase elementary OS" button changes to become "Download elementary OS".
When you click on the "Download elementary OS" button a window appears with options to "cancel or download". Click on the "Download" button to download an ISO image of Elementary OS.
How To Create An Elementary OS USB Drive
I highly recommend using Etcher for creating Linux USB drives. It is available for Windows and Linux.
Simply visit
https://etcher.io/ and click on the download link at the top of the page. It automatically works out whether you are using Windows or Linux.
The installation differs slightly depending whether you are using Windows or Linux to create the drive. For Linux you just need to double click on the downloaded file and follow the instructions.
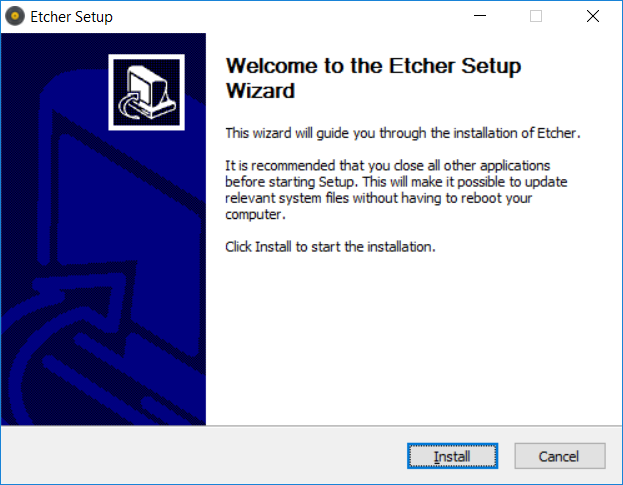
For Windows double click on the file and click on the "Install" link. After the installation has finished click on the "Finish" icon and Etcher will start.
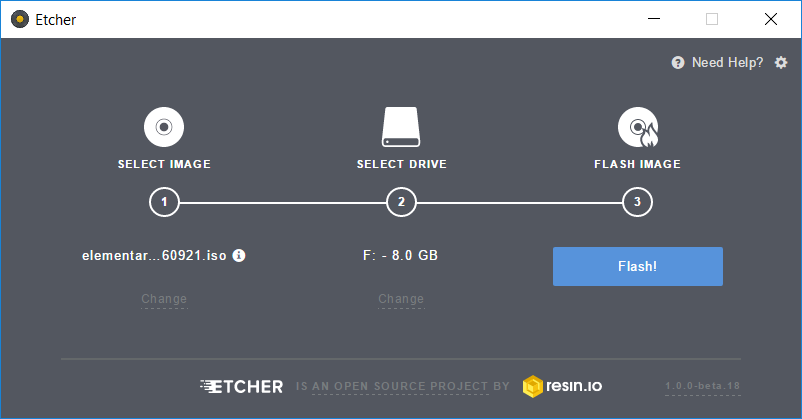
The user interface for Etcher is about as simple as it can get.
- Insert a blank USB drive
- Click "Select Image" and find the Elementary OS ISO downloaded previously
- Click "Select Drive" and choose your USB drive
- Click "Flash"
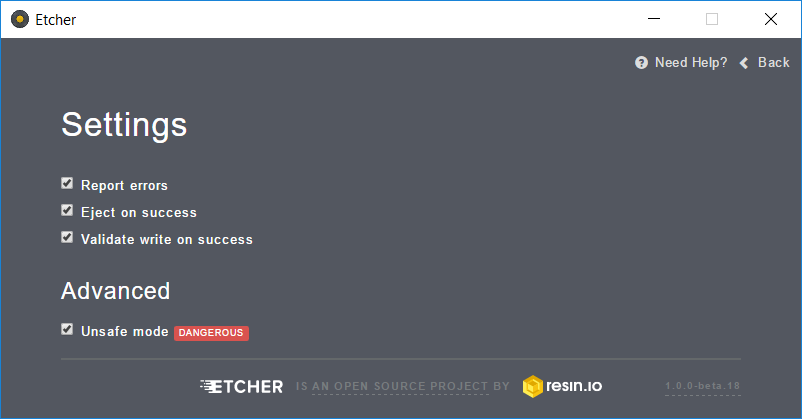
For some drives the "select drive" button does not appear and it shows as "connect a drive". Click on the settings icon in the top right corner.
Under the "Advanced" option it says "Unsafe Mode". Checking this box makes all of your drives available including your hard drive. This is of course why it is the unsafe option. You should however now be able to select the drive letter of your USB drive.
How To Boot To Elementary Live
Depending on whether you are using UEFI or BIOS you should be able to boot straight to the Elementary OS by rebooting your computer.
If you are using Linux you will probably see a grub menu with a system option at the bottom. Choose this option and then choose to boot from the USB drive.
If you are using Windows and the computer boots straight back to Windows without giving an option for booting to Elementary then try this:
- Right click on the start button
- Choose power options
- Click on "Choose what the power button does"
- Click the link that reads "Change settings that are currently unavailable"
- Scroll to the bottom and remove the tick from the "Turn on fast startup" option
- Click "Save changes".
- Reboot the computer whilst holding the shift key down.
- When the blue screen appears choose to boot from USB device
- You should now see a menu with an option to try Elementary
How To Install Elementary
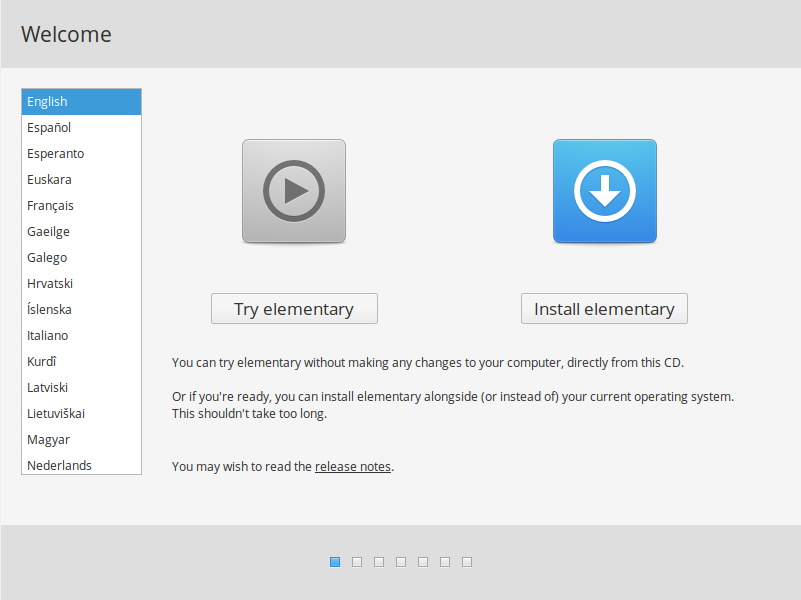
When Elementary OS first boots you get the option to try Elementary or install it.
I recommend the try option initially so that you can test things like connecting to the internet and get a basic idea of what Elementary is about.
This will give you some comfort as to whether you like what you see.
To install Elementary either click the "Install Elementary" button when the system first boots or click on the install icon from the menu.
Installing Elementary is fairly straight forward and it is easy to dual boot with another operating system simply by
creating an empty partition.
If you haven't connected to the internet prior to running the installer then a screen will appear asking you to connect.
A screen then asks you whether you want to download updates during the installation and whether you want multimedia codecs to be installed.
I recommend ticking both of these boxes.
The next screen is the installation type screen and from here you can choose to erase the disk and install Elementary.
If you have created an empty partition and you have another operating system installed then an option will appear which will let you install alongside that other operating system.
When you click "Install Now" a screen will appear telling you which partitions are being used and which partitions will be created. If you are ready click "Continue".
In my experience the option for "Installing alongside another operating system" generally works and you are indeed safe to continue.
You will now be asked where you are in the world. This sets the timezone on your computer correctly and your clock will therefore be set properly when you boot into the real system for the first time.
The penultimate step is to choose the keyboard layout for your computer.
It is highly likely the correct one has been chosen already.
If not click on the language on the left and the layout on the right.
You can test the layout by entering text into the box provided.
The final step is to set up a user.
Enter your name and a name for the computer.
Choose a username and a password.
Click "Continue".
The system will now be installed.
To start using your new system reboot the computer and remove the USB drive. When you boot you should now see a menu with an option for booting into Elementary.
As installers go this is probably as easy as it gets.
First Impressions
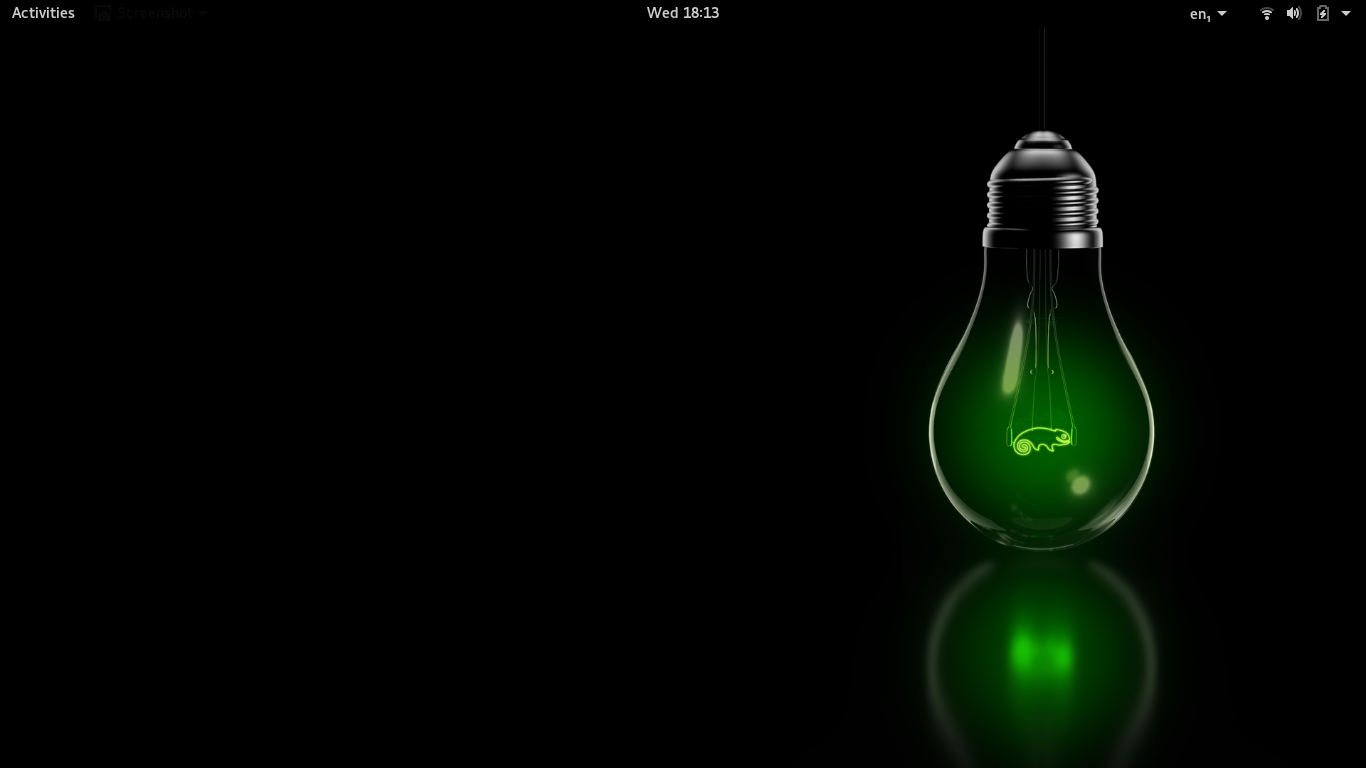
There is no doubt that Elementary OS looks good. The wallpaper is vibrant, the icons are crisp and clean and everything looks pixel perfect.
The interface is very simplistic so for the Everyday Linux User this is a nice straight forward and easy to use system.
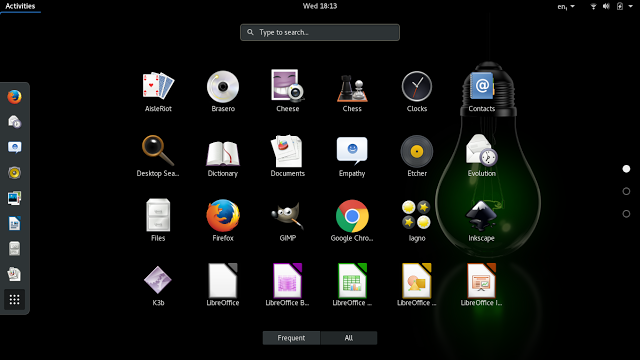
Clicking on "Applications" in the top left corner brings up the menu.
The default view is a list of icons for all of the applications installed on the system and there are a series of little dots at the bottom which help you navigate to the next and previous set of icons.
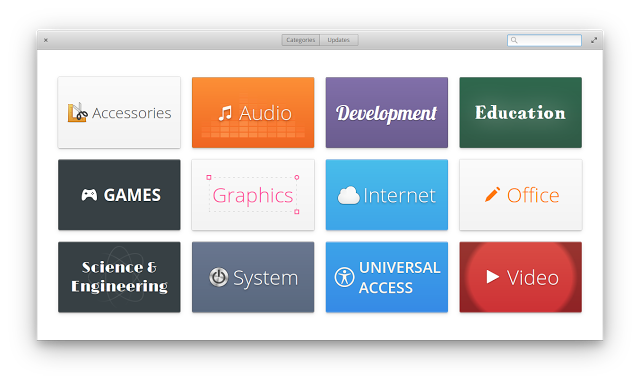
There is another menu view which shows a list of categories and items within the category.
You can also use the search bar to narrow down the items that are returned.
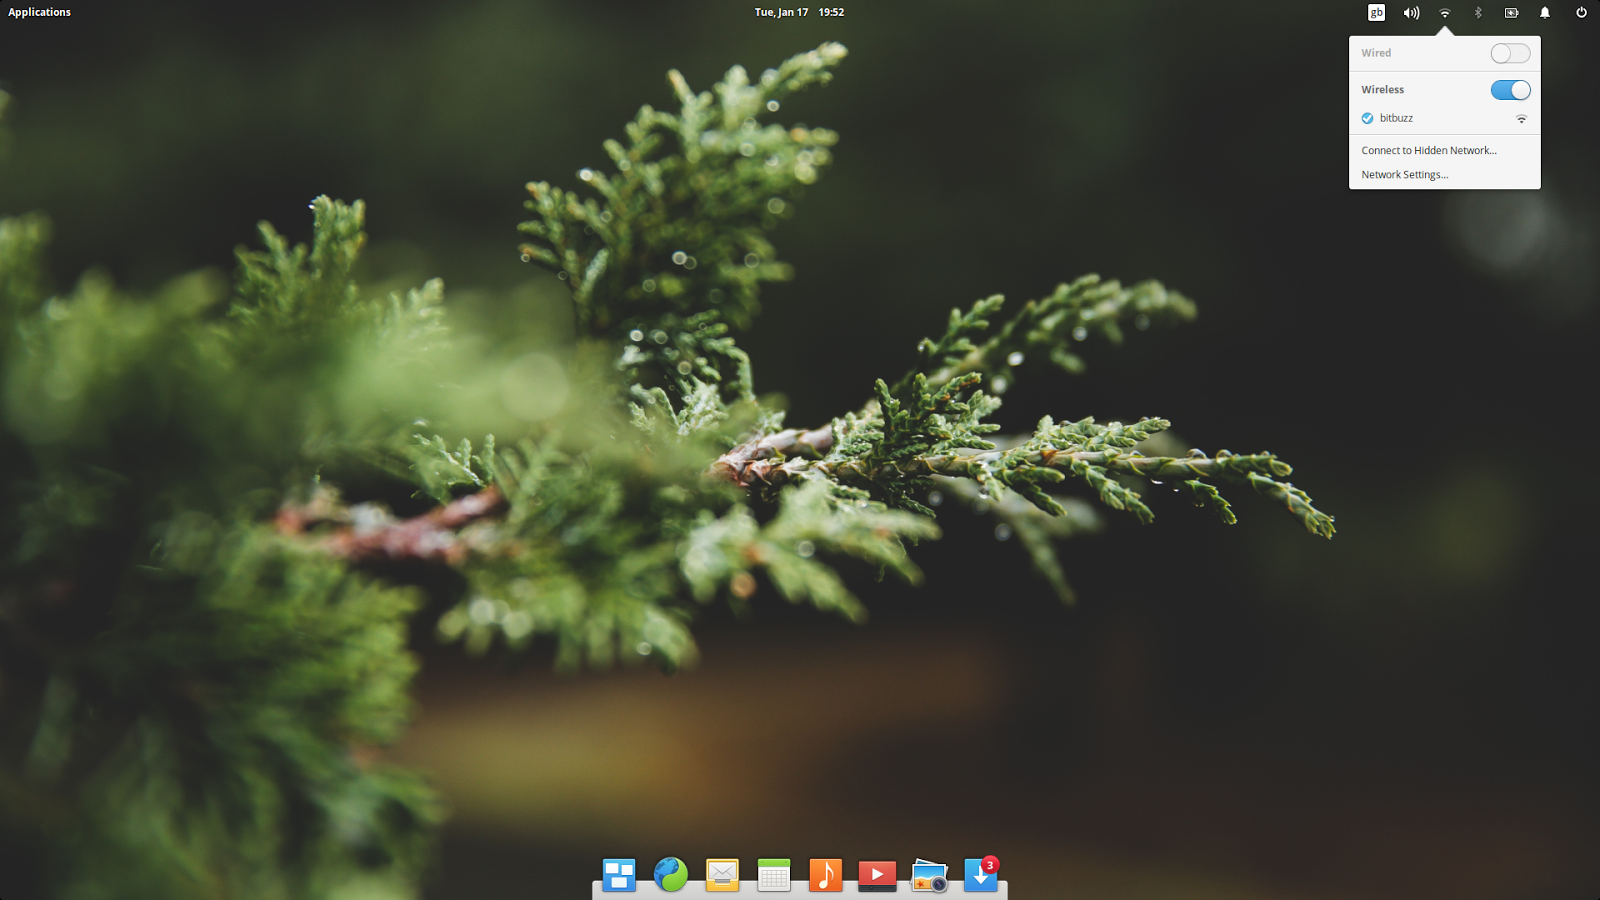
In the top right corner of the screen there are a series of icons for adjusting audio, power, network, power and bluetooth settings.
There is a clock in the top center of the screen.
At the bottom of the screen is a series of quick launch icons for commonly used applications.
The first icon on the launch bar shows a multitasking screen which is how you interact with virtual desktops.
Connecting To The Internet
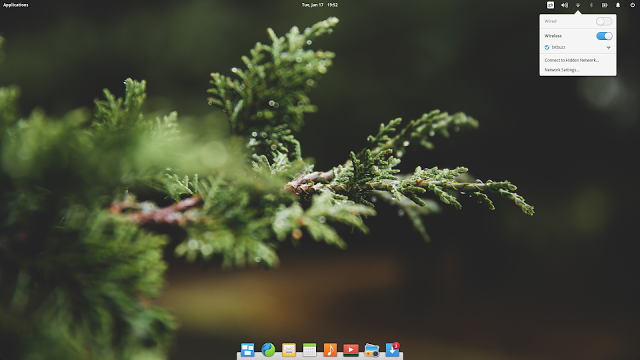
Connecting to the internet is very easy. Simply click on the network icon and choose the wireless network you wish to connect to.
I have installed Elementary on my Lenovo Ideapad Y700 and I am pleased to say that any network problems I used to get with this laptop are now well in the past.
Email
Elementary delivers a simple set of applications which are enough to be useful but not full of bloat as suggested from the very outset on their homepage.
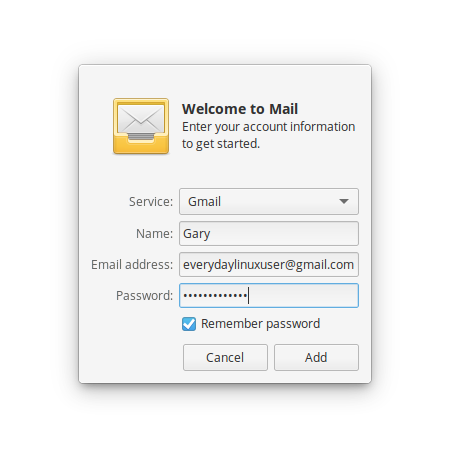
The mail program is called Geary and it works with all modern mail providers including GMail.
There is however a caveat. When you first try and login to GMail you may get an email (which you will need to check in another client such as the web interface or via your phone) which says that a login was attempted and you need to lower your security settings to allow Geary access to the email.
Whilst this may seem insecure (and I guess it is) there is an element of comfort that Microsoft Outlook causes the same issue when you try and connect to GMail.
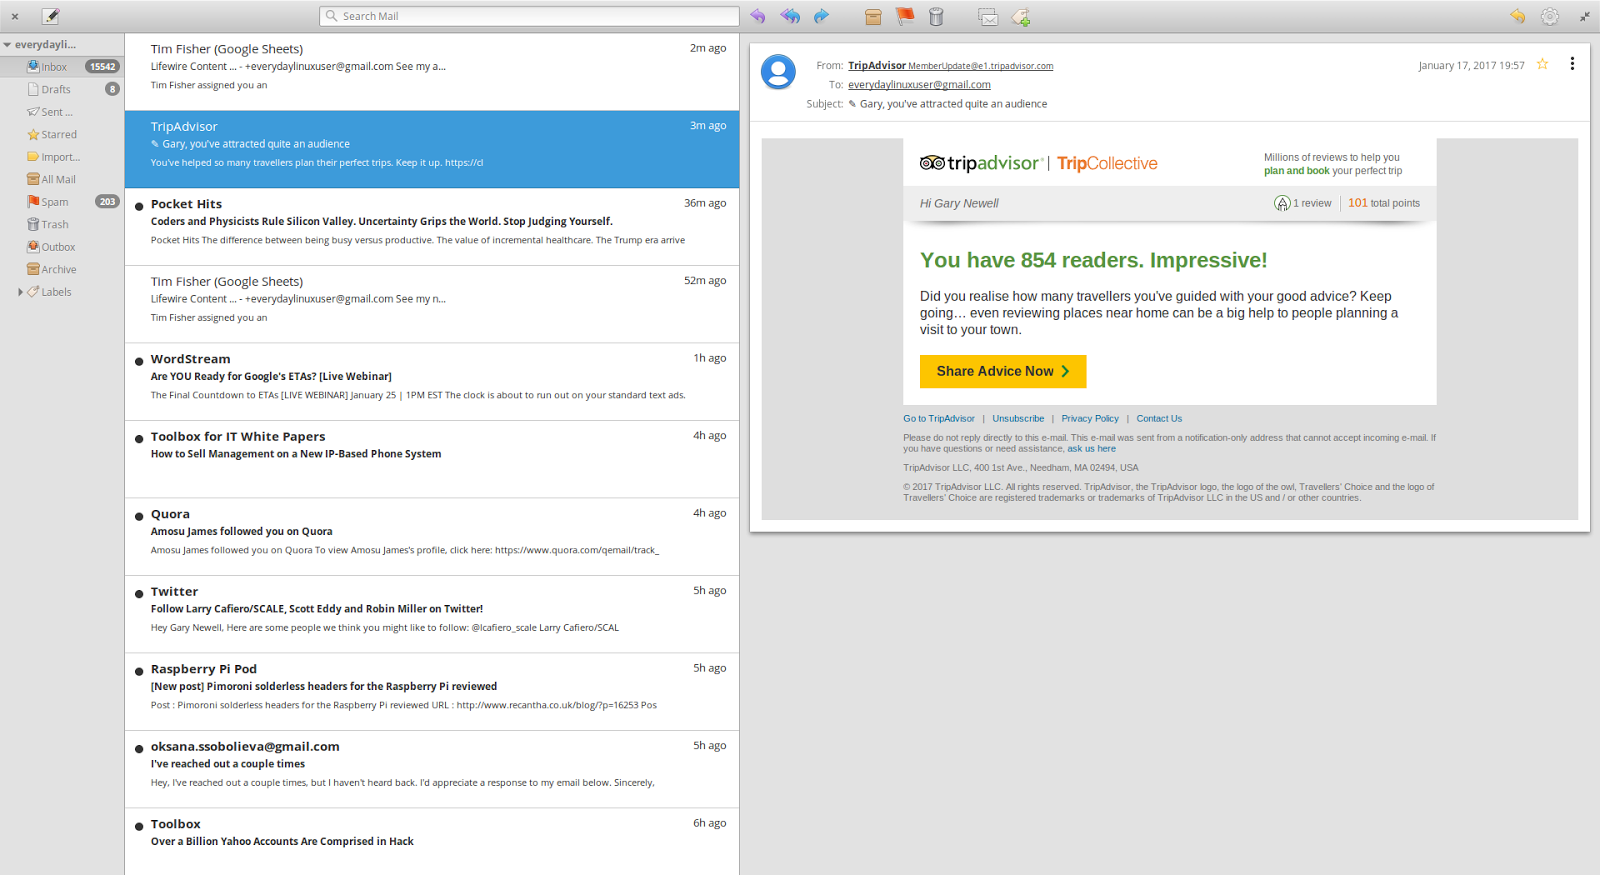
The email client is very basic. You basically get a list of the folders down the left side with the emails for the selected folder in the centre panel.
The right pane shows a preview of the email.
That is pretty much all there is to it.
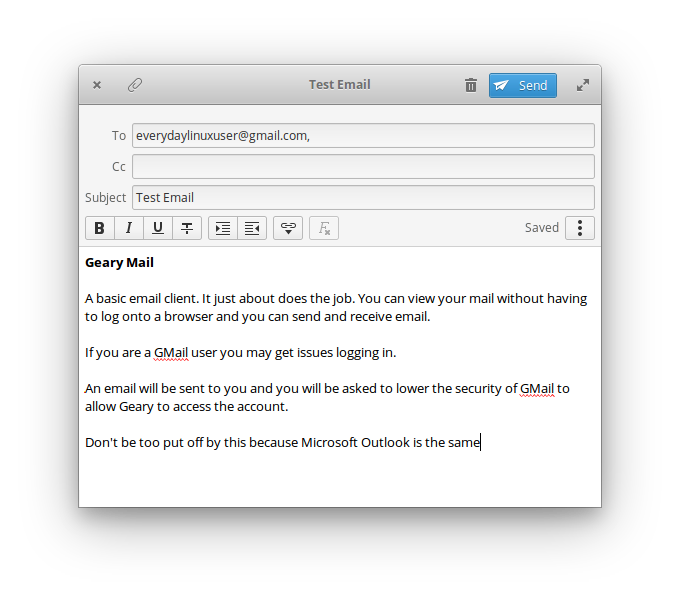
As you can see, composing emails is very basic but it works.
It is worth noting the appearance of the Windows within Elementary. They are all very clean and very crisp.
For people used to using Macs this will be very pleasing.
Calendar
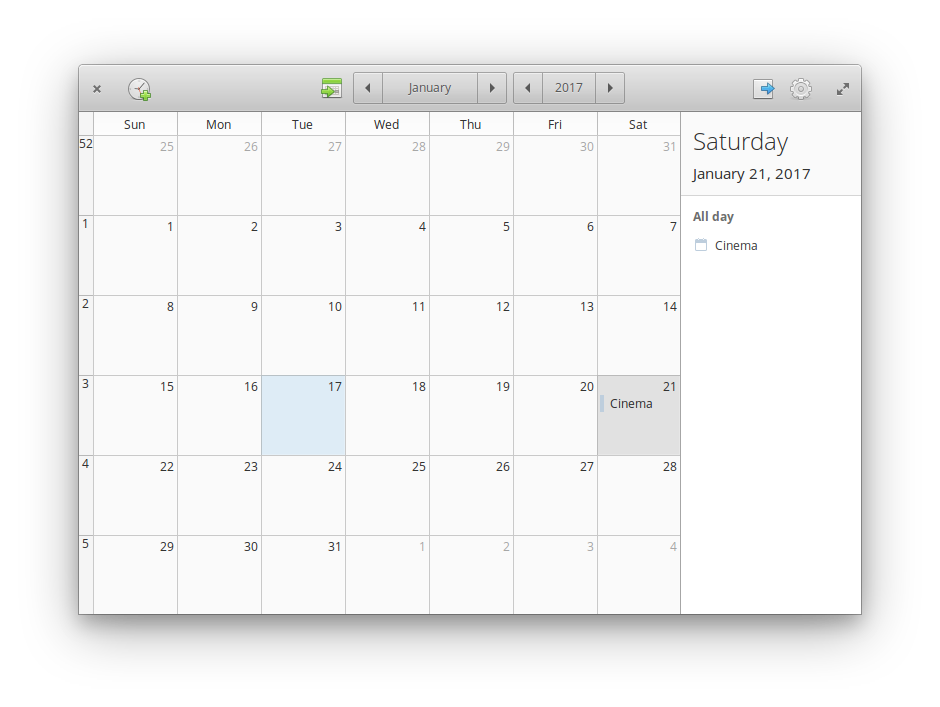
The quick launch bar at the bottom includes a calendar icon.
The calendar provides a nice simple monthly view.
Adding events is as easy as clicking on an icon at the top of the screen or by double clicking on a date.
You can choose the location of the event, set reminders, invite other people and create recurring events.
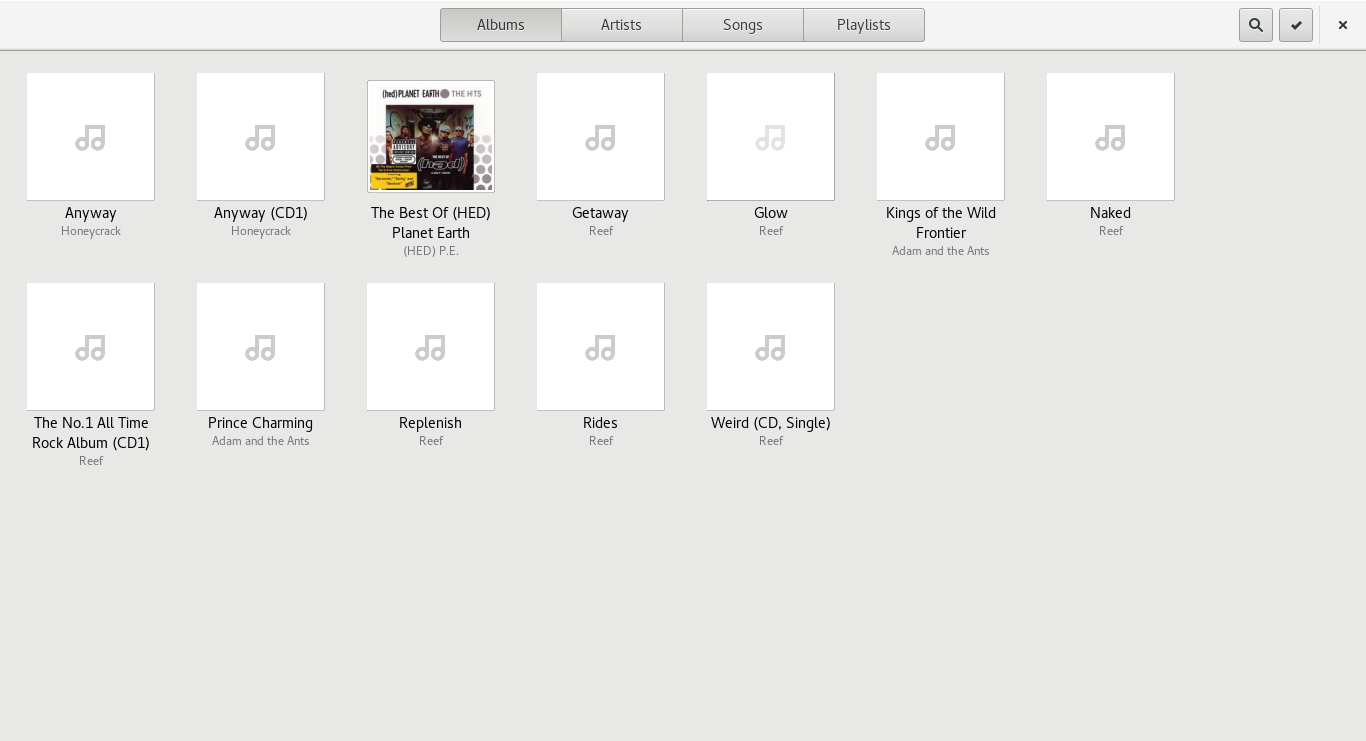
Music
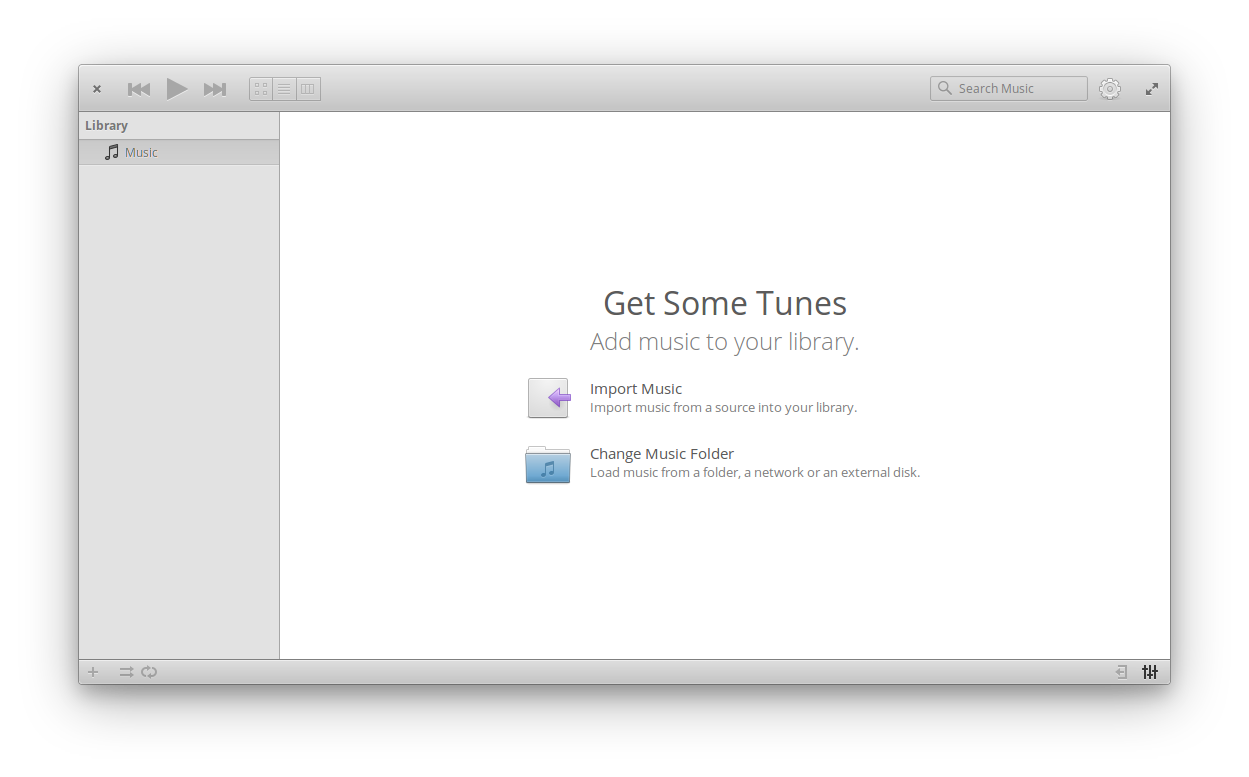
The audio player within Elementary OS is called Noise.
For playing your own music however it is just what you need.
The first thing to do is import music which is easy because there is a big link asking you to import music.
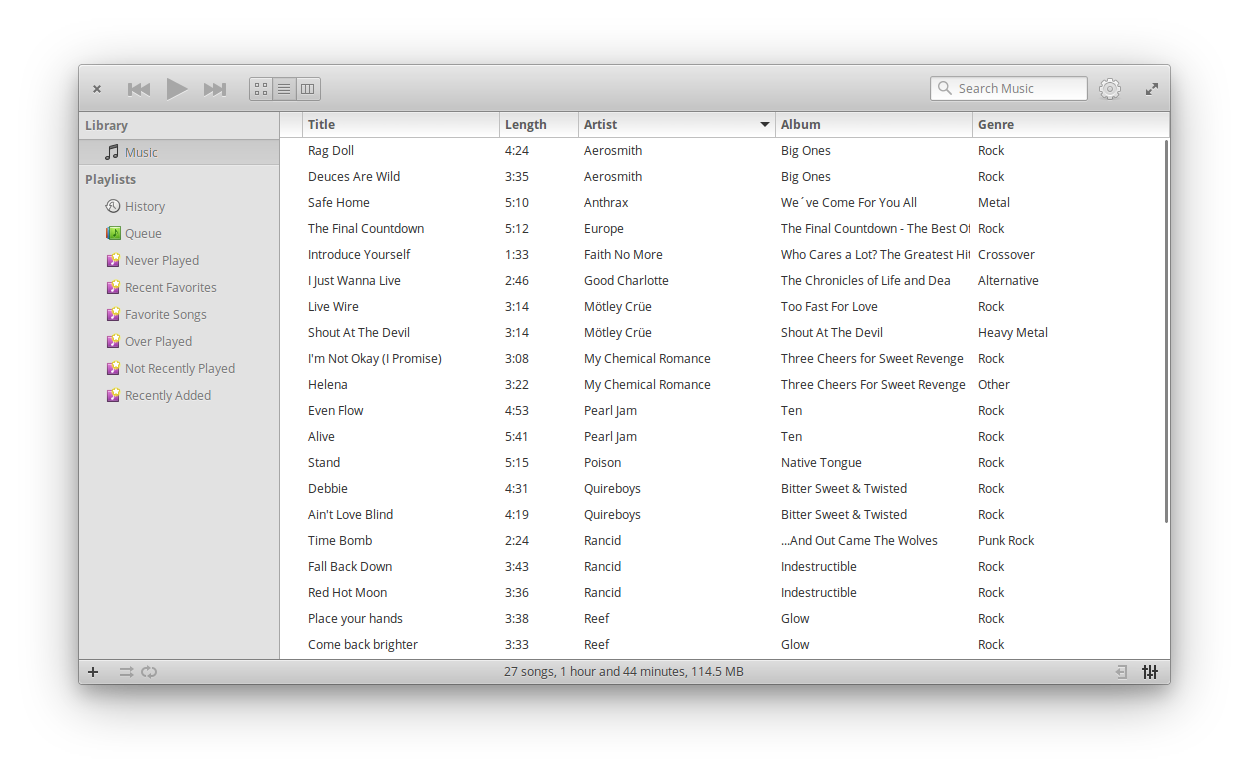
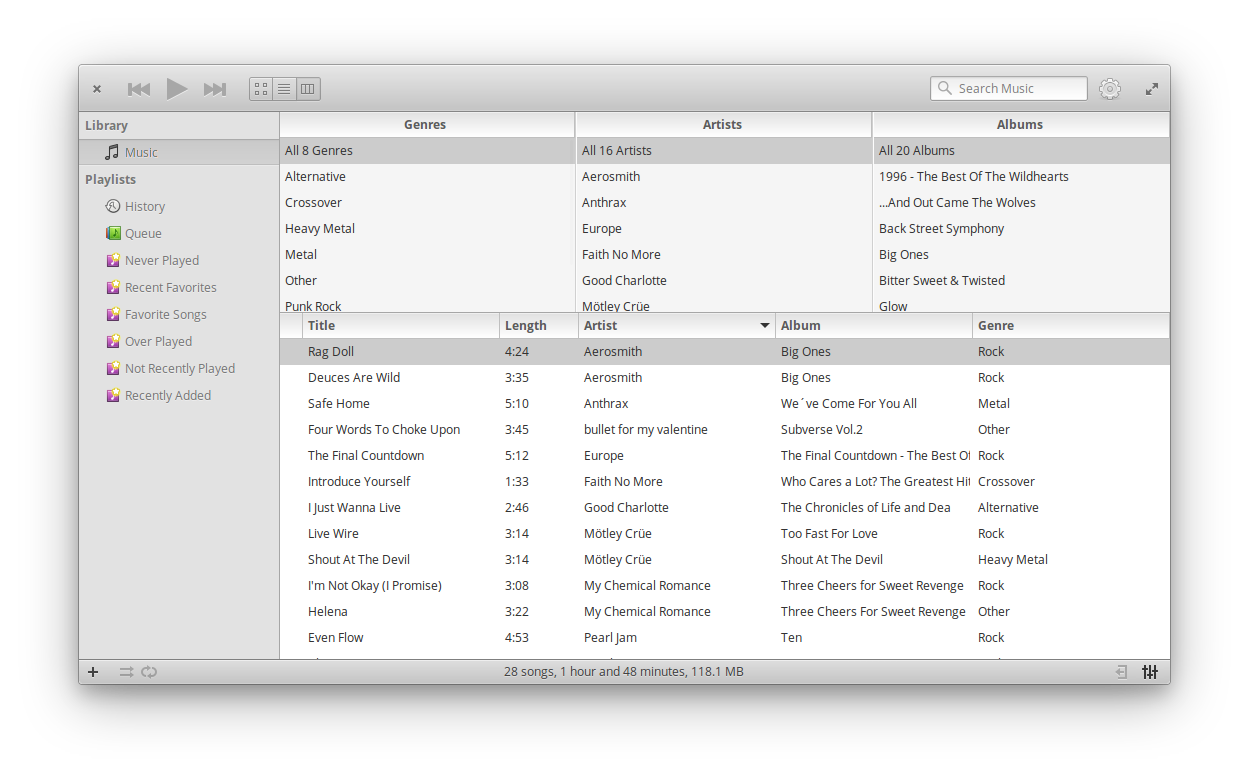
After the music is installed you can view the content in various ways such as a full list view, an image view and a more technical view.
You can do the basics such as create new playlists and add tracks to that playlist.
You can also create smart playlists which lets you choose songs by various categories and limit the playlist to a certain number of songs or a certain duration.
As you would expect the audio plays perfectly fine and MP3s are playable as long as you chose the option to install the multimedia codecs during installation.
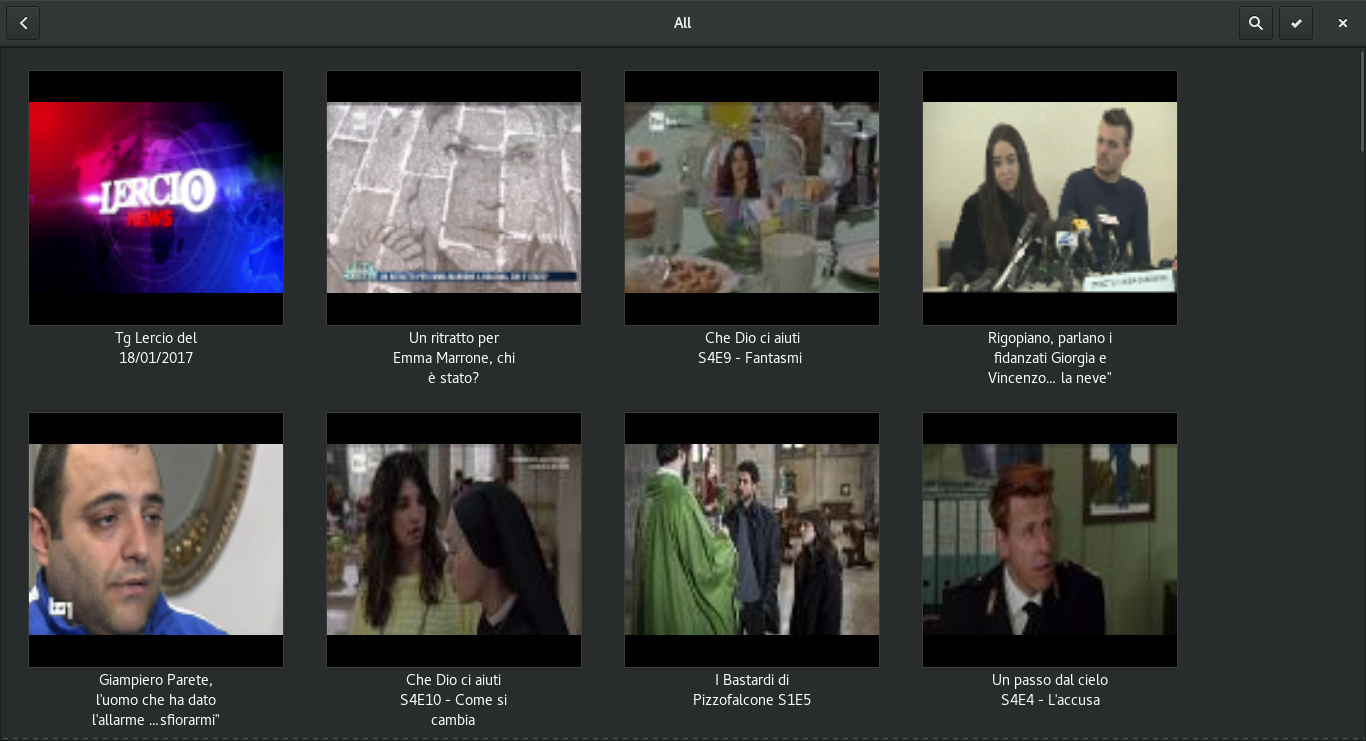
Video
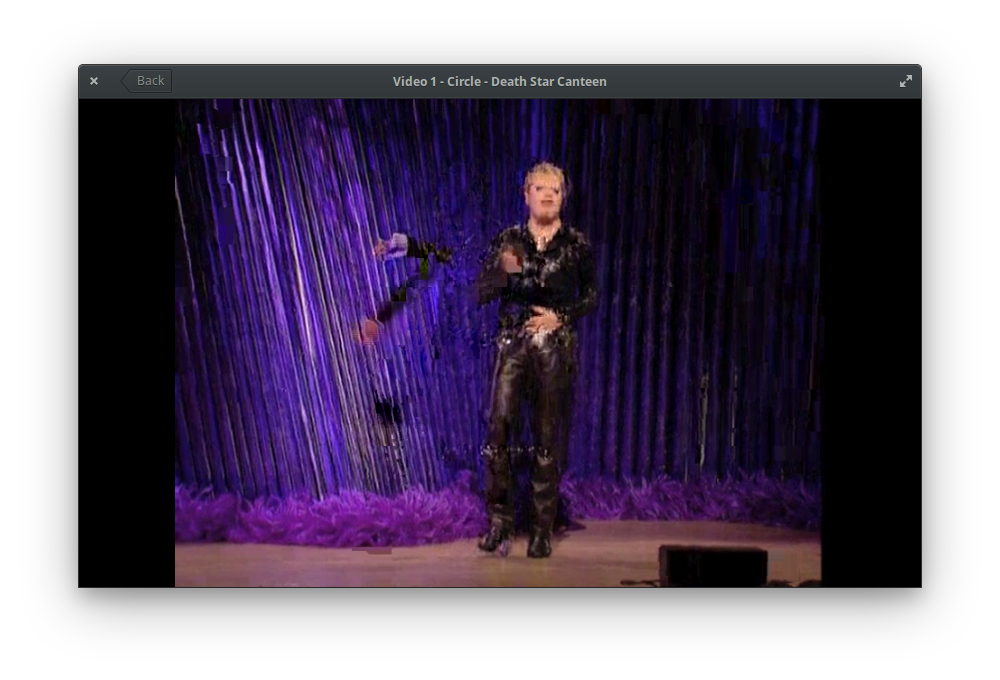
The video player is called Audience.
There is a single option when you open Audience for the first time and that is to choose a video to play.
On subsequent uses you can choose to load a previously viewed video as well.
It is basic but it works. All you want really.
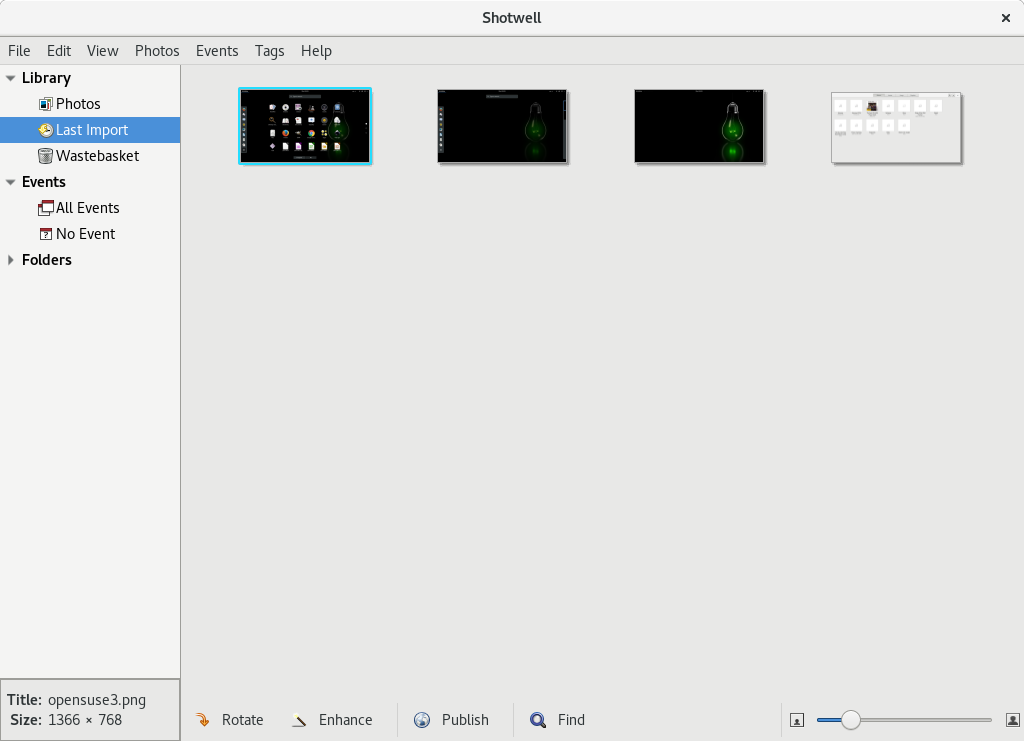
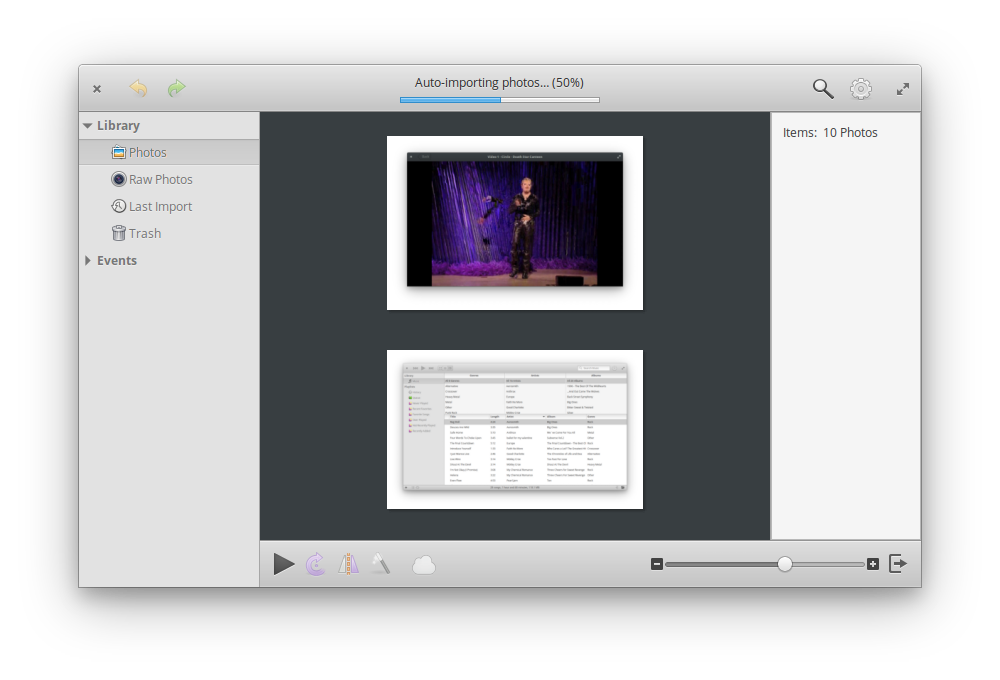
Photos
The photo viewer is called Pantheon-Photos and as with the other tools basic but functional.
You can import photos and view them.
There are categories that you can choose such as the date or whether you want to view photos or videos.
That is about it though.
When you view a photo however there are lots of options. You can share it via email or bluetooth and you can set the photo as your desktop background.
Web Browser
The default web browser with Elementary OS is called Epiphany and it is at this point where cracks start to form.
Everything thus far has been a bit too plain sailing hasn't it. All the applications are simple but functional and the desktop is really easy to use. Even installation was a breeze.
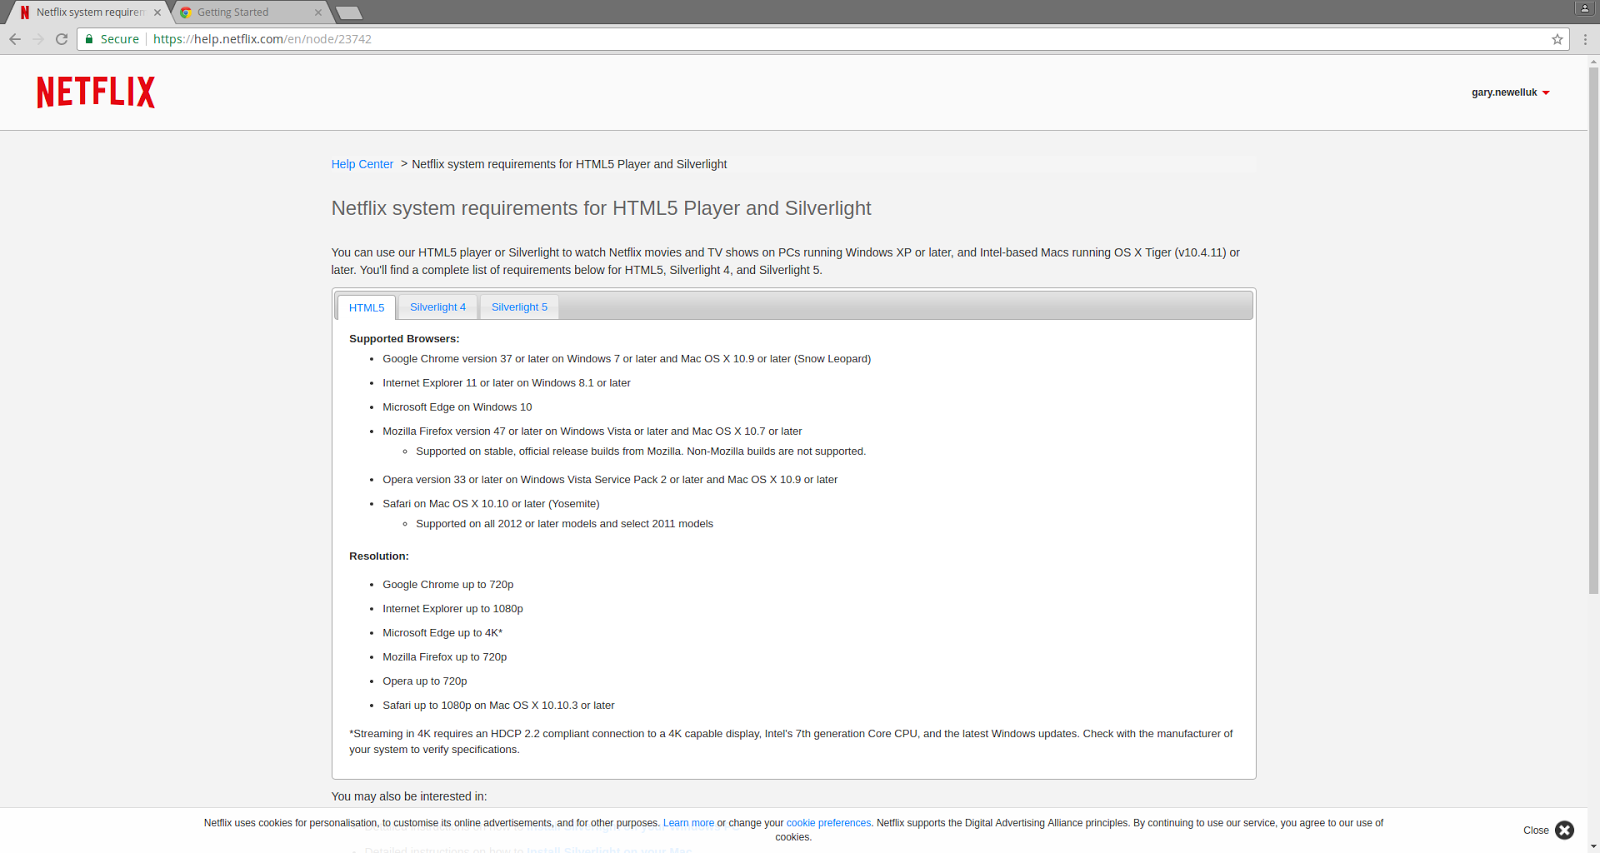
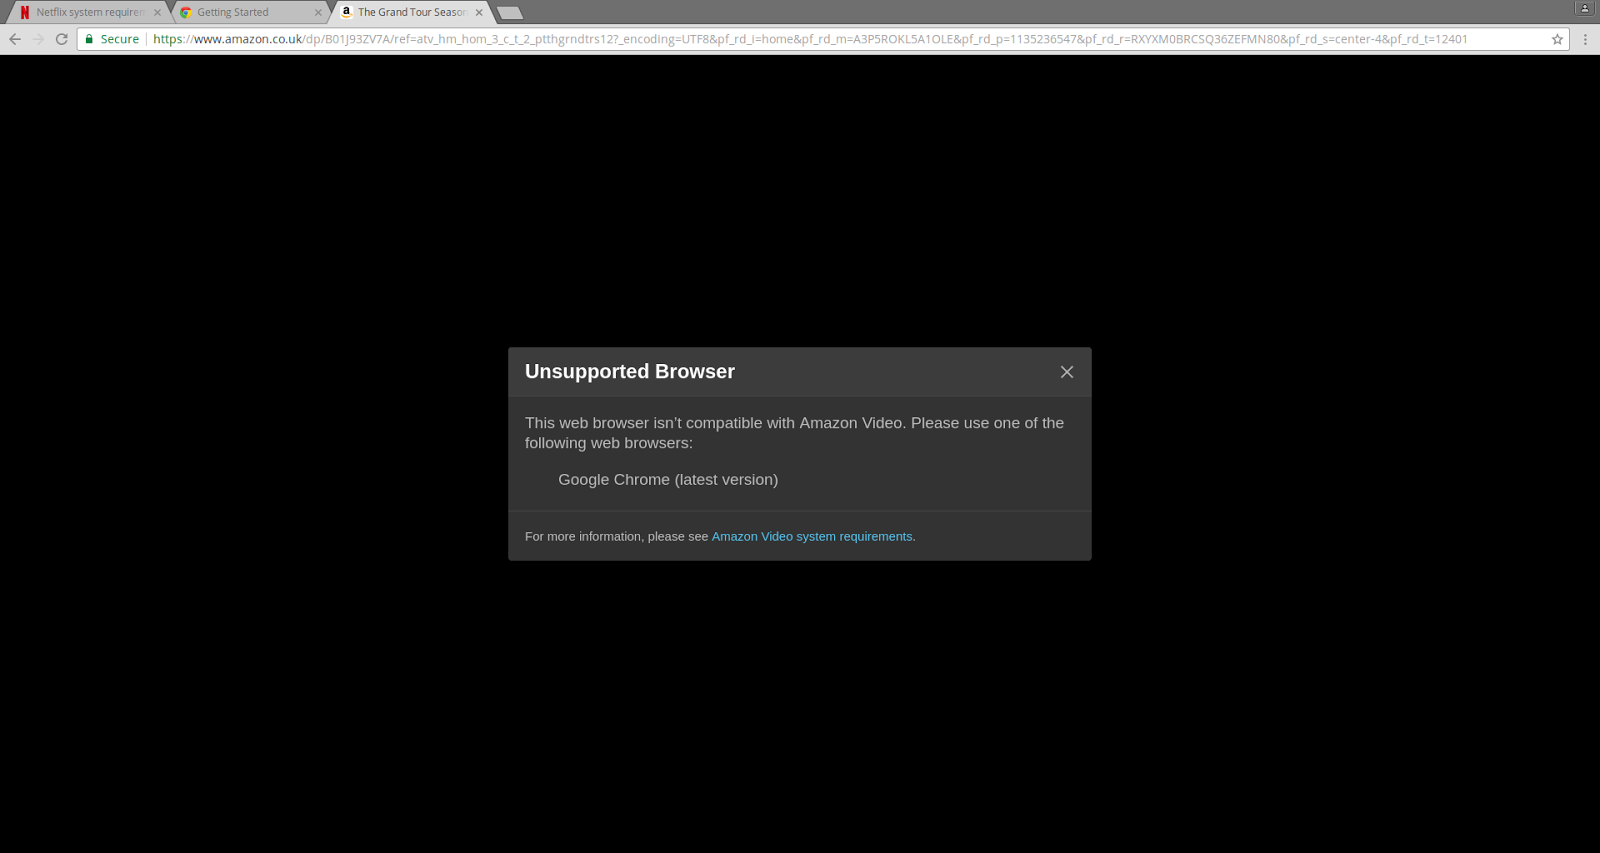
One of my requirements and probably many other people's requirements is to be able to watch Netflix and Amazon Prime Video.
Netflix will not work with Epiphany and neither will Amazon Prime.
Installing Applications
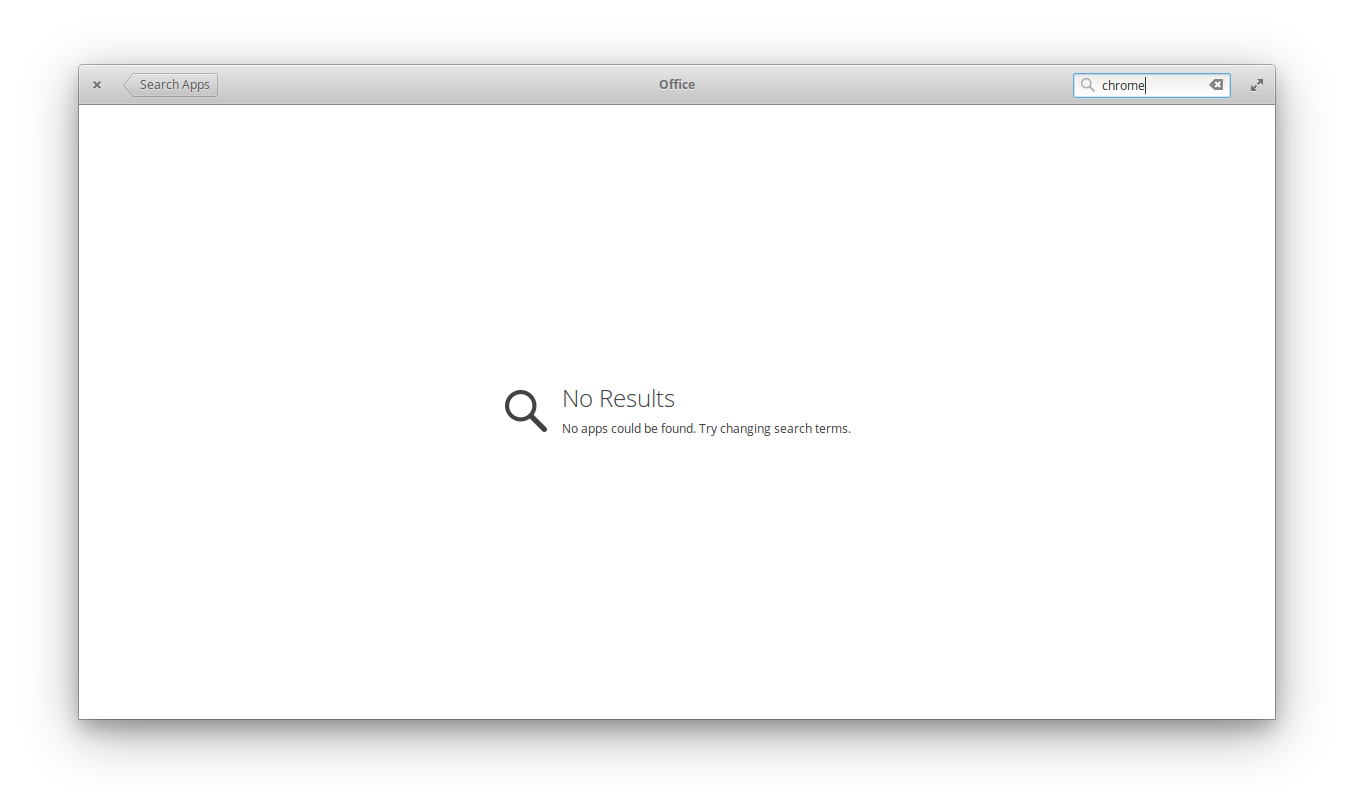
Clearly you would think the Netflix and Amazon Prime issue could be solved by installing a browser such as Chrome.
Unfortunately this isn't as simple as it should be.
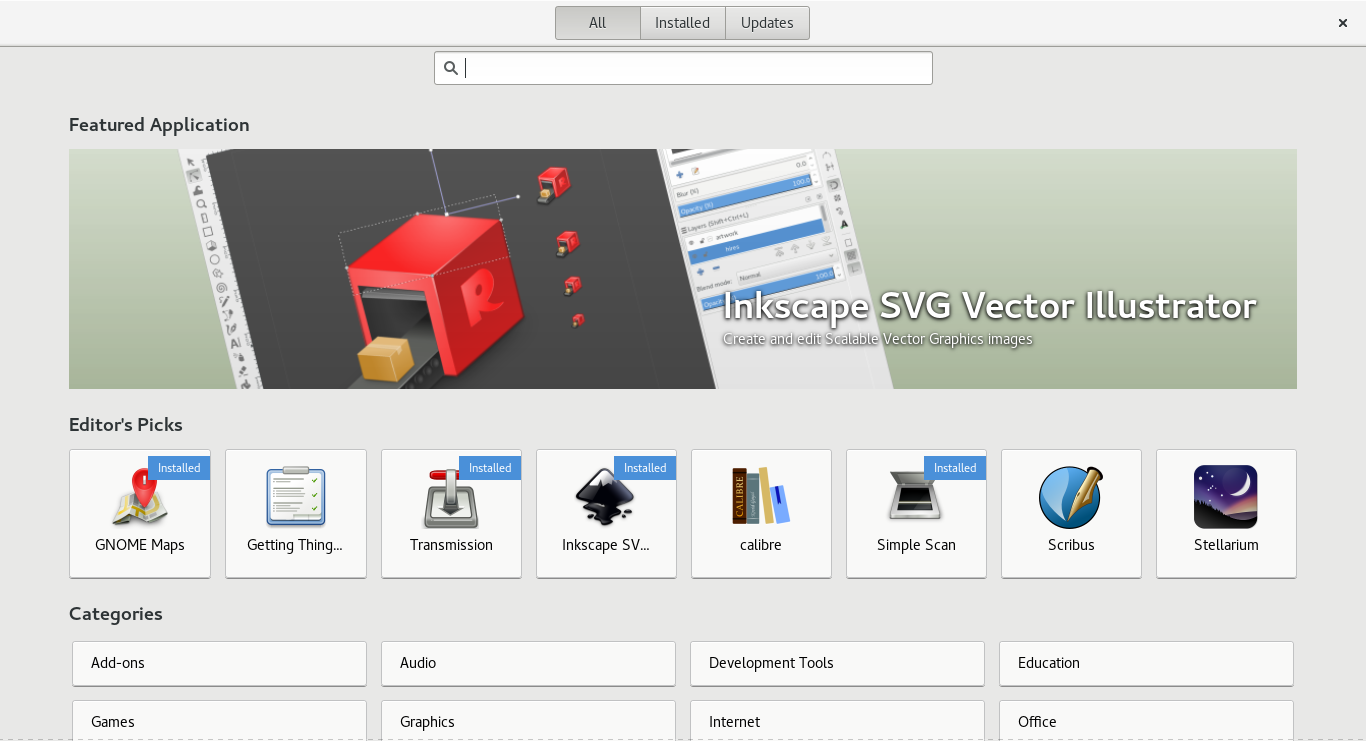
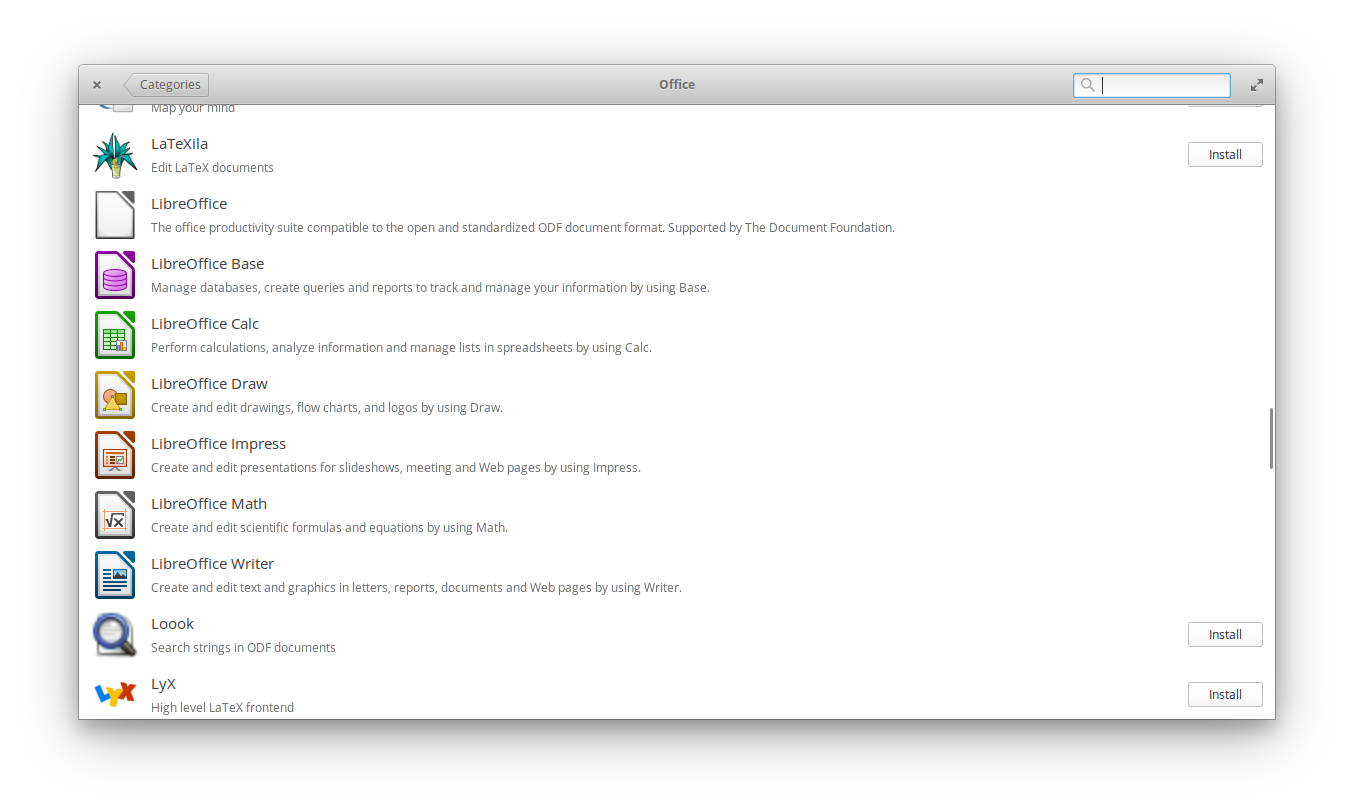
The AppCenter is the tool that you use within Elementary OS to install applications and it looks just as good as the other applications within Elementary.
At first it seems quite useful as well. For instance the default Elementary installation lacks office software.
Clicking on the Office category brings up this screen with the option to install LibreOffice.
The AppCenter isn't as useful for installing applications that I and probably many other people like to use.
For instance Google Chrome:
As Elementary OS is based on Ubuntu you can go to the Chrome website and download it but installing Chrome requires you to use the command line because there isn't anything installed for installing DEB packages graphically.
You can install the GNOME Software Manager which seems to help but seems counterproductive or you can install GDEBI which gave me mixed results.
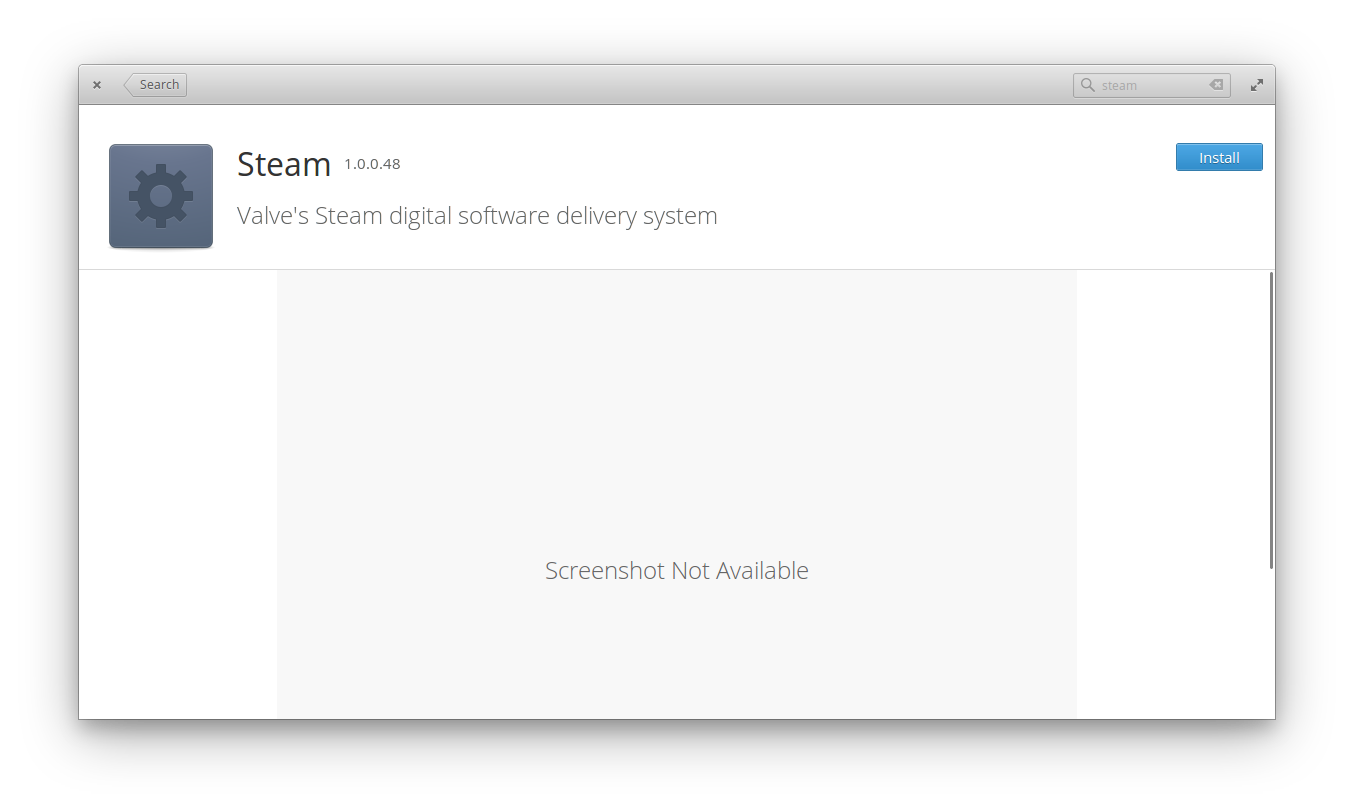
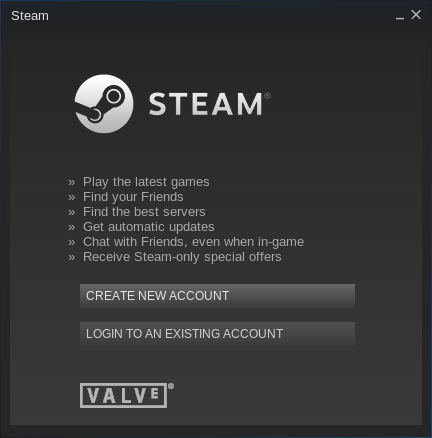
This isn't the only issue. Installing Steam also caused a problem.
Steam does appear in the search results but clicking on the "Install" button does absolutely nothing. Actually that is a lie. It starts to show a progress bar which almost instantly disappears and then nothing happens.
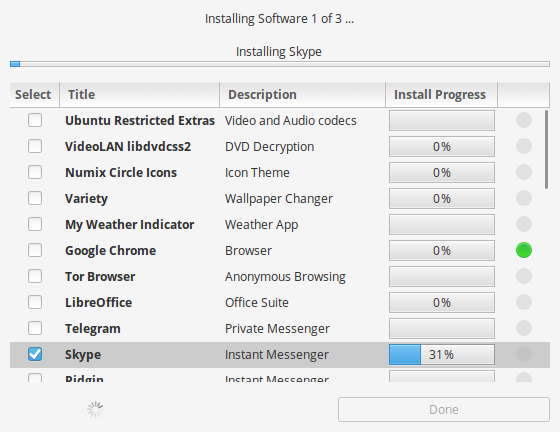
The solution I went for was to install Synaptic and then I
visited this site and downloaded the Debian package at the bottom of the page and installed it.
This installs Ubuntu After Install. When you run it you can choose between a whole host of applications to install including Chrome, Steam, Skype and many others.
You can of course use the command line to install the applications and you will find that for Chrome it doesn't work straight away if you do this. After using dpkg to install the package you will then have to run a fix using
sudo apt-get install -f.
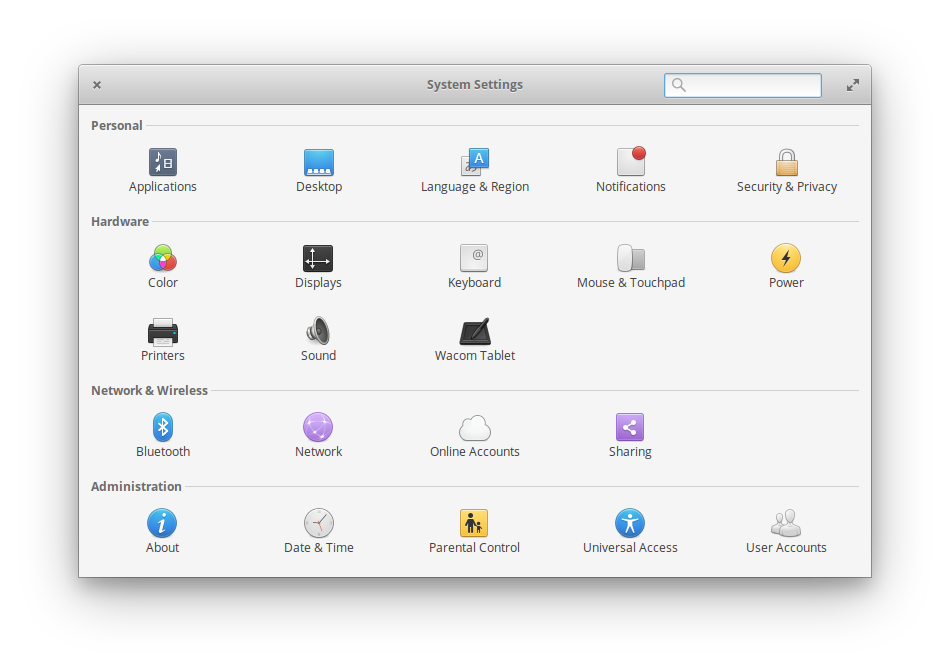
Hardware
The latest Linux kernel is great for most hardware. Elementary compliments this well with a nice easy interface for installing the hardware.
The settings panel is used to set up hardware and configure your system.
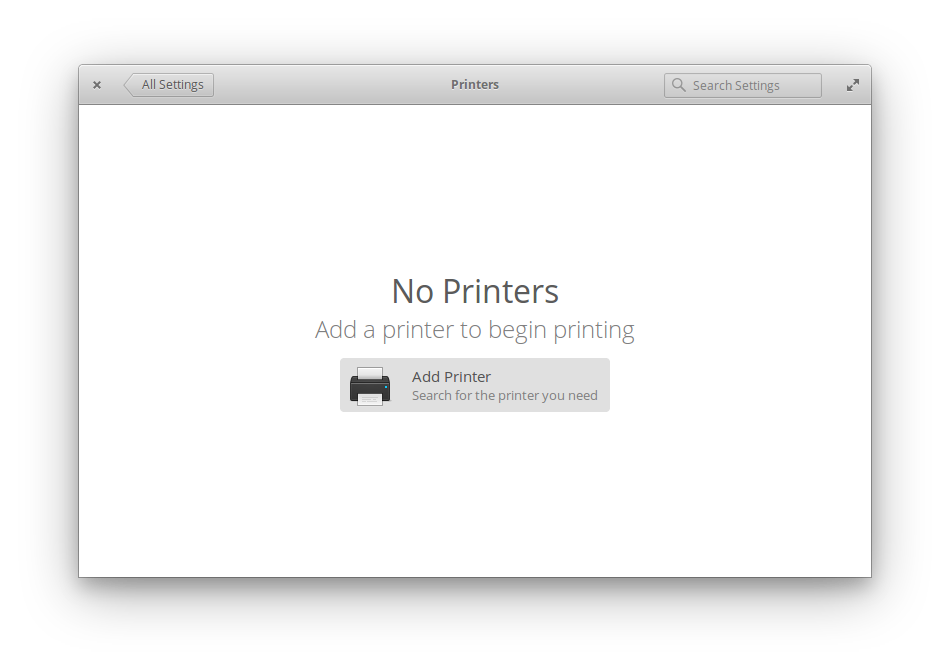
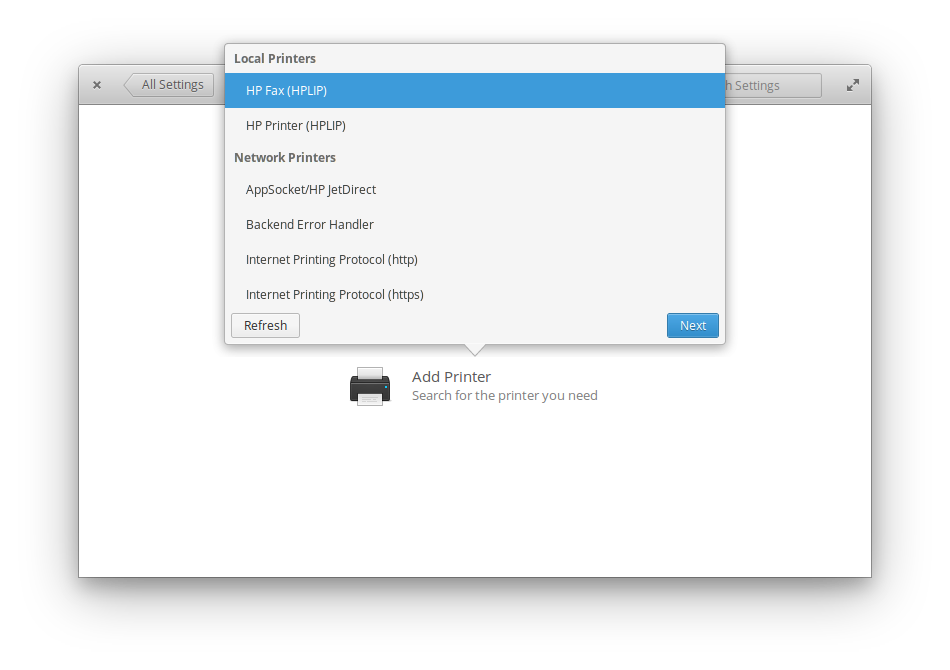
If you want to add a printer simply click on the printer settings icon.
An option will appear for adding a printer.
You can connect to network or local printers and I can confirm that I set up an Epson WF-2630 printer without issues.
I was also able to connect to the WD MyCloud network storage drive without issues and my Sony Walkman and my Android Phone were both perfectly picked up without issue.
Issues
I have had a couple of occasions whereby the whole system has frozen shortly after login and the only way to get it going again is to reboot.
It is worth pointing out that I have used Elementary as my sole operating system for the past 2 weeks and this has literally happened twice.
Summary
Elementary looks great. It is easy to install, easy to use and the applications are perfectly adequate for basic tasks.
The big issue is the package manager. The biggest issue with Ubuntu is the package manager.
The fact that somebody has had to go to the effort to create the Ubuntu After Install application shows there is a problem.
Why can't Ubuntu or one of these derivatives grasp the bull by the horns and come up with a solution.
People like to use Chrome yet all we get is Firefox or some basic equivalent. Chrome works with everything. It is by far the best browser and I don't want to settle for second best.
If you don't want to include it as part of the main package manager add a simple tool for installing this and many other applications including Steam.
On the whole though the distribution looks good and is simple to use and I do recommend it for the Everyday Linux User.
Thanks for reading.
Introduction
Elementary OS is an interesting Linux distribution. Everything about it screams look at me, look how good I look. The user interface is so very welcoming and enticing but when I tried Elementary Freya (version 0.3) I felt that when you scratched at the surface what was underneath wasn't particularly endearing for the Everyday Linux User.
I have spent the first couple of weeks of 2017 looking at Elementary OS to judge its suitability for the average home computer user.
The
Elementary OS website has the following tag line underneath the logo:
"A fast and open replacement for Windows and macOS"
When I read that I think "great, I should therefore be able to do all of the things with Elementary OS that I can do with Windows". What does that mean? Well I like to play games so Steam should be available, there needs to be an office suite, I need to be able to watch Amazon Prime and/or Netflix. I should be able to set up all my hardware with the minimum of effort and it should be fairly easy to use.
At the bottom of the Elementary OS homepage the following text is displayed which basically tells you what it is about:
"elementary OS ships with a carefully curated selection of apps that cater to every day needs so you can spend more time using your computer and less time cleaning up bloatware."
What this tells me is that I should expect to get a set of applications to get started. If this is the case then any extra software I need should be easily found and I shouldn't have an issue installing it.
Is this the case? Read on to find out.
How To Get Elementary OS
The developers of Elementary OS make a point of asking for a payment for their operating system. The amount you pay is up to you although the $10 option is the default.
If you plan to try Elementary OS out before making a purchase you can click on "Custom" and enter the amount you desire such as 0.
If you enter 0 into the custom box then the "Purchase elementary OS" button changes to become "Download elementary OS".
When you click on the "Download elementary OS" button a window appears with options to "cancel or download". Click on the "Download" button to download an ISO image of Elementary OS.
How To Create An Elementary OS USB Drive
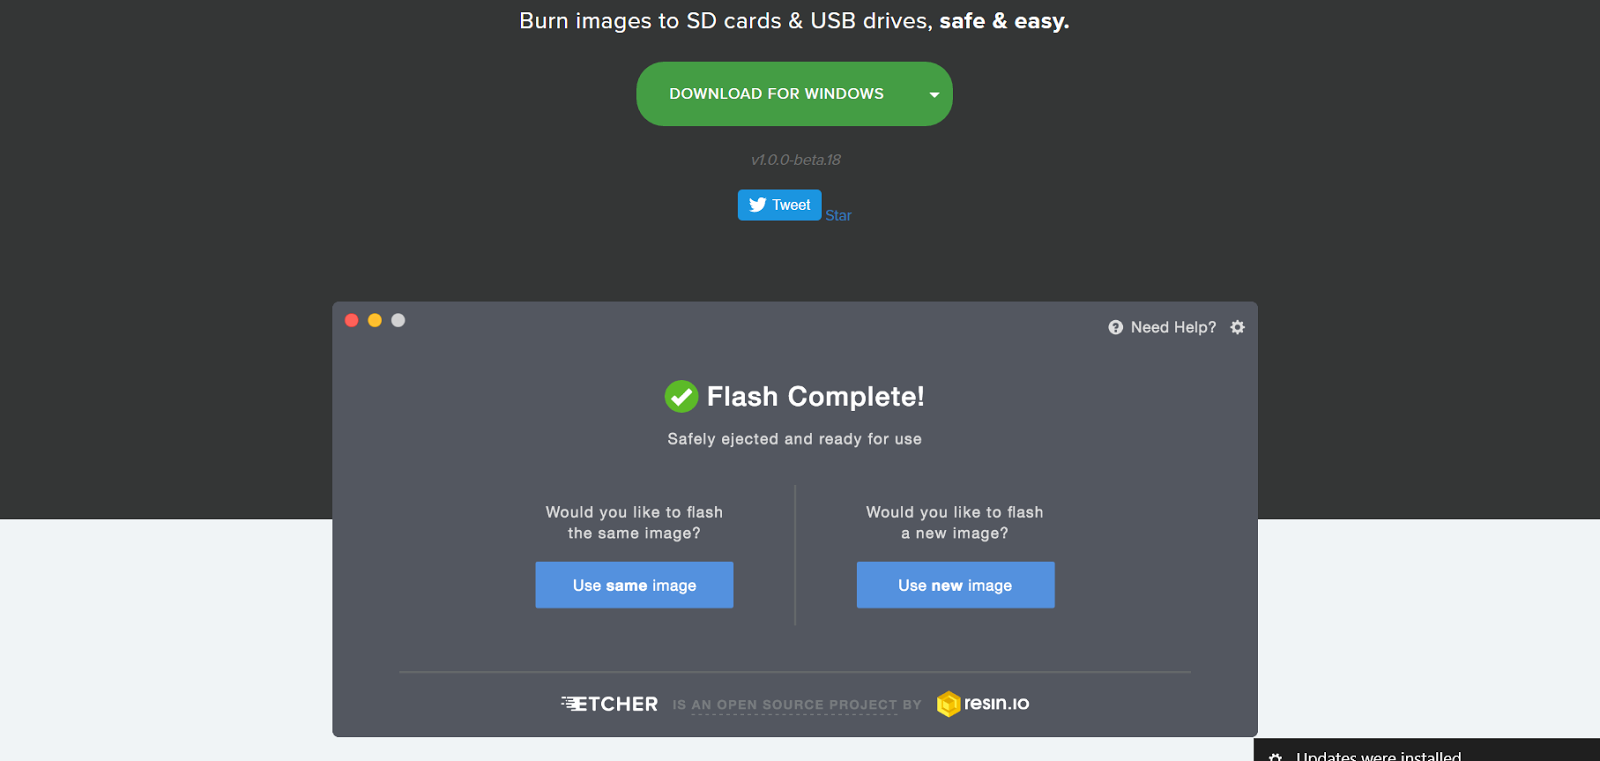
I highly recommend using Etcher for creating Linux USB drives. It is available for Windows and Linux.
Simply visit
https://etcher.io/ and click on the download link at the top of the page. It automatically works out whether you are using Windows or Linux.
The installation differs slightly depending whether you are using Windows or Linux to create the drive. For Linux you just need to double click on the downloaded file and follow the instructions.
For Windows double click on the file and click on the "Install" link. After the installation has finished click on the "Finish" icon and Etcher will start.
The user interface for Etcher is about as simple as it can get.
- Insert a blank USB drive
- Click "Select Image" and find the Elementary OS ISO downloaded previously
- Click "Select Drive" and choose your USB drive
- Click "Flash"
For some drives the "select drive" button does not appear and it shows as "connect a drive". Click on the settings icon in the top right corner.
Under the "Advanced" option it says "Unsafe Mode". Checking this box makes all of your drives available including your hard drive. This is of course why it is the unsafe option. You should however now be able to select the drive letter of your USB drive.
How To Boot To Elementary Live
Depending on whether you are using UEFI or BIOS you should be able to boot straight to the Elementary OS by rebooting your computer.
If you are using Linux you will probably see a grub menu with a system option at the bottom. Choose this option and then choose to boot from the USB drive.
If you are using Windows and the computer boots straight back to Windows without giving an option for booting to Elementary then try this:
- Right click on the start button
- Choose power options
- Click on "Choose what the power button does"
- Click the link that reads "Change settings that are currently unavailable"
- Scroll to the bottom and remove the tick from the "Turn on fast startup" option
- Click "Save changes".
- Reboot the computer whilst holding the shift key down.
- When the blue screen appears choose to boot from USB device
- You should now see a menu with an option to try Elementary
How To Install Elementary
When Elementary OS first boots you get the option to try Elementary or install it.
I recommend the try option initially so that you can test things like connecting to the internet and get a basic idea of what Elementary is about.
This will give you some comfort as to whether you like what you see.
To install Elementary either click the "Install Elementary" button when the system first boots or click on the install icon from the menu.
Installing Elementary is fairly straight forward and it is easy to dual boot with another operating system simply by
creating an empty partition.
If you haven't connected to the internet prior to running the installer then a screen will appear asking you to connect.
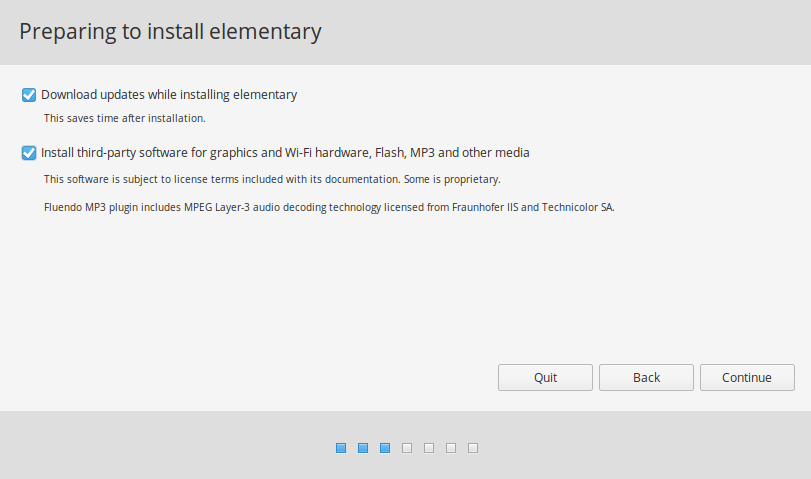
A screen then asks you whether you want to download updates during the installation and whether you want multimedia codecs to be installed.
I recommend ticking both of these boxes.
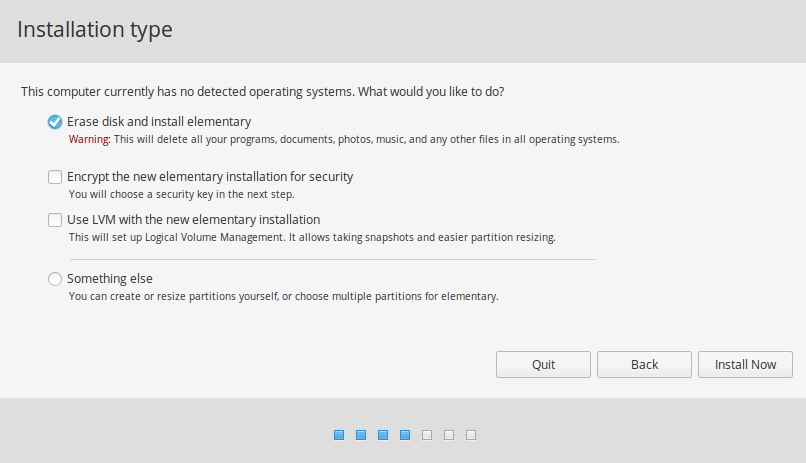
The next screen is the installation type screen and from here you can choose to erase the disk and install Elementary.
If you have created an empty partition and you have another operating system installed then an option will appear which will let you install alongside that other operating system.
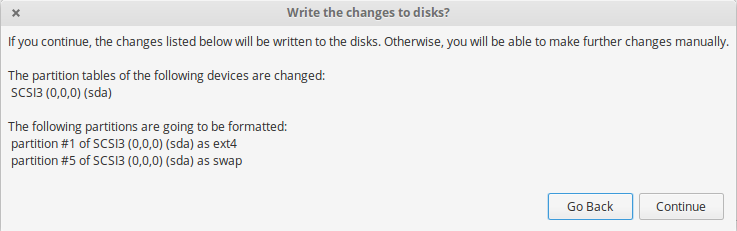
When you click "Install Now" a screen will appear telling you which partitions are being used and which partitions will be created. If you are ready click "Continue".
In my experience the option for "Installing alongside another operating system" generally works and you are indeed safe to continue.
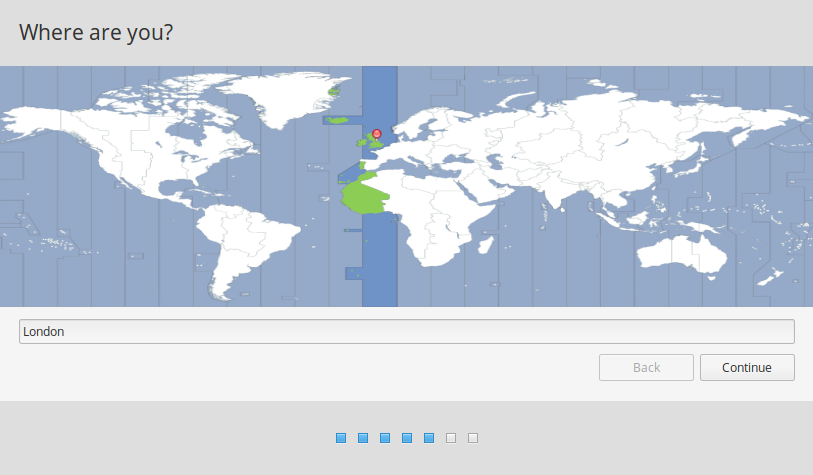
You will now be asked where you are in the world. This sets the timezone on your computer correctly and your clock will therefore be set properly when you boot into the real system for the first time.
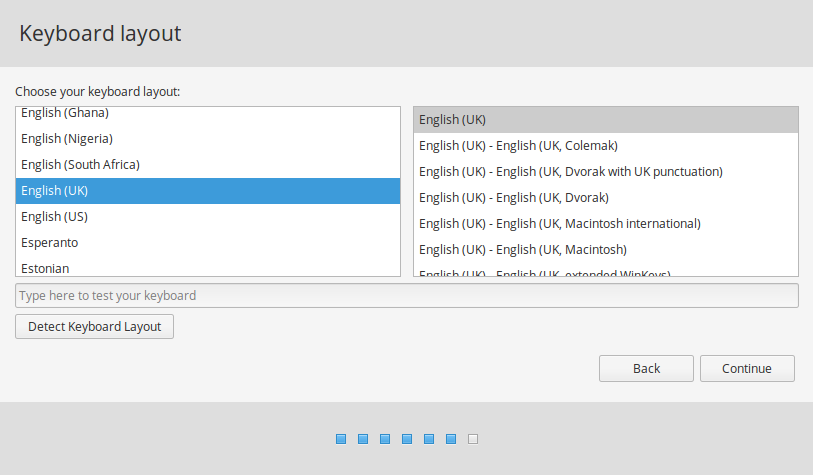
The penultimate step is to choose the keyboard layout for your computer.
It is highly likely the correct one has been chosen already.
If not click on the language on the left and the layout on the right.
You can test the layout by entering text into the box provided.
The final step is to set up a user.
Enter your name and a name for the computer.
Choose a username and a password.
Click "Continue".
The system will now be installed.
To start using your new system reboot the computer and remove the USB drive. When you boot you should now see a menu with an option for booting into Elementary.
As installers go this is probably as easy as it gets.
First Impressions
There is no doubt that Elementary OS looks good. The wallpaper is vibrant, the icons are crisp and clean and everything looks pixel perfect.
The interface is very simplistic so for the Everyday Linux User this is a nice straight forward and easy to use system.
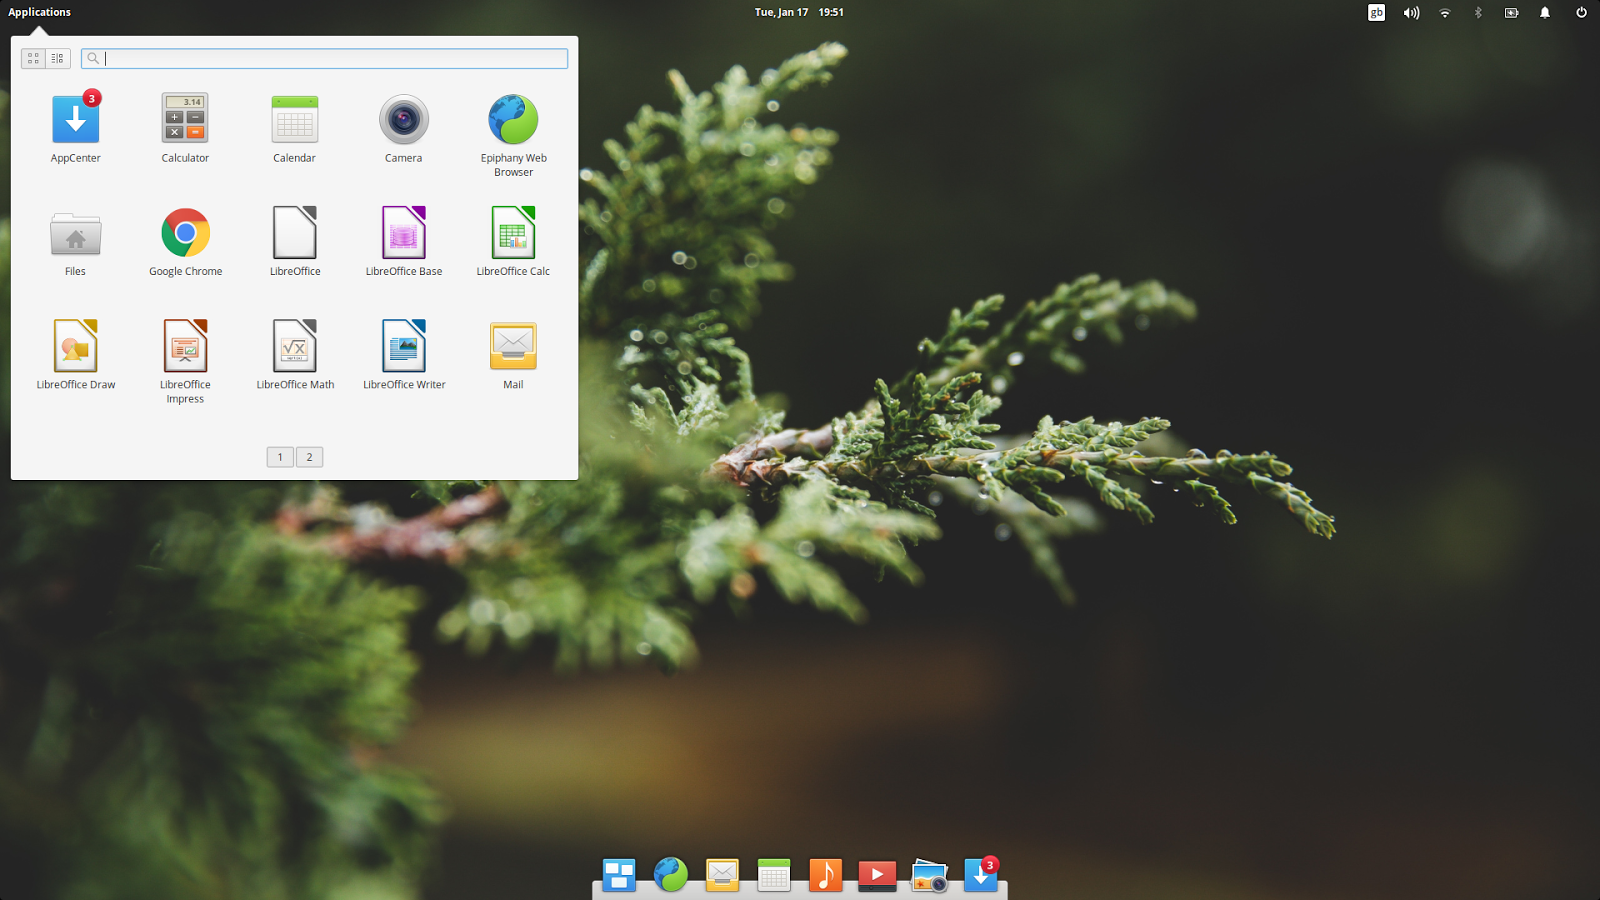
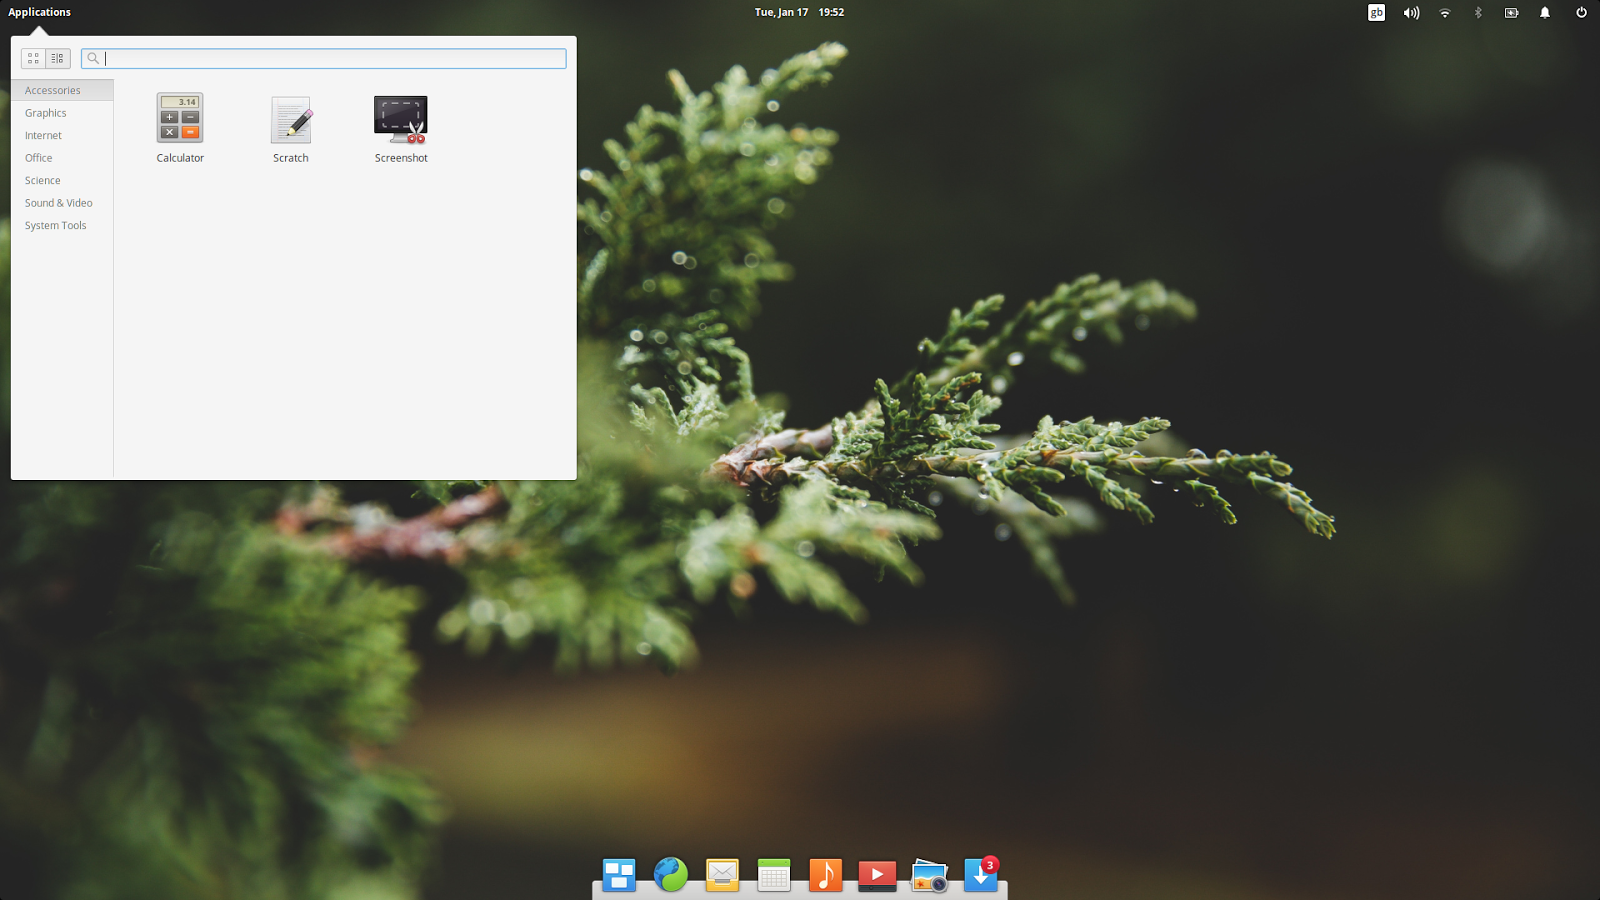
Clicking on "Applications" in the top left corner brings up the menu.
The default view is a list of icons for all of the applications installed on the system and there are a series of little dots at the bottom which help you navigate to the next and previous set of icons.
There is another menu view which shows a list of categories and items within the category.
You can also use the search bar to narrow down the items that are returned.
In the top right corner of the screen there are a series of icons for adjusting audio, power, network, power and bluetooth settings.
There is a clock in the top center of the screen.
At the bottom of the screen is a series of quick launch icons for commonly used applications.
The first icon on the launch bar shows a multitasking screen which is how you interact with virtual desktops.
Connecting To The Internet
Connecting to the internet is very easy. Simply click on the network icon and choose the wireless network you wish to connect to.
I have installed Elementary on my Lenovo Ideapad Y700 and I am pleased to say that any network problems I used to get with this laptop are now well in the past.
Email
Elementary delivers a simple set of applications which are enough to be useful but not full of bloat as suggested from the very outset on their homepage.
The mail program is called Geary and it works with all modern mail providers including GMail.
There is however a caveat. When you first try and login to GMail you may get an email (which you will need to check in another client such as the web interface or via your phone) which says that a login was attempted and you need to lower your security settings to allow Geary access to the email.
Whilst this may seem insecure (and I guess it is) there is an element of comfort that Microsoft Outlook causes the same issue when you try and connect to GMail.
The email client is very basic. You basically get a list of the folders down the left side with the emails for the selected folder in the centre panel.
The right pane shows a preview of the email.
That is pretty much all there is to it.
As you can see, composing emails is very basic but it works.
It is worth noting the appearance of the Windows within Elementary. They are all very clean and very crisp.
For people used to using Macs this will be very pleasing.
Calendar
The quick launch bar at the bottom includes a calendar icon.
The calendar provides a nice simple monthly view.
Adding events is as easy as clicking on an icon at the top of the screen or by double clicking on a date.
You can choose the location of the event, set reminders, invite other people and create recurring events.
Music
The audio player within Elementary OS is called Noise.
For playing your own music however it is just what you need.
The first thing to do is import music which is easy because there is a big link asking you to import music.
After the music is installed you can view the content in various ways such as a full list view, an image view and a more technical view.
You can do the basics such as create new playlists and add tracks to that playlist.
You can also create smart playlists which lets you choose songs by various categories and limit the playlist to a certain number of songs or a certain duration.
As you would expect the audio plays perfectly fine and MP3s are playable as long as you chose the option to install the multimedia codecs during installation.
Video
The video player is called Audience.
There is a single option when you open Audience for the first time and that is to choose a video to play.
On subsequent uses you can choose to load a previously viewed video as well.
It is basic but it works. All you want really.
Photos
The photo viewer is called Pantheon-Photos and as with the other tools basic but functional.
You can import photos and view them.
There are categories that you can choose such as the date or whether you want to view photos or videos.
That is about it though.
When you view a photo however there are lots of options. You can share it via email or bluetooth and you can set the photo as your desktop background.
Web Browser
The default web browser with Elementary OS is called Epiphany and it is at this point where cracks start to form.
Everything thus far has been a bit too plain sailing hasn't it. All the applications are simple but functional and the desktop is really easy to use. Even installation was a breeze.
One of my requirements and probably many other people's requirements is to be able to watch Netflix and Amazon Prime Video.
Netflix will not work with Epiphany and neither will Amazon Prime.
Installing Applications
Clearly you would think the Netflix and Amazon Prime issue could be solved by installing a browser such as Chrome.
Unfortunately this isn't as simple as it should be.
The AppCenter is the tool that you use within Elementary OS to install applications and it looks just as good as the other applications within Elementary.
At first it seems quite useful as well. For instance the default Elementary installation lacks office software.
Clicking on the Office category brings up this screen with the option to install LibreOffice.
The AppCenter isn't as useful for installing applications that I and probably many other people like to use.
For instance Google Chrome:
As Elementary OS is based on Ubuntu you can go to the Chrome website and download it but installing Chrome requires you to use the command line because there isn't anything installed for installing DEB packages graphically.
You can install the GNOME Software Manager which seems to help but seems counterproductive or you can install GDEBI which gave me mixed results.
This isn't the only issue. Installing Steam also caused a problem.
Steam does appear in the search results but clicking on the "Install" button does absolutely nothing. Actually that is a lie. It starts to show a progress bar which almost instantly disappears and then nothing happens.
The solution I went for was to install Synaptic and then I
visited this site and downloaded the Debian package at the bottom of the page and installed it.
This installs Ubuntu After Install. When you run it you can choose between a whole host of applications to install including Chrome, Steam, Skype and many others.
You can of course use the command line to install the applications and you will find that for Chrome it doesn't work straight away if you do this. After using dpkg to install the package you will then have to run a fix using
sudo apt-get install -f.
Hardware
The latest Linux kernel is great for most hardware. Elementary compliments this well with a nice easy interface for installing the hardware.
The settings panel is used to set up hardware and configure your system.
If you want to add a printer simply click on the printer settings icon.
An option will appear for adding a printer.
You can connect to network or local printers and I can confirm that I set up an Epson WF-2630 printer without issues.
I was also able to connect to the WD MyCloud network storage drive without issues and my Sony Walkman and my Android Phone were both perfectly picked up without issue.
Issues
I have had a couple of occasions whereby the whole system has frozen shortly after login and the only way to get it going again is to reboot.
It is worth pointing out that I have used Elementary as my sole operating system for the past 2 weeks and this has literally happened twice.
Summary
Elementary looks great. It is easy to install, easy to use and the applications are perfectly adequate for basic tasks.
The big issue is the package manager. The biggest issue with Ubuntu is the package manager.
The fact that somebody has had to go to the effort to create the Ubuntu After Install application shows there is a problem.
Why can't Ubuntu or one of these derivatives grasp the bull by the horns and come up with a solution.
People like to use Chrome yet all we get is Firefox or some basic equivalent. Chrome works with everything. It is by far the best browser and I don't want to settle for second best.
If you don't want to include it as part of the main package manager add a simple tool for installing this and many other applications including Steam.
On the whole though the distribution looks good and is simple to use and I do recommend it for the Everyday Linux User.
Thanks for reading.
Posted at 21:51 | by
Gary Newell