Monday, 29 October 2012

Precise Puppy - Linux Perfected

Introduction

There have been a number of releases of Linux distributions in the past couple of weeks but no release gets me more excited than a new version of Puppy Linux.

The latest release of Puppy Linux is called "Precise Puppy" and can be downloaded from the Puppy homepage.

I downloaded a version at the weekend and using Unetbootin I installed it to a USB drive and this is my review of the latest version of Puppy Linux


Installation

Unlike most versions of Linux you do not need to install Puppy Linux. It actually runs perfectly well from a USB drive.

Simply plug in the USB drive and wait for the system to boot up. If the computer boots straight into your existing operating system then you will need to change the boot order of your PC to boot from a USB drive before the hard drive. (Alternatively install the Puppy ISO to a CD and boot from the CD as they are always set to boot before the hard drive, if that is not the case follow this link which shows how to change the boot order).

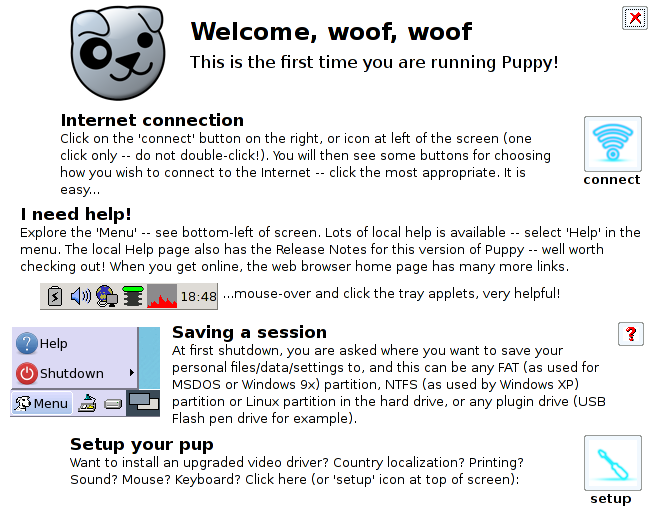
Once you have booted into Puppy for the first time the following screen will be shown.

Precise Puppy Linux

In the centre of the screen is the quick setup wizard. From this screen you should set your country of residence, your timezone and keyboard layout. You will also see the current screen resolution that has been selected. 

The next screen that appears gives you the option to set up your internet connection and provides information about saving your session.

Puppy Linux generally runs from memory but all your files such as pictures and music will need to be stored somewhere and so Puppy Linux gives you the option to create a save file on the hard drive of the computer you are running on within the operating system that resides on the computer.

I recommend rebooting straight away as this will give you the option of creating the save file. You can give the file any name you choose and specify the drive you wish to save the file on.

Connecting to the internet

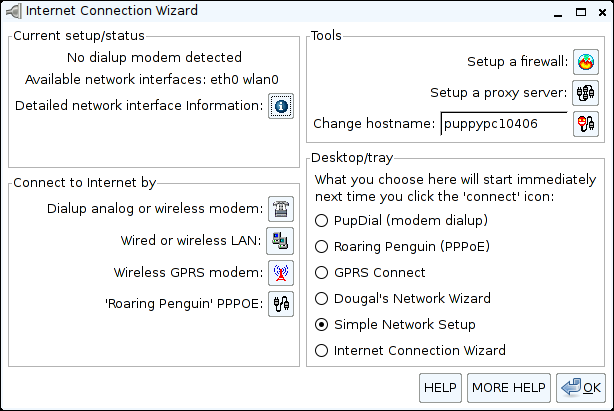
To set up an internet connection click the connect icon on the desktop.

The internet connection wizard will load.

There are a number of different options available for connecting to the internet but I found the Simple Network Setup option to be perfectly adequate in setting up my connection.


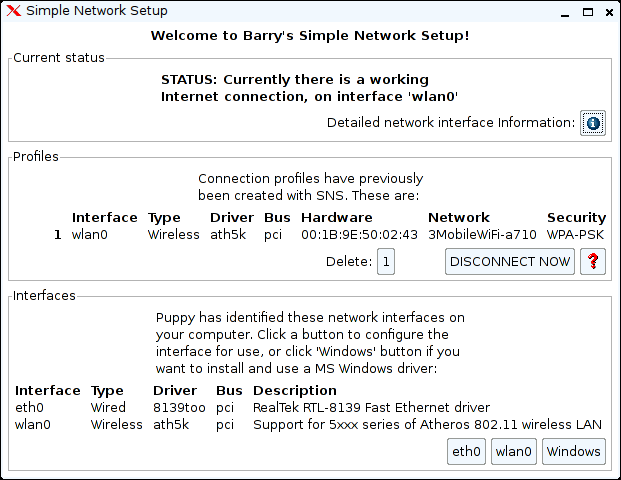
The Simple Network Setup tool will give you a list of all the potential network options.

As you can see I have an ethernet connection and a wireless card.

Clicking on the WLAN0 button brings up a list of networks that I can connect to.

To connect to a network all that I had to do was select the name of the network and enter the security key.

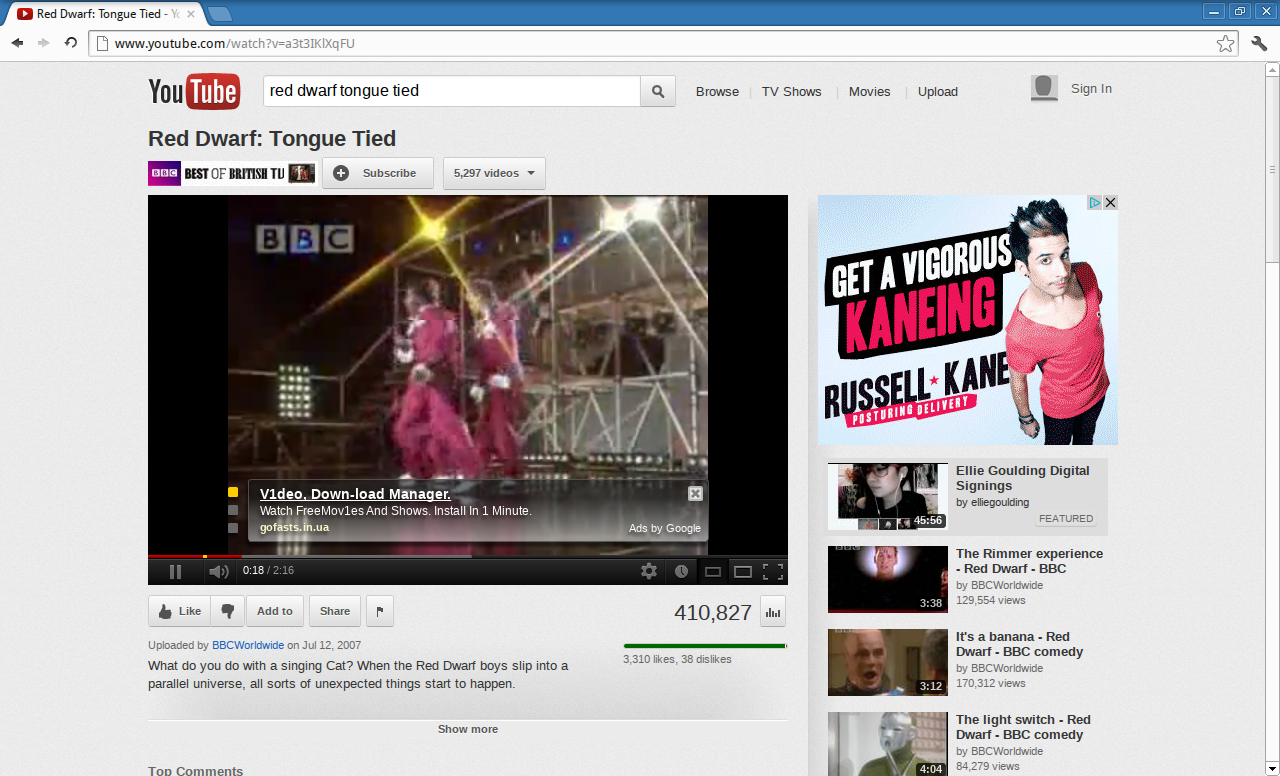
The browser that comes with Puppy is Seamonkey which is a lightweight browser.

The first thing I do when I use a new distribution is to go to Youtube and attempt to watch a video. This lets me know instantly if I am going to have any problems with running Flash.


I am pleased to announce that Flash works fine within Precise Puppy as can be seen in the image above.

Music

Another good test when I use a new version of Linux is to run the default music player and attempt to play MP3 files.

The default player within Precise Puppy is PMusic. Before I say whether it can play MP3s or not I just want to say "WOW". I really like this tool.

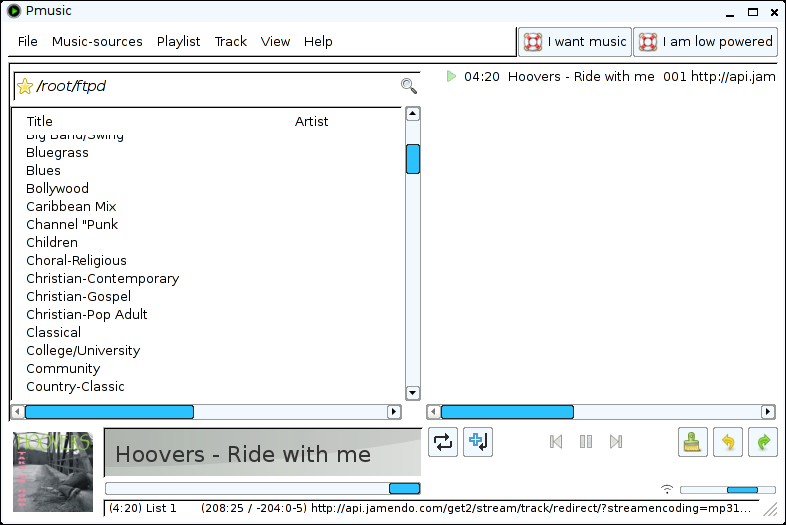
Visually the tool isn't spectacular but it has some neat little tricks that had me playing with it for ages.

Firstly when you start the application it starts playing music straight away by connecting to an online radio station.

If you want to listen to different music click the music sources menu and you can choose from a list of sources including CDs, local media, radio stations, web hits and podcasts. 

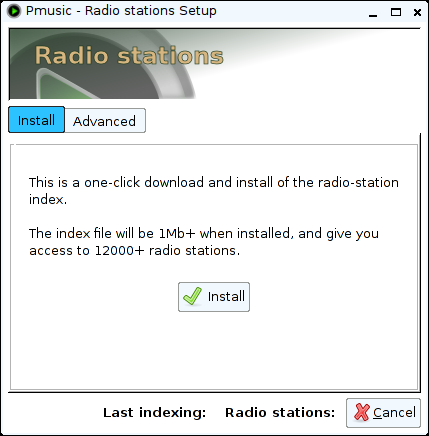
Clicking the radio stations setup link gives you the option of installing an index of online radio stations.

Once the list is downloaded you can access an incredibly large list of radio stations.

You can search the radio station list by category or by country.


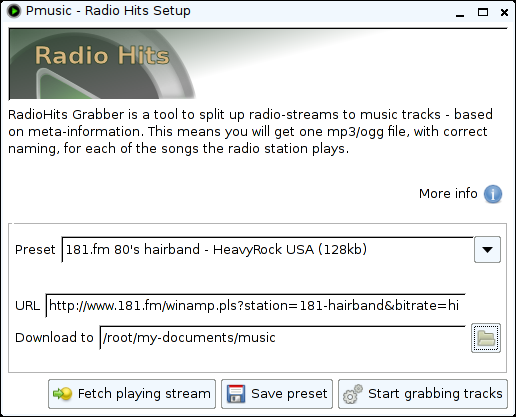
The secret gem within Pmusic is the Radio Hits Setup screen.

Simply choose a preset radio station and a path to download to and then click to start grabbing tracks.

The tool will download songs from the selected radio station in MP3 format. 

The neat thing about the tool is that it ignores adverts and only downloads complete tracks.


Installed Applications

Puppy Linux has always impressed me with the sheer number of great tools that are available that are pretty much unique to Puppy installs.

There are far too many applications installed to list them all here but what needs to be mentioned is that all of them are designed to be lightweight. There is no LibreOffice and no GIMP. Remember that Puppy is designed to run from memory therefore it doesn't make sense to have resource hungry applications installed by default.

I have already mentioned the great PMusic tool for playing music but Puppy Linux comes with other good tools such as mtPaint which is an image editing application, Abiword for basic word processing, the brilliant Geany editor and a host of tools for ripping music. There are also tools available which enable you to create your own version of Puppy and burn it to USB.

Installing Applications

We all have applications that we just can't live without or just prefer. In my case I like Chromium and although Seamonkey generally works it isn't as good as Chromium.

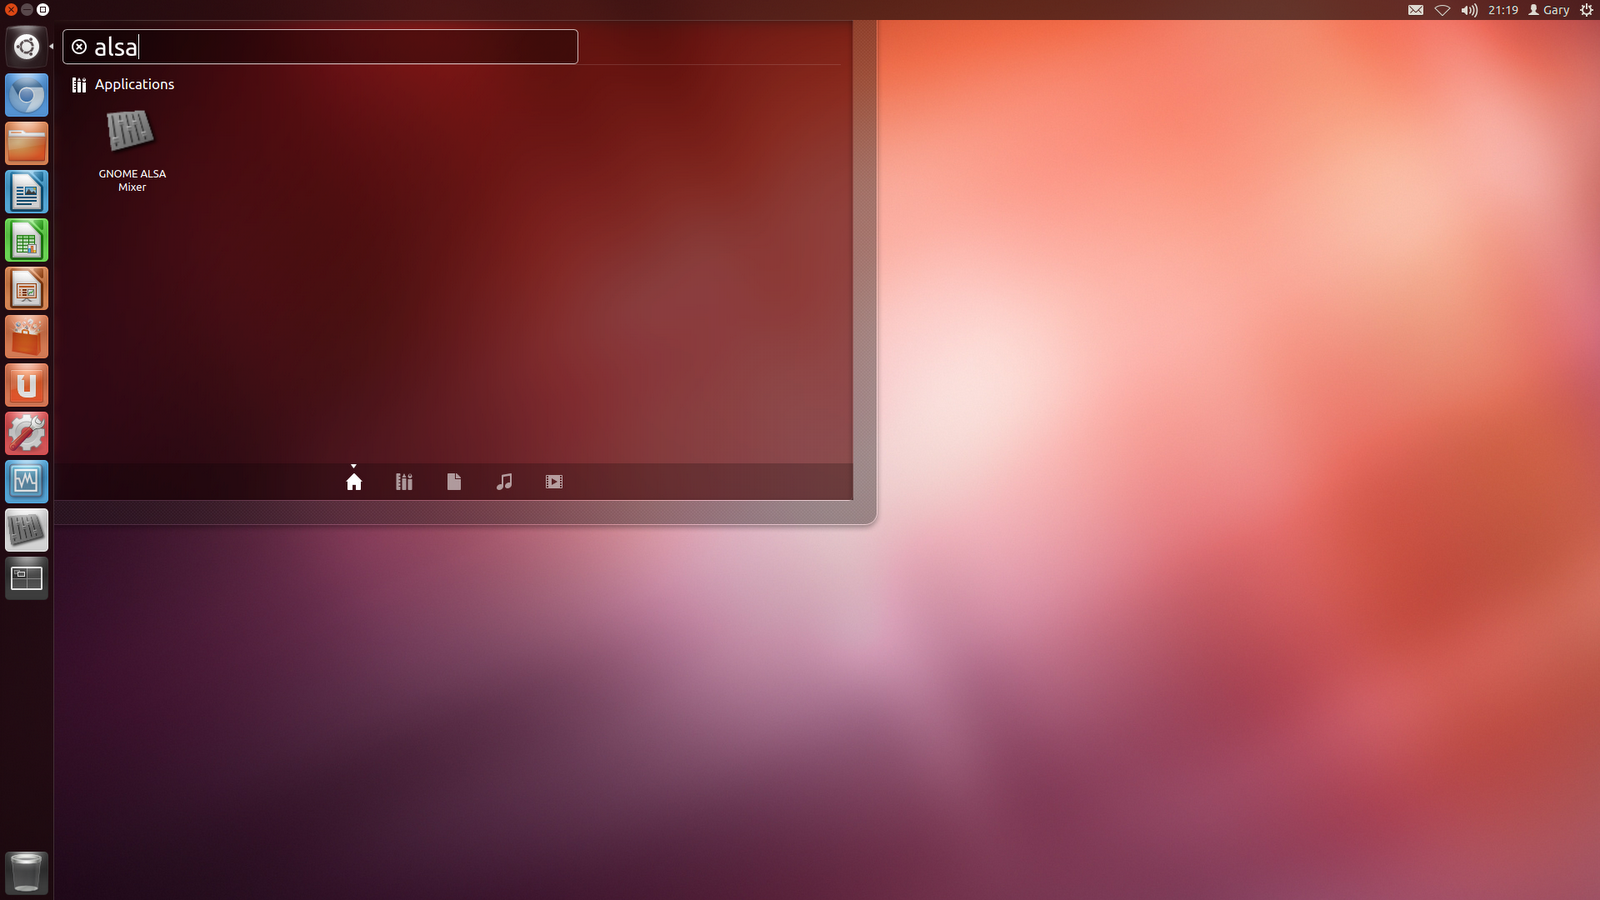
To install software click the Install icon on the desktop.

Now the screen that appears gives a lot of options.

To break the options down the screen is basically split in two halves.

The first half of the screen deals with installing Puppy to either a USB or hard drive.

The second half of the screen deals with installing applications from the repository.

There are two ways to install applications. The first and most common way is to run the package manager.

The second is to install an SFS file.


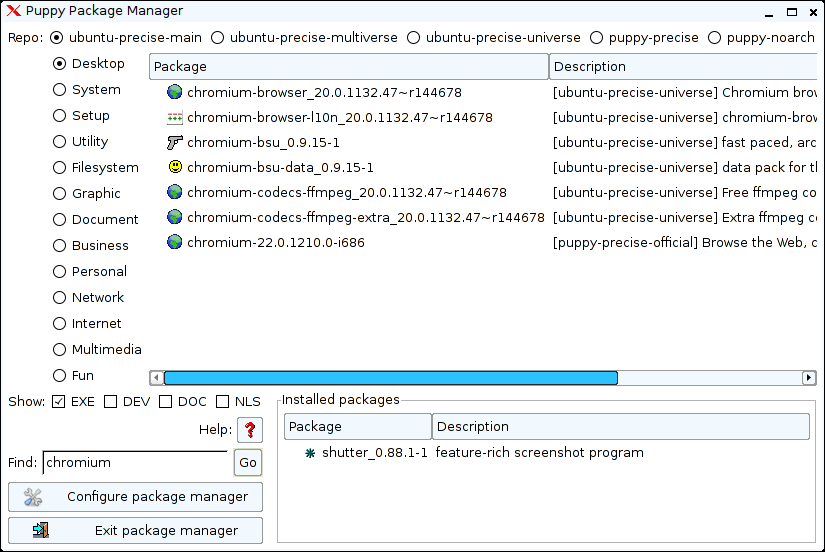
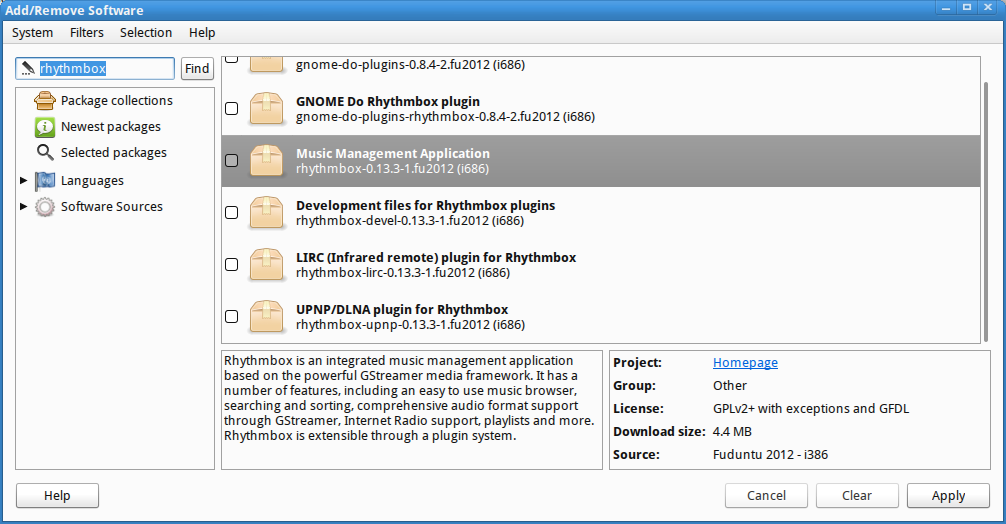
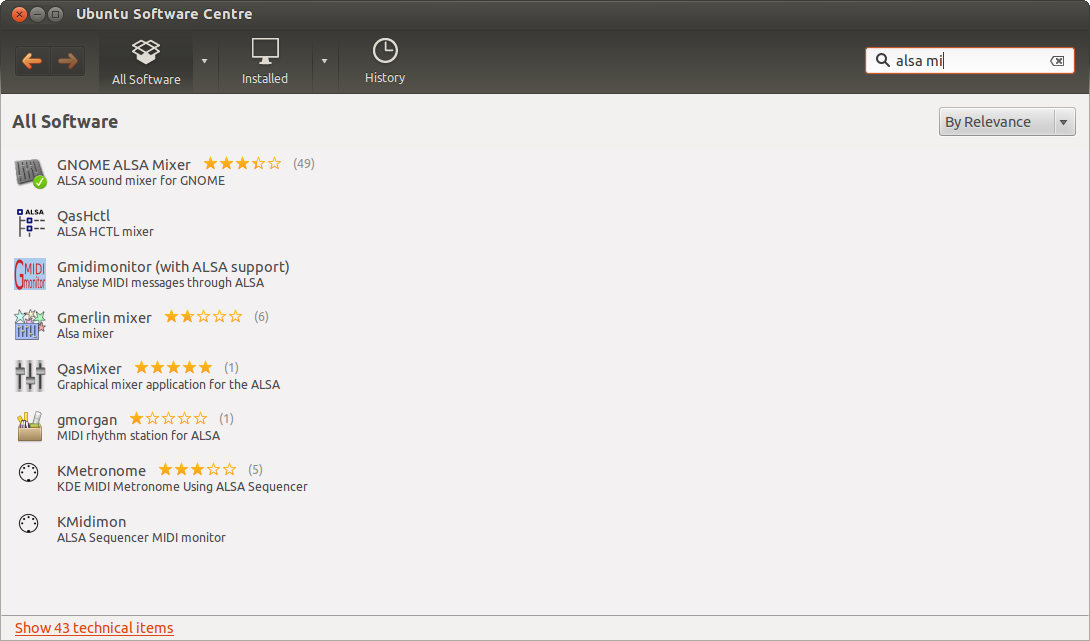
The package manager works pretty much the same as most package managers.

Enter the name of the package you want to find and then click go.

After clicking go a message appears asking if you want to search the selected repository or all repositories.

Once you have found the program you wish to install just click on it and the installation will begin.

You will be asked whether you want to install just the selected application or to examine dependencies. 

If you choose to examine dependencies a further screen will be displayed asking whether you want to install the selected dependencies or all dependencies.

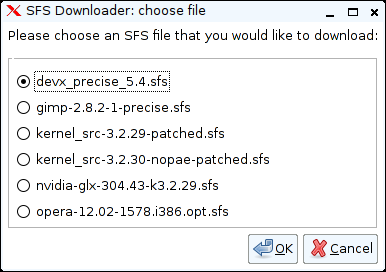
For some applications you can choose to install an SFS file instead of searching the package manager.

The SFS downloader contains various options including GIMP, NVidia drives and the Opera web browser.

Simply choose the file you wish to install and click OK.

You are then giving a list of download locations from which to install from.
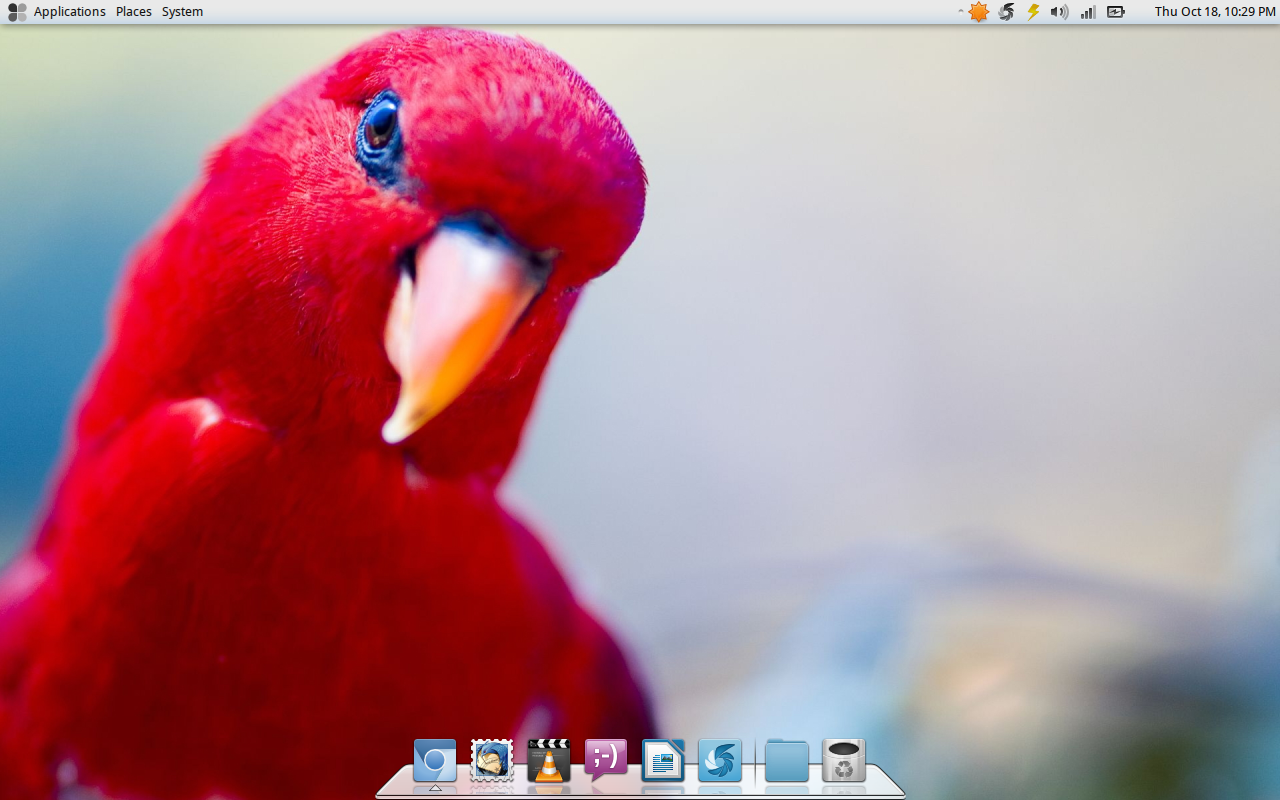


The Desktop

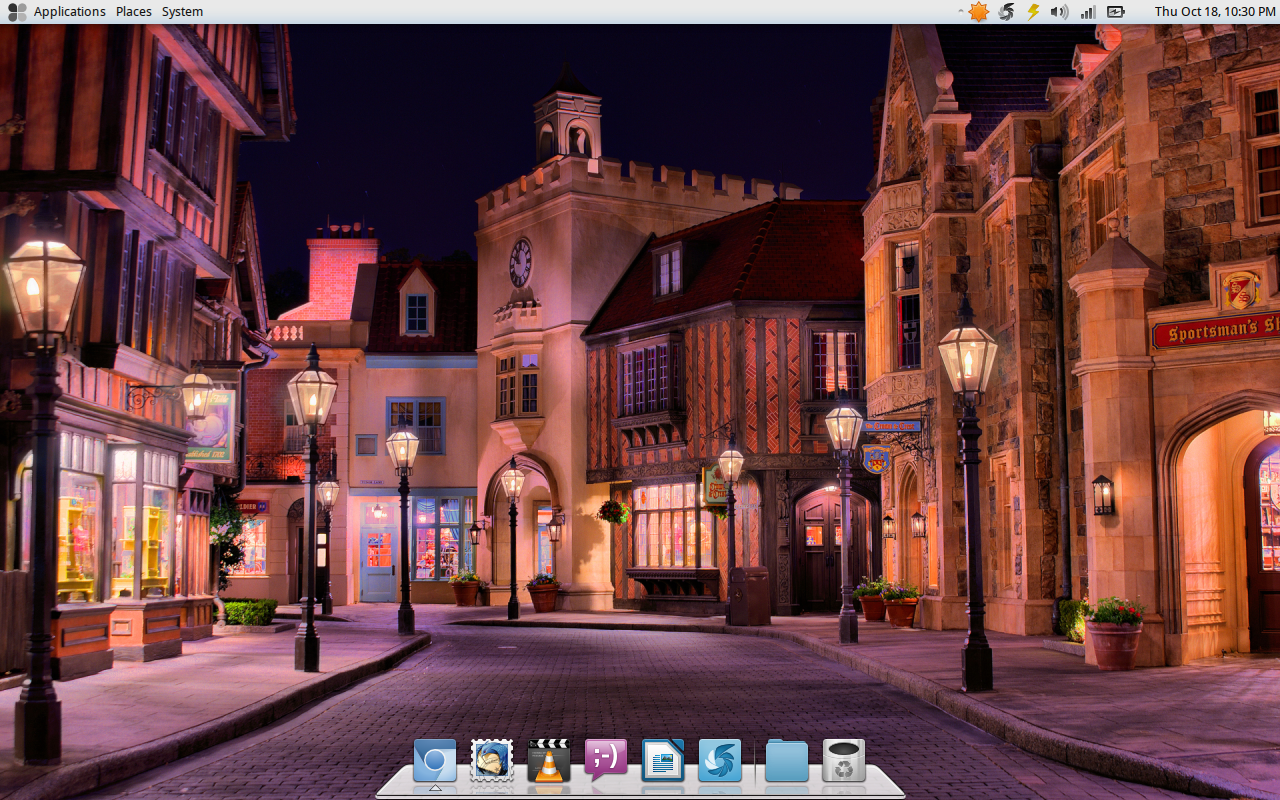
The Puppy desktop itself consists of a taskbar at the bottom with a menu and system tray.

There are also a carefully selected list of icons on the desktop. 

The first row of icons provides a icons for system related tasks such as installing software and mounting drives. 

The second row of icons are for productivity such as word processing, spreadsheets and image editing.

The third row of icons are for connectivity including browsing the web, email and chat.

The fourth row of icons gives access to a calendar and the music player.

The fifth row has only one icon which is for connecting to the internet.

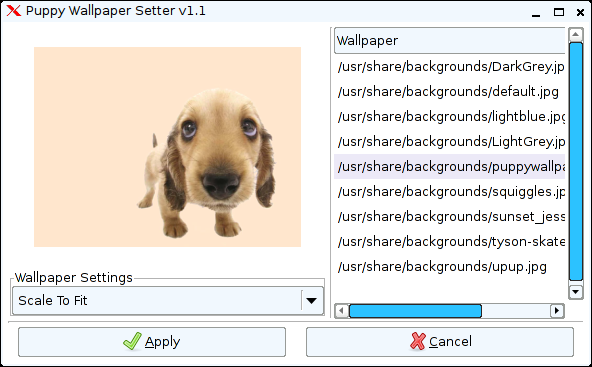
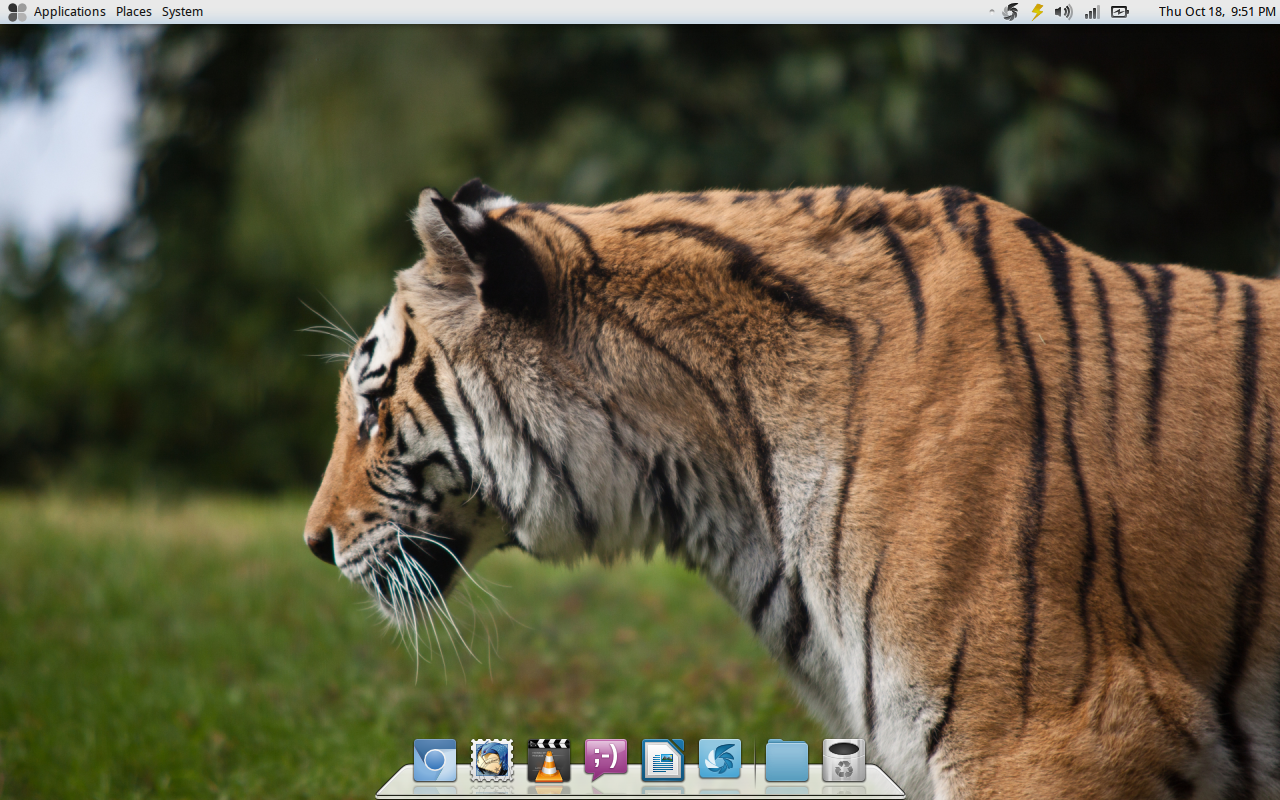
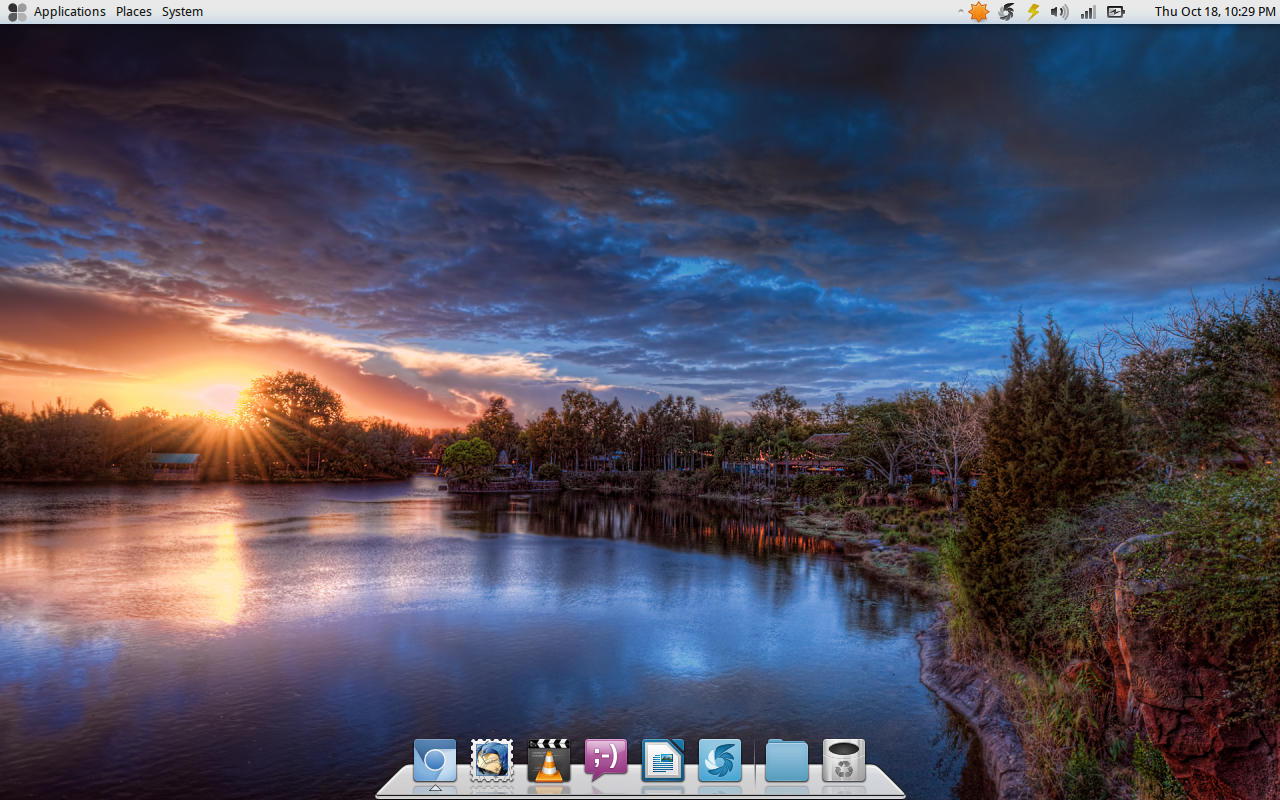
If you want to change the background wallpaper it will come as no surprise that there is a special tool written for this purpose that is unique to Puppy Linux.

The Puppy Wallpaper Setter provides a list of about 10 wallpapers to choose from.

You can install more by downloading them from the web and placing them in the /usr/share/backgrounds folder.

Summary

Puppy Linux is truly unique in so many ways. It runs from memory, It is designed to run from a USB drive as opposed to just providing a live version and It has its own installer, package manager and suite of clever tools.

The boot time is quick even on the older Samsung R20 hardware that I am running it on. (I also tried it on a Toshiba Satellite L870 laptop which has an I5 processor and 8gb of ram and it was phenomenally quick).

I have reviewed a number of Puppy Linux releases and this along with MacPup is the most complete and thought out release yet. 

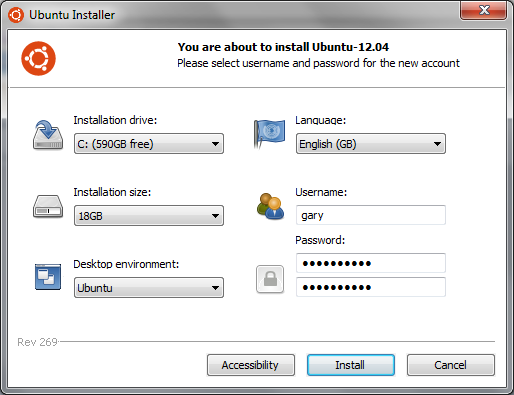
Precise Puppy is linked to the Ubuntu 12.04 repositories so the software available is more up to date than it has ever been. 

I always keep a version of Puppy Linux on a pen drive and carry it with me wherever I go. This release is thoroughly recommended.

Thankyou for reading.


Raspberry PI - The Sinclair Spectrum of the 21st Century

Introduction

One Christmas in the mid 1980s when I was 10 or 11 years old my parent's bought me the best gift I have ever received.

My parents know nothing about computing or technology so they would never have come up with the gift if they hadn't asked "What would you like for Christmas this year?"

The gift I received was the Sinclair Spectrum +2. My cousin Ian had a 48k Spectrum with rubber keys and we had spent an inordinate number of hours playing games like Matchday and Grand Prix Simulator.

The Sinclair Spectrum was a great games machine at the time and even though the games lacked sound quality and graphical ability they more than made up for this with playability.

The thing is though the Spectrum wasn't just about playing games. The Sinclair Spectrum gave budding young programmers the ability to write their own games and applications.

I learned a lot by copying reams of code from the middle pages of Sinclair User and I believe that the Sinclair Spectrum is responsible for making me a decent programmer (not spectacular, but very competent) today.

The Raspberry PI

You might be wondering at this point what all this has to do with the Raspberry PI. Some of you might be wondering what on earth a Raspberry PI is.


The Raspberry PI is about the size of a credit card and is basically a circuit board. It costs around £35 and that is all that you get when you order one.

It boasts a mere 700mhz ARM processor and just 512 mb of Ram. If you want to run an operating system you have to buy an SDHC memory card with an operating system on it (or buy a blank card and install one on it). There is no built in WIFI and it has 2 USB ports, a HDMI port, an Ethernet socket, a power socket and audio/video ports.

To power the Raspberry PI you can use a standard mobile phone charger.

After purchasing the Raspberry PI there is other hardware that you will immediately require. You will need a USB keyboard and mouse, a USB hub (2 USB ports will be taken straight away with a keyboard and mouse), a HDMI cable, a USB wireless dongle and of course a monitor (or TV).

At this point you might be wondering what is the point? A low end tablet comes with similar memory, running Android for around £150. A decent netbook is available for around £200 and will come with a lot more power and even a fairly mediocre laptop has more power at not much more than £250.

To answer this question you have to understand the demographic the Raspberry PI is mainly targeting.

If I was an 11 year old today where is my Sinclair Spectrum?

Using a tablet it is entirely likely that I will learn nothing. A tablet is a great entertainment device for watching videos and listening to music, for browsing the web and playing novelty games.

Netbooks and laptops are perfectly fine for learning basic programming and to mess around with but herein lies a problem. If little Johnny wants to try Linux out for the first time it is likely his parents will tell him not to bother because if it all goes wrong then they might not know how to fix the issue and that means getting PC World to fix the computer. £200+ is a lot of money to be turned into a door stop by an experiment attempted by an eager 11 year old.

Lets face it, it is more than likely that an 11 year old will screw up and may need help along the way. Do you want that 11 year old experimenting on a £400 laptop or on a computer that costs £35?

The other peripherals will still work even if little Johnny accidentally steps on the Raspberry PI rendering it useless. Another £35 and little Johnny is ready to go again.

The great thing about the Raspberry PI is that even if little Johnny messes up the operating system it is just one format of a memory card from being back to its original state.

The Raspberry PI is the Sinclair Spectrum of the 21st Century giving another generation of budding computer enthusiasts and potential programmers the chance to experiment without their parents looking over their shoulders for fear of their child rendering the family laptop useless, losing all the precious photos and the presentation that dad spent days writing.

£35. That is a real bargain. That is less than the average hourly rate of good programmers.

The 512mb of memory should not be seen as a drawback either. It should be seen as a plus point. The Sinclair Spectrum that I was given boasted 128k of memory and that was huge compared with the 16k and 48k models that came before it.

When you have less resources to deal with you learn to manage it better, you learn better programming techniques and you learn to work within the boundaries that you have been given.

So why all the hype?

The Raspberry PI has clearly exceeded the expectations of the inventors. It has caught the imagination of so many people. Why is this?

I cannot answer this question with any certainty but I can only give the reasons why I wanted one so much.

The Raspberry PI is a great toy. The hardware is the same on every model which means I can develop software for the Raspberry PI specifically and know it will work on each and every one. I can also use the Raspberry PI for so many different purposes. For instance I can install emulators on it and use it to run old Megadrive and SNES games. The one thing I know is that no matter how much I play with it I cannot mess it up. If it all goes wrong I just put the image of the operating system back onto the SD card and start again.

Thankyou for reading.

Sunday, 28 October 2012

Just a quick update....

You may or may not be wondering why there have been no new articles this week.

I have been very busy working on a number of things.


  1. I downloaded the latest version of Puppy Linux (Precise Puppy). There will be a review of this in the next week.
  2. I downloaded the ARM version of Puppy Linux (Puppi)
  3. I received in the post a shiny new Raspberry PI and I'm not ashamed to admit to wasting an inordinate amount of time playing with it.
There are going to be lots of articles in the next few weeks as there have been a number of distributions with new releases and there are so many that I have never reviewed yet fully intend to.

Plans for this week include articles for

  1. Precise Puppy
  2. Puppi for the Raspberry PI
  3. Raspbian Linux
  4. PCLinuxOS
All updates to this blog are posted on Twitter and many of the articles make it to either LXER or Linux Today.

The next review will be available on Monday 29th October.

Thursday, 18 October 2012

Fuduntu - And now for something the same but different

Introduction

The tag line for Fuduntu reads "Fuduntu - Punny Name, Serious Distro". My initial thought was that it would be another Ubuntu clone but after reading the about page on the Fuduntu website (http://www.fuduntu.org/) I found out that Fuduntu is primarily based on Fedora but has the look and feel of Ubuntu. (Well Ubuntu before Unity).

I downloaded the ISO from the Fuduntu download page (http://www.fuduntu.org/get.php), used Unetbootin to burn it to a USB drive and proceeded to install Fuduntu to the hard drive on my Samsung R20 laptop.


Installation

Fuduntu has its own installer but it is fairly similar to the one used by Ubuntu. It is fairly easy to work out what you need to do to install the system.

Choose whether you want to use the whole disk for Fuduntu, then select where you live and the username and password you want to use to log in. All fairly standard stuff for modern distributions really.

Rather than rehash instructions that have been written a number of times before here is a link showing you how to install Fuduntu. (http://www.fuduntu.org/wiki/index.php/Installing_Fuduntu)

Look and feel


Fuduntu is a throwback to the pre-Gnome 3 and Unity desktops. Fuduntu comes with the Gnome 2 desktop with a taskbar at the top and a dock at the bottom.

The most notable part of the desktop is the majestic image of a tiger. It is hard to believe that you won't like the picture of the tiger but if you don't it is easy to change it by right clicking on the desktop and clicking "change desktop background".

There are 18 backgrounds available by default and most of them have bright vibrant colours.

The taskbar at the top of the screen is fairly standard.

Firstly there are three menus "Applications","Places" and "System". When I look at these menus and look at how Unity and Gnome 3 have changed the desktop landscape I wonder whether we have really progressed. 

I find it hard to believe that any system is easier than finding your applications under the applications menu, your files and folders under places and anything system related such as setting up users and installing applications under system.

The main thing missing of course is the ability to search for an application.

On the right hand side of the toolbar are icons for showing notifications, a lightning bolt which provides information on cpu usage, temperature and screen settings, a volume control, a wireless icon, a battery monitor and the clock.

The dock at the bottom of the screen has icons for the most commonly used applications including Chromium (Web Browsing), Thunderbird (Email), VLC (Media Player), Pidgin (Messenging), LibreOffice Writer (Word Processing), File Browser (File Manager) and Garbage (Rubbish Bin).


The Internet

Connecting to the internet was very easy. I clicked the wireless icon on the toolbar and both my home broadband connection and three mobile broadband connections were available.

I entered the key for the three mobile broadband and I was connected in seconds.

The default browser installed on Fuduntu is Chromium which for me is a good choice because I prefer Chromium over Firefox.

Multimedia

The next big test was whether I could play flash videos and listen to music.

The first test was to go to You Tube and attempt to watch a video.


The video I chose was the song in Cat's dream in Red Dwarf and as you can see from the image above it worked straight away without having to install any extra software.

Normally to test playing MP3s I use either Rhythmbox or Banshee but neither is installed within Fuduntu so instead I used the VLC player to play an MP3 file and it played without any issues which again means there was no messing around trying to install the correct codecs.

Applications

I think that Fuduntu has a very good balance of applications installed by default. Rather than go for a scattergun approach and install two of everything the Fuduntu team have basically made a decision for each type of application meaning that the system is completely useable straight away but not overly bloated with software that needs to be removed.

Applications of note are as follows:

Under accessories there is an archive manager, calculator, the gEdit text editor and Shutter which is a very good screen capturing utility.

Under graphics there is GIMP (Image manipulation), Shotwell photo manager and LibreOffice Draw.

Under the internet section there is Chromium (web browser), Pidgin (Instant Messenger), Remmina (remote desktop client), Thunderbird (Email client) and Dropbox (Online file storage).

Under Office Tools there is LibreOffice Writer (Word processing), Calc (Spreadsheet) and Draw (Drawing). 

Under Sound and Video there is Brasero  (Disc burner), Cheese (Webcam viewer), VLC (Media Player)

Under System there is GParted (Partition manager), a cd/dvd creator, backup tool, system monitor and terminal.

I think that if you are going to install LibreOffice Writer and Calc then you may as well install Impress as well and also it would be good to have either Rhythmbox or Banshee.

Installing Applications

If you need an application that isn't already installed then you can install applications by choosing add/remove software under the system -> administration menu.

Fuduntu uses its own repositories. As Fuduntu is a Fedora based distribution RPMs are used. 


The easiest way to find a package is to type the name in the search box and click find. If you don't know the name you can also enter the type of application (for example music player).

A list of applications that can be installed appear in the right hand pane. To install the application check the box and click apply.

It is possible to use the Fedora repositories but because of Fuduntu's reliance on Gnome 2 it is better to attempt to use the Fuduntu repositories first as the applications have been tested and are more likely to work with Fuduntu.

Summary

Fuduntu is actually very nice. I had forgotten just how good Gnome 2 is and it makes my laptop run like a dream compared with Unity and Gnome 3.

The menu structure is so easy to follow and the dock at the bottom makes it easy to launch applications.

I think the Fuduntu team have got the balance right when it comes to choosing which applications are installed by default although as mentioned above a music player like Rhythmbox would add a bit more value to it.

The look and feel is very clean and the choice of background images make the whole experience very pleasant. There are a few neat window effects included as well courtesy of Compiz.

I have been using this distribution for a few days now and I haven't hit any errors or issues. Usually there is something that hits you straight away but with Fuduntu there are no obvious problems which means it is stable.

So how does it relate to other operating systems?

I really like Zorin (/2012/07/zorin-6-best-operating-system-i-have.html?showComment=1350594295140#c1906898506465356337) and because Zorin has its own desktop I would put Zorin a little bit ahead.

With regards to Ubuntu I would say that Fuduntu is aimed at a different audience. Fuduntu definitely works better on older hardware and it is lighter on resources. Against Mint I would say I prefer Fuduntu's Gnome 2 interface over the Mate desktop (/2012/08/linux-mint-13-everybodys-best-mate.html) but that is because it is more mature as a desktop. Mint 13 with the Cinnamon desktop is a far better experience but again you need to have the system resources to cope with running Cinnamon. Fedora is now heavily Gnome 3 based and as with Ubuntu I think it is aimed at a different audience.

I do not know how long the Fuduntu team intends to continue using the Gnome 2 desktop and whether they will adopt one of the other desktops as they mature or whether they will do the same as Zorin and create their own desktop. 

For now though none of that is important. If you like Gnome 2 and you like Fedora how it used to be but with all the hassle of installing extra codecs and software taken care of then Fuduntu is well worth installing.

Thankyou for reading.


Monday, 15 October 2012

Is it safe to trust in the cloud?

Introduction

I have written a couple of articles about Peppermint Linux in the past few months (/2012/09/peppermint-3-cloudy-future.html/2012/08/peppermint-linux-3-mint-with-no-holes.html).

Peppermint Linux is a lightweight distribution which provides the perfect link between a desktop distribution and "The Cloud".

If you read the comments at the bottom of these articles you will see that there is some cynicism about how safe the cloud is.

This article is being written to go some way into explaining why I think "The Cloud" is a good thing and whilst I don't necessarily think we should all go full tilt and get rid of our hard drives, we can use the applications and storage provided online safely and without fear.

So what is "The Cloud"?

Well as far as I can tell "The Cloud" and "Web 2.0" etc are just buzz terms devised by marketing people. In reality "The Cloud" is broad terminology for using the internet for multiple purposes.

For instance I see "The Cloud" as being a mixture of web applications such as email, word processing and spreadsheets, file storage such as image hosting and file hosting, online banking and basically any function that ordinarily would have been performed locally but which can now be performed on the web.

Should we fear "The Cloud"?

Should we fear "The Cloud"? My answer to this question is absolutely not. Of course we should all be careful and make clever judgement calls but not adopting a good idea because it might go wrong would have left us with rollers instead of wheels.

I think a great example of where the cloud has moved us forward is with banking. Now in the UK we love to hate banks and bankers. They are greedy,slimy,money grabbing and unethical (and that is just the good ones). However advances in banking in the past 20 years has really made a difference.

Some of you will remember the time when to withdraw money from bank accounts you had to walk to the bank, join a queue and wait patiently to get to the front hoping that you could get there before a couple of the tellers went away for lunch.

Then came cash machines and telephone banking. Withdrawing and depositing money became easier because of cash machines and transferring money became easier because of telephone banking. Today we have online banking and I don't know about you but I can't live without it. For years I have received paper bank statements which were at least a month out of date by the time I received them and their only use was to try and match the payments against the home finance application installed on my computer.

Now I know where my money is going instantly. I can transfer money between savings and current accounts to make sure I don't go overdrawn and receive extortionate fees. I can apply for credit and with the aid of some of the newer sites I can lend money in small amounts to people.

If I didn't trust the cloud I would lose the benefits of online banking.

One of the comments I read against the cloud is that if everything is on your own computer it is in your possession therefore you are fully in control of it. Lets consider this in banking terms. To have everything in my possession means storing all my cash in a tin under my bed. Is that any more secure than my money sitting in a bank account with a major bank covered by regulations and government guarantees? If my bank gets robbed I lose nothing, if I left my money in a tin under my bed and my house gets burgled then I lose the lot.

Banking isn't the only area of the cloud that has improved my life. The ability to write documents online using Google's office suite has proved invaluable. Of course I can use desktop applications like LibreOffice for writing documents but using Google gives me extra benefits. If I want access to my documents created with LibreOffice I either have to carry them on a pen drive, external hard drive or upload them to the web somewhere where I can access them. If I upload them to the web then I am in fact using another cloud service.

So which is safer, carrying my documents around on a pen drive or having them stored on a service such as Google? If someone guesses my password or gets past my security question then of course they have access to all my documents, however if my pen drive falls out of my pocket then I not only lose my documents someone still has access to my documents and even if they are encrypted certain people would be able to crack the encryption given enough time.

Another great online service is the ability to store all my family photographs online and share them with friends and family. In the past I would have had to send a film off to Truprint, pay £1.99 and wait a week or two for my film to come back. I then had to work out which pictures were worth getting copied to send to family and friends. Now I can use the digital camera and instantly delete the photos not worth keeping and upload the rest online.

The great thing about such services is that I can now access those photos from absolutely anywhere. The great risk of course is that the service is removed without warning and that I lose all the photos. I think it is only prudent to keep a backup of all the photos on DVDs but I also think that this isn't just the case for cloud services but for normal desktop computer use. If you store all your documents and images on your hard drive it is a good idea to back them up somewhere in case something bad happens to your hard drive.

Whilst I am talking about backups what about file hosting services? Ubuntu One, Google Drive and Dropbox give you the ability to backup important files to the cloud where they can be retrieved from anywhere. You can also choose to share the files with other people.

Again the issues with such services is security and also whether the service is going to be removed at any point in time. This basically boils down to choosing good passwords and choosing reputable companies to do business with.

Summary

If you wanted to you could totally restrict yourself and stay safe in your house by bolting all the doors and windows shut every night. The same can be said for the internet. You can restrict your computer usage and not embrace new technologies 

Sometimes bad things happen and the written press do nothing to help with people's fears. Yes servers get hacked in the same way people get mugged in the street. Does a mugging in a street stop any of us getting out of bed and going to work in the morning? Of course it doesn't. 

Life goes on and the web will move on whether you are or I am ready to embrace it. I am delighted at how the web has moved on. It remains as the most important invention since the wheel.

Thanks for reading.


Thursday, 11 October 2012

Ubuntu - WUBI Installs vs Virtual Box

Introduction

Recently I wrote an article highlighting 5 ways to try Linux without messing up windows (/2012/09/5-ways-to-try-linux-without-messing-up.html).

In the article I highlighted that you can use the WUBI installer to install Ubuntu within Windows. One of the comments at the bottom of the article asked "What about virtual machines?". 

This article shows how to do both within Windows 7.

WUBI Install


Run the downloaded file and the following screen will appear.


The installer is very easy to work out 

1. Choose the drive that you want to install to
2. Choose your language
3. Choose the amount of disk space to set aside for Ubuntu
4. Choose the desktop environment (Ubuntu, Kubuntu (KDE), Xubuntu (XFCE), Lubuntu LXDE)
5. Choose a user and password to run under.

When you have entered all the details click install.


The installer will process the installation and download the files needed from the Ubuntu server and then you will be asked to reboot your machine.

When you reboot, Ubuntu will finish installing and you will be given the choice whether to boot into Ubuntu or boot into Windows.

Every time you boot the computer from this point on you will be need to choose whether to use Windows or Ubuntu.

The files for the Ubuntu install can be found in c:\wubi (or whichever drive letter you chose to install WUBI under). You should not mess around with these files directly. Either boot into Ubuntu to use Ubuntu or boot into Windows to use Windows.

If you do not want to use Ubuntu anymore simply run the Ubuntu Uninstall program within Windows.

Virtual Box (Not Virtual PC)

You may be wondering why I am comparing the WUBI install to Virtual Box and not Virtual PC. I found trying to use Virtual PC a complete pain. Ubuntu would load to the language choice screen and then the Virtual PC would shut down. This link sums it up for me (http://www.zdnet.com/blog/hardware/ubuntu-on-virtual-pc-2007-no-way-dude/273)

Virtual Box provides the same functionality as Virtual PC and is free to download from https://www.virtualbox.org/wiki/Downloads. Virtual Box is provided by Oracle so it is a fairly trustworthy source.

Virtual Box basically gives you the ability to run virtual computers or a machine within a machine. You simply create a virtual machine, specify a virtual hard drive (which is basically a file on your hard drive) and then you can install any operating system you choose.

Run the installer by double clicking on the executable file that you downloaded.

The first screen is just a welcome screen.


Clicking next takes you to a screen where you can choose which parts of VirtualBox you wish to install.

Unless you are limited by space I would recommend accepting the default options and choosing next.


The third screen asks where you want the icons for Virtual Box to go. You can choose to have an icon on the desktop and/or on the quick launch bar.


The 4th screen looks a bit alarming because of the red writing but you can generally just click yes. What this screen is saying is that you may temporarily be disconnected from the internet.


Finally you are ready to install. Click Next.


Half way through the installation you may see some messages about device drivers that need to be installed. I recommend clicking the checkbox that says that you are happy to accept all drivers from Oracle.


That is it. VirtualBox should be installed.

To run it either click the quick launch icon, double click the icon on the desktop or click the start button and type virtualbox into the search box.


A screen similar to the one on the right appears.

There is a menu at the top and under that a bar with icons.

The left pane shows a list of virtual machines (Of which there should be none as you won't have installed any yet).

The right pane gives details about selected virtual machines.


To install Ubuntu click the New icon on the toolbar.

The screen to the right appears. Type the name Ubuntu into the name box.

This automatically sets the type to Linux and version to Ubuntu.

If you were installing other versions of Linux you would obviously choose a different version. Do not worry if the particular distro you want to use does not appear, just pick the version that is closest. All this does really is predict the memory usage and disk space required on subsequent screens.

Click Next and you will be asked to choose how much memory to allocate to the virtual machine.

Based on the selection of Ubuntu on the previous screen Virtual Box has suggested using 512mb of ram. In reality I would at least double that if at all possible.

Remember not to allocate all your memory to the virtual machine as your computer will need memory for running other applications and services.


The next few screens deal with allocating space for your operating system by creating a virtual hard drive.

Select create a virtual hard drive and click create.


The next screen asks you to decide on the file type for your hard drive.

Generally I accept the default option and I won't pretend that I have even read up on the other options because I haven't.

The default option has always served me well.


The third screen is all about how space is allocated to the virtual machine.

You can either allocate a fixed amount or dynamically add space when it is required.

If you dynamically add space then you optimally only use space as you require it whereas setting a fixed size takes a chunk of space and preallocates it.

If you dynamically add space then every time you install software within Ubuntu it will take longer to install because space has to be first allocated to the virtual hard drive and then the installation can take place.

If you choose a fixed size then because the space is pre-allocated you will only have to wait for the time for the application to install.

If you have a large enough hard drive I would recommend choosing a fixed size and make it big enough to store an operating system and other files.

The final part of creating the virtual machine is to determine how much space to allocate to it.

The installer will have made a guess at the minimum space required to install Ubuntu.

If you can I would recommend increasing the space as 8gb isn't all that much.

Again be careful not to allocate all your remaining disk space.


When the machine is created you will see the machine name in the left pane and on the right the details of the hardware settings for the operating system.

If you are going to install Ubuntu from a CD drive insert the CD now. If you are going to install Ubuntu from an image (ISO) then simply start the virtual machine by double clicking on it.


A warning message appears almost instantly stating that keyboard commands will be automatically captured by the virtual machine.

I would click the "Do not show this message again" checkbox and click ok.


The next screen lets you determine where the image is for installing the operating system. If you are using a CD or DVD select the drive from the drop down list.

If you are installing from an image click the folder icon and find the ISO file to install.

Click start to continue.


The virtual machine will now start booting the install media and with Ubuntu you will see a screen asking you whether you want to try Ubuntu or install it.

If you just wanted to try the live media then you probably shouldn't have followed this article at this stage as you can just burn the ISO to a CD or USB drive and reboot your computer to use Ubuntu in live mode.

Click on install Ubuntu to continue.


The next screen may look scary to someone uninitiated with virtual machines because it says that no operating system has been found and the options are to format the disk and install Ubuntu or do something else.

Do not worry, your Windows is safe. Remember this is a virtual machine with a virtual hard disk. The virtual hard disk has nothing on it. Simply leave the default option to install Ubuntu to use the entire disk.


Ubuntu will now start copying files to the virtual drive.

Whilst this is going on you can fill in the installation options such as picking your location and the username and password to be used within Ubuntu.


When the install finishes you can reboot the virtual machine and you will be presented with the screen on the right.

That is it you have a virtual machine installed.


Summary

So WUBI or Virtual Box? 

WUBI is great if you plan to try Ubuntu out over a period of time and gradually ween yourself off Windows. You can try it for a period of time and if you don't like it simply uninstall it. When you boot your PC you can choose to boot into Ubuntu or Windows and so when you choose Ubuntu you are actually using Ubuntu on your computer as it would be if you chose to do a full install. The downside is that it really only works for Ubuntu.

If you plan to try out a few versions of Linux then Virtual Box is a much better proposition. You can choose to create a number of virtual machines each running different versions of Linux. Virtual Box makes it possible to make a more informed choice over which Linux distribution would work best for you.

You could of course use live versions of distributions but these don't really give you the full picture of how the operating system would work when installed fully. Virtual Box for me is the next step after using the live media. 

The live media is the sales brochure, the virtual machine is a fully working prototype, the full install is the end solution.

Thank you for reading.

Click here to download Ubuntu

Monday, 8 October 2012

Ubuntu and the lack of HDMI sound

Introduction

I recently acquired a fairly decent media center computer and up until this weekend I had not really used it for much more than storing a lot of music and video files as it has a large hard drive and it isn't a computer that I plan to experiment much with once I have it set up properly.

Yesterday however I decided to install Ubuntu 12.04 and attempt to get the computer set up so that it can be used for its intended purpose which is as both a media centre and as a gaming computer (mainly retro gaming).

The computer is connected to a flat screen television via a HDMI cable and it looks and behaves quite well.

When I say quite well there was obviously one issue otherwise this article would not have been written. There was no sound. 

I tried the usual hunt around Google for an answer and there are a number of possible solutions but I am going to highlight the one that worked for me and it is so simple it is unbelievable.

Step 1

A number of the solutions revolved around the fact that the HDMI sound output was not available at all but in my case the HDMI output was available.


First of search for "Sound" and click on the "Sound" icon.


Look at the list of sound output devices. As you can see in the image above I have an HDMI output option. 

NOTE: If you do not see an HDMI output option then you should follow one of the other methods for getting HDMI sound working because this solution relies on the HDMI output already being present

Before the fix when I clicked the test sound button on this screen nothing happened. There was no sound played.

Step 2

Load up the Ubuntu Software Centre.


Now search for Gnome ALSA Mixer


Install the Gnome ALSA Mixer application.

Step 3

Run the Gnome ALSA Mixer


When I first ran Gnome ALSA Mixer all of the volume bars were set to mute. By unchecking the mute boxes on this screen I was then able to play music via Rhythmbox.


Summary

The solution was so simple it is unbelievable. Bizarrely I had tried running ALSA Mixer from the terminal and there was no indication that the volume was muted.

I know this is not the solution for everyone but hopefully by posting this article I will at least aide someone else.