
Introduction
In my last article I showed you how to set up a Raspberry PI for first time use. This will have hopefully helped you to get a working system.
If you are a novice with regards to Linux then you may have had a play around with the applications that have been installed but you might be stumped when connecting to the internet.
The article shows two ways to connect to the internet using the Raspberry PI. The first way uses the graphical tool provided. The second way shows how to connect to the internet using the command line. Whilst ordinarily I would recommend using the GUI sometimes it isn't available and so knowing both ways helps in the long run.
Connecting to the internet using the WIFI config tool
This guide assumes that you are running the Raspbian operating system.
Setting up a WiFi connection is relatively easy.
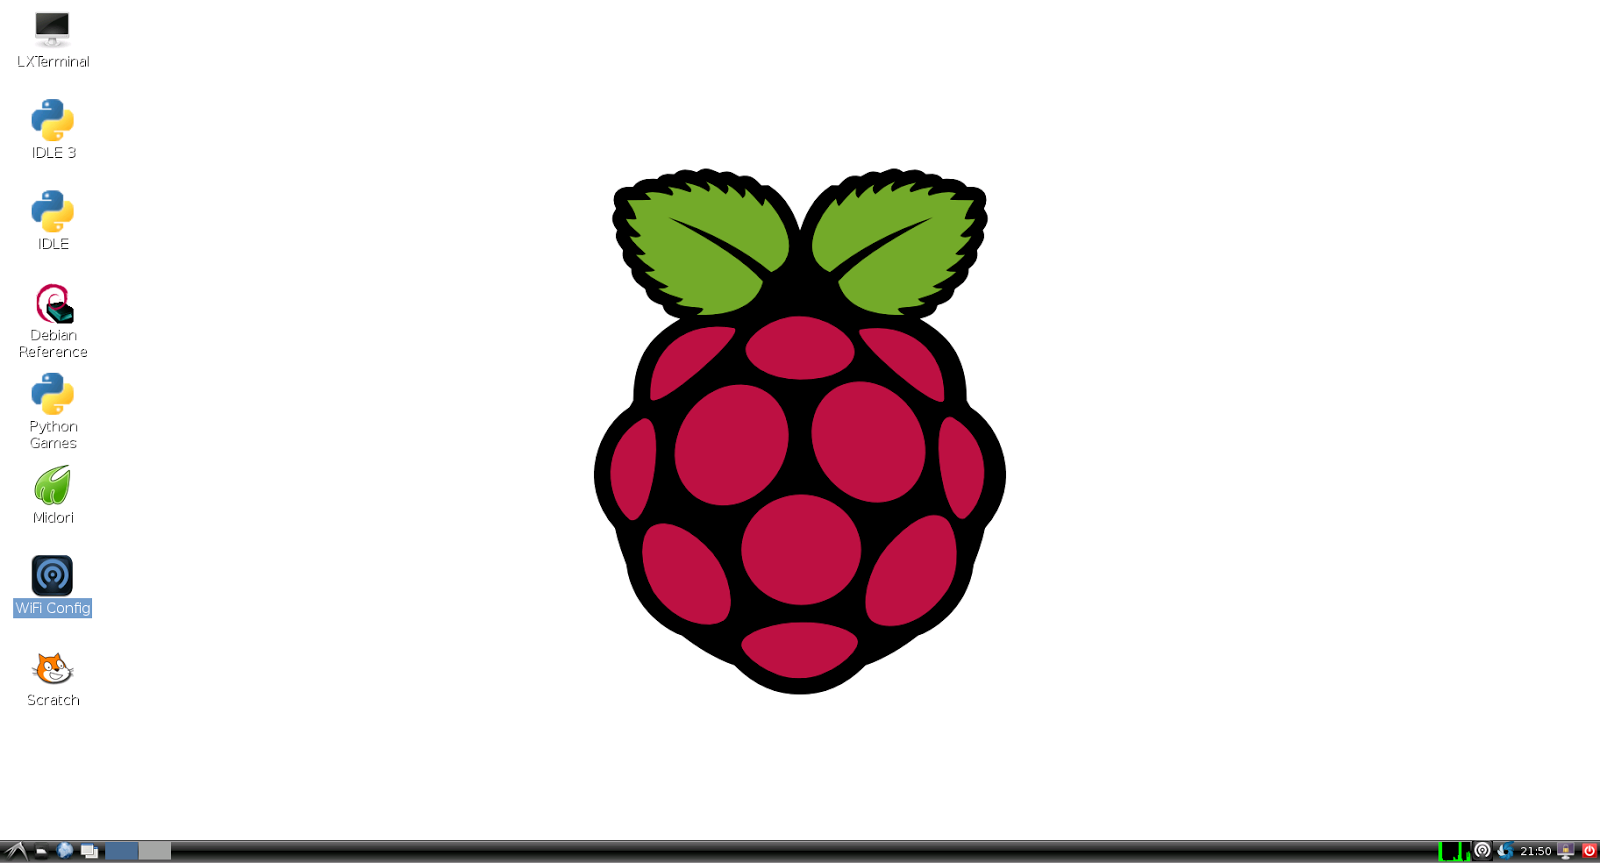
First click the WIFI Config icon as highlighted in the image above.
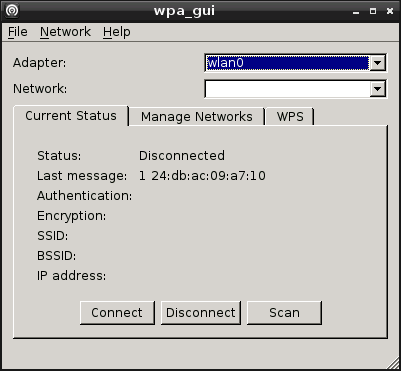
The wpa_gui tool will load. If you have a wireless USB dongle plugged in to your USB hub then you should see an adapter in the adapter dropdown. Make sure that the adapter is selected. It probably says wlan0.
Now click scan.
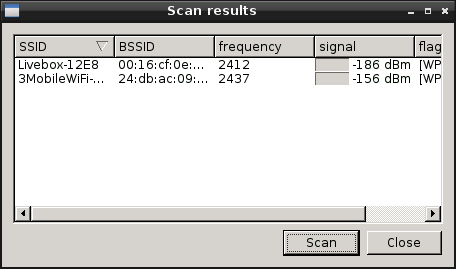
The scan results should show all the wireless networks in your vicinity. As you can see from the image above I have two networks available.
It is worth taking a note of the values in the flags column as it is useful for the next step.
Double click the wireless network you wish to connect to.
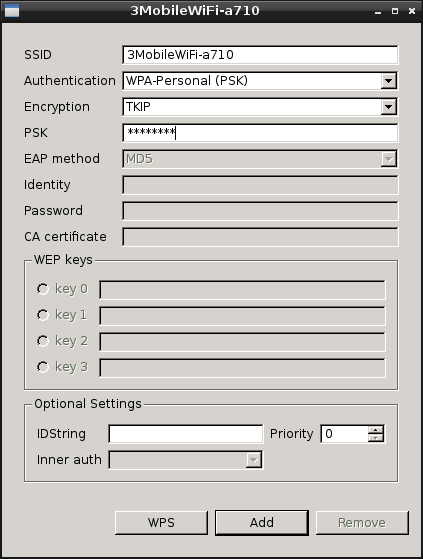
What do all the boxes mean?
SSID: This is the public name for the network.
Authentication Method: Open, WEP, WPA or WPA2. For home use you are likely to need WPA_Personal (PSK) or WPA2-Personal (PSK).
Encryption: TKIP or CCMP. For WPA it is likely to be TKIP and for WPA2 CCMP.
PSK: The encrypion key (Only use for personal, not enterprise)
EAP Method: You only need to worry about this if you are using WPA Enterprise or WPA2 Enterprise but this is the authentication protocol used for the network you are connecting to.
Identity: The identity required to connect to the network (Enterprise only)
Password: The password required to connect to the network (Enterprise only)
CA Certificate: The certificate authority (Enterprise only)
WEP Keys: If the authentication method is WEP then this is the key required to connect to the network. (WEP Only)
Now all of that is probably very confusing. The simple way to know what to set is to look at the flags column in the scan results screen.
The flags column tells you what you already need to know. For me it says WPA-PSK which lets me know that I need to choose WPA_Personal. It also has TKIP in the flags column which tells me I need to set the encryption method to TKIP.
Now all I need to do is enter the security code into the PSK box.
Had the flags column said WEP then I know I'd have needed to select WEP and entered the key into the WEP keys box. Had the flags column shown CCMP instead of TKIP I know I would have had to set the Encryption dropdown to CCMP.

The wpa_gui screen should now have networks available in the dropdown list. Change the network dropdown so that you see the network that you set up in the previous step.
Click Connect.
At this point you should now have an internet connection.
To test it out run the Midori browser from the desktop and try loading www.everydaylinuxuser.com.
Connecting to the Internet using WPA_Supplicant
The method shown in the previous step works for Raspbian but if you run other versions of Linux then there might be other graphical tools that are supplied for connecting to the internet. Most of the graphical tools are easy to use but with the Raspberry PI it is likely that you will connect to the same network every time as it isn't really a mobile device like a phone or a tablet. With this in mind do you really need a GUI to set up the internet? Wouldn't it be better to learn one way of connecting to the internet that will work on most versions of Linux?
This little guide will show you what the GUI was doing in the background to connect to the internet so that if you ever needed to you can create a wireless connection from the command line.
Note that if you have followed the first part of the tutorial then the configuration files will probably already be set up with all the correct settings so you will not need to edit the files at all but you can still view them for reference purposes.
First of all load up the terminal. To do this click the LXTerminal icon on the Raspbian desktop.

The first thing we are going to do is set up the network interface. Enter the following text into the terminal window:
sudo nano /etc/network/interfaces
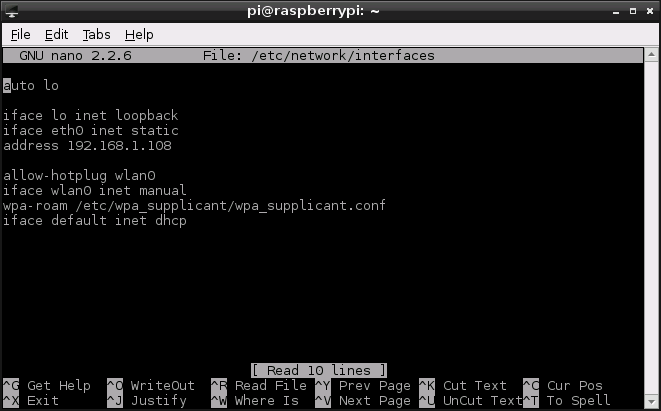
In my interface configuration I have given the Raspberry PI a static network address so that I can connect to it using SSH and I will know that the address will be the same every time. That however is for a different article that will come later on.
The lines you are interested in are really the last 4. So make sure your file has the following lines in it.
auto lo
iface lo inet loopback
allow-hotplug eth0
iface eth0 inet dhcp
allow-hotplug wlan0
iface wlan0 inet manual
wpa-roam /etc/wpa_supplicant/wpa_supplicant.conf
iface default inet dhcp
So what does it all mean?
Well the two sections you are really interested in are the ones starting allow-hotplug eth0 and allow-hotplug wlan0.
The allow-hotplug eth0 will detect when an ethernet cable is plugged into the Raspberry PI and connected to the router. When this happens the iface etho0 inet dhcp will use DHCP to connect to the network. In its simplest form the internet connection will be created via the ethernet cable.
The allow-hotplug wlan0 will detect a wireless interface and will use wpa-roam with the configuration file in /etc/wpa_supplicant/wpa_supplicant.conf.
Using this information you will hopefully realise that you need to add some more settings to the file /etc/wpa_supplicant/wpa_supplicant.conf.
Press Ctrl and O to save the /etc/network/interfaces file and press CTRL and X to exit nano. (Nano is the editor)
Now type sudo nano /etc/wpa_supplicant/wpa_supplicant.conf into the terminal.
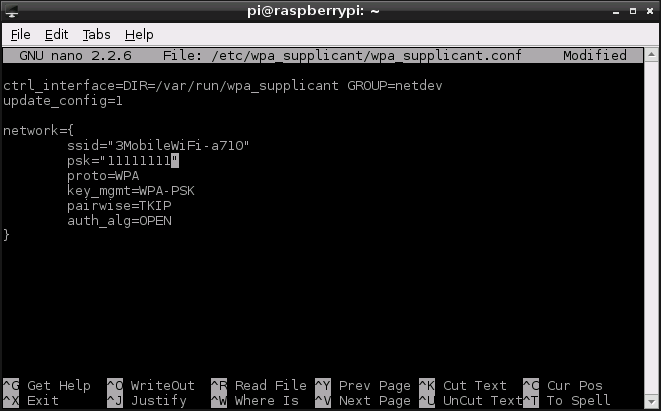
You will need to enter the lines of code from the image above into your terminal window.
It isn't a simple copy and paste though as you will need to replace the ssid with the name of your network and the psk with the security key used to connect to the internet.
Proto will be one of RSN or WPA. The key_mgmt will be set to either WPA_PSK or WPA_EAP and depends on your router. Pairwise will be set to CCMP or TKIP. Finally auth_alg can be either OPEN, SHARED or LEAP. This is the same information as highlighted in the GUI section of this article earlier.
If you followed the first part of this tutorial to set up the wireless using the WIFI config tool it is highly likely that most of the information is already entered into this file (if not all of it). Just keep a copy of this file safe and if you choose to install a different version of LINUX to connect to the same internet connection you can just copy the file into the /etc/wpa_supplicant folder.
Now press CTRL and O to save the file and then CTRL and X to exit the file.
Close the terminal and reboot your Raspberry PI. Your internet connection will start automatically every time.
Summary
For a lot of people the WIFI Config tool will be perfectly adequate for connecting to the internet but by knowing what the tool is doing in the background you can use this knowledge for future reference as the GUI tools might not always be available.
In the example above the WIFI Config tool will have amended the /etc/network/interfaces file and placed a link to the wpa_supplicant.conf file with all the correct settings as specified within the GUI. If the config tool had not been available you would have needed to edit the network interfaces file and the wpa_supplicant configuration file yourself.
I hope this article has been useful.
Thankyou for reading.

At first I was quite hesitant to use Linux as my operating system because of its unfamiliarity to me. But with posts like this I was able to have a jump start and I think that I am on a roll. To be honest, I may not use another OS from now on.
ReplyDelete