Introduction
In this guide I am going to show you how I dual booted Ubuntu and Windows 10 on my Lenovo Y700 Ideapad which contains a 128 gigabyte SSD and a 1 terabyte hard drive.
I have dedicated a whole new post for this guide as there is enough information to warrant it but there are links to other guides for areas that cross over.
Backup Your Computer
I always start with this option because you need to know that you can get back to where you started should something go awry.
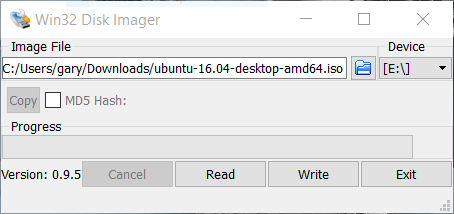
Create A Bootable Ubuntu USB Drive
In order to install Ubuntu you will need a bootable Ubuntu USB drive.
Disk Management
This is where the major part of the guide differs from the previous one.
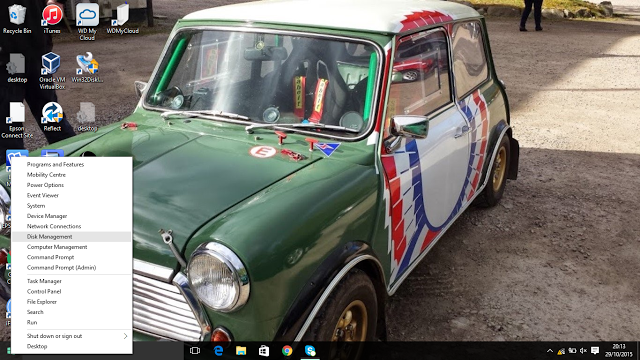
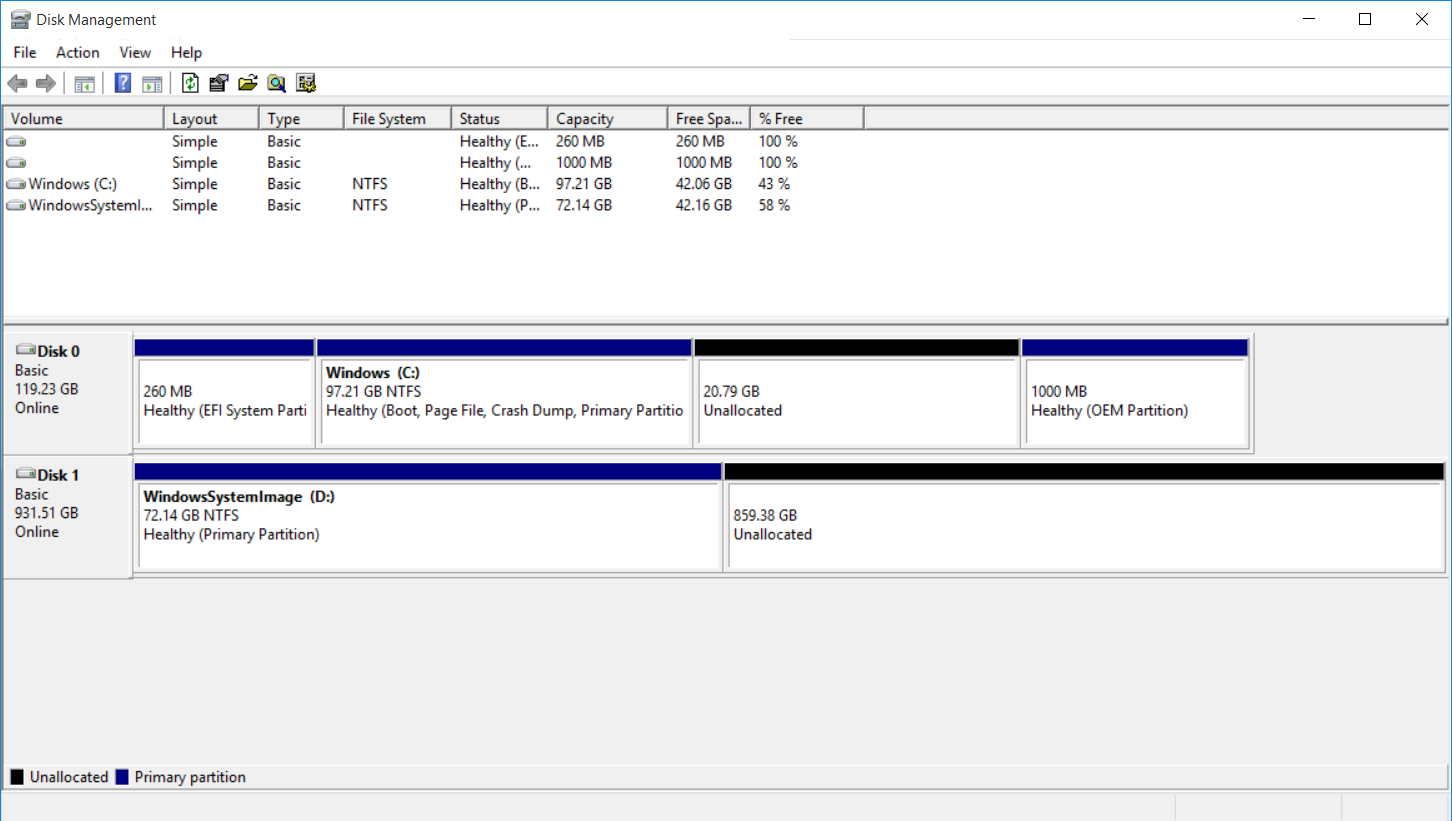
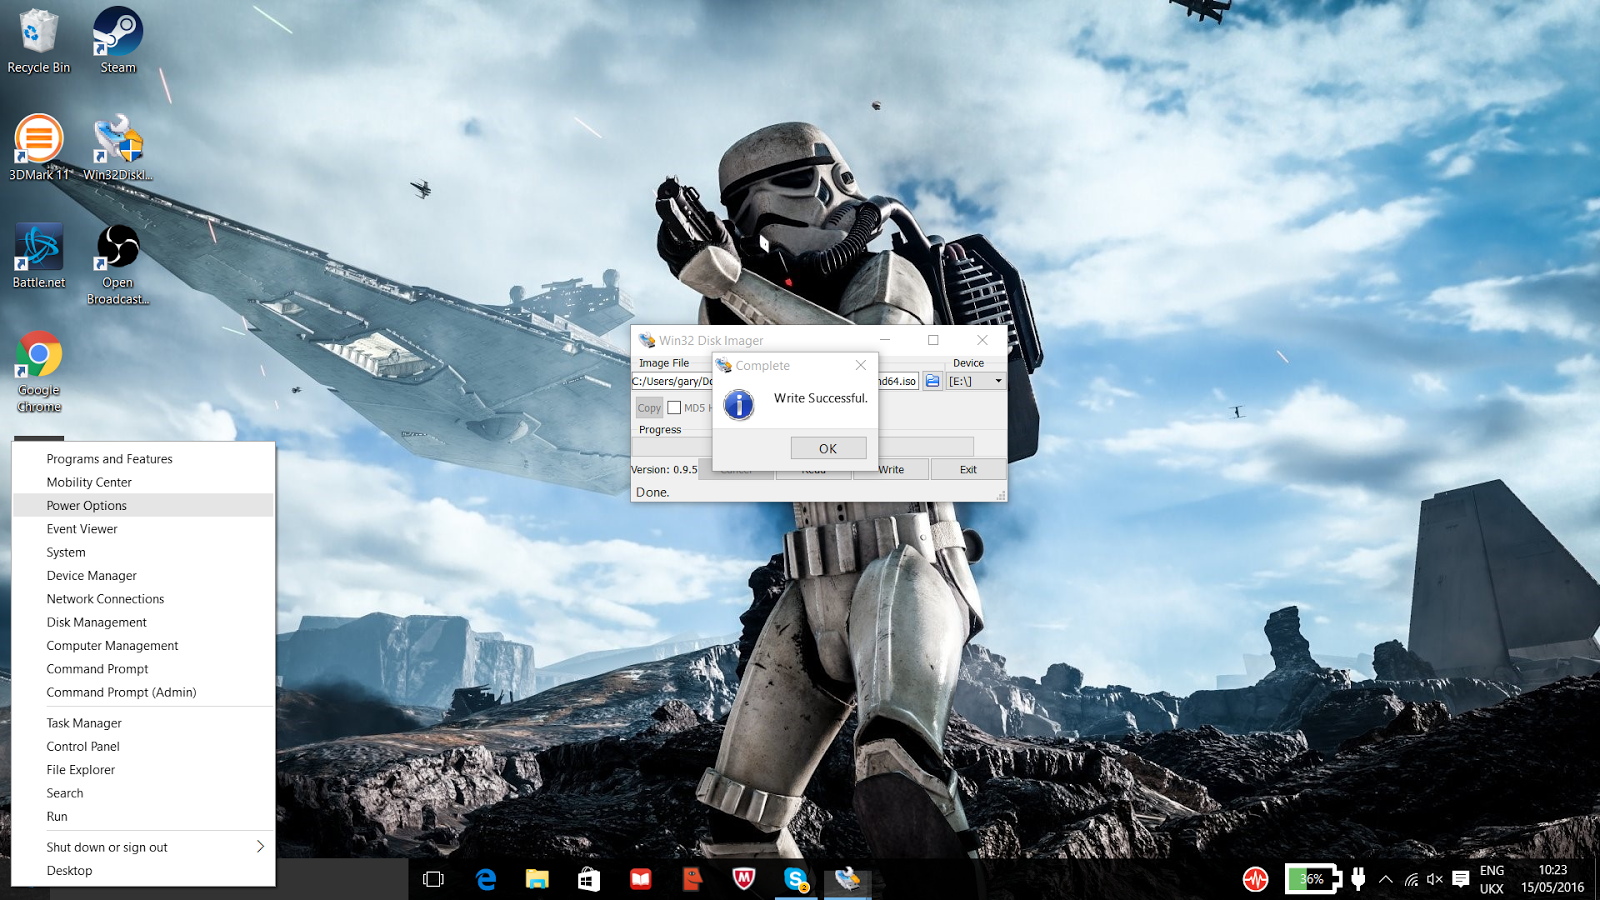
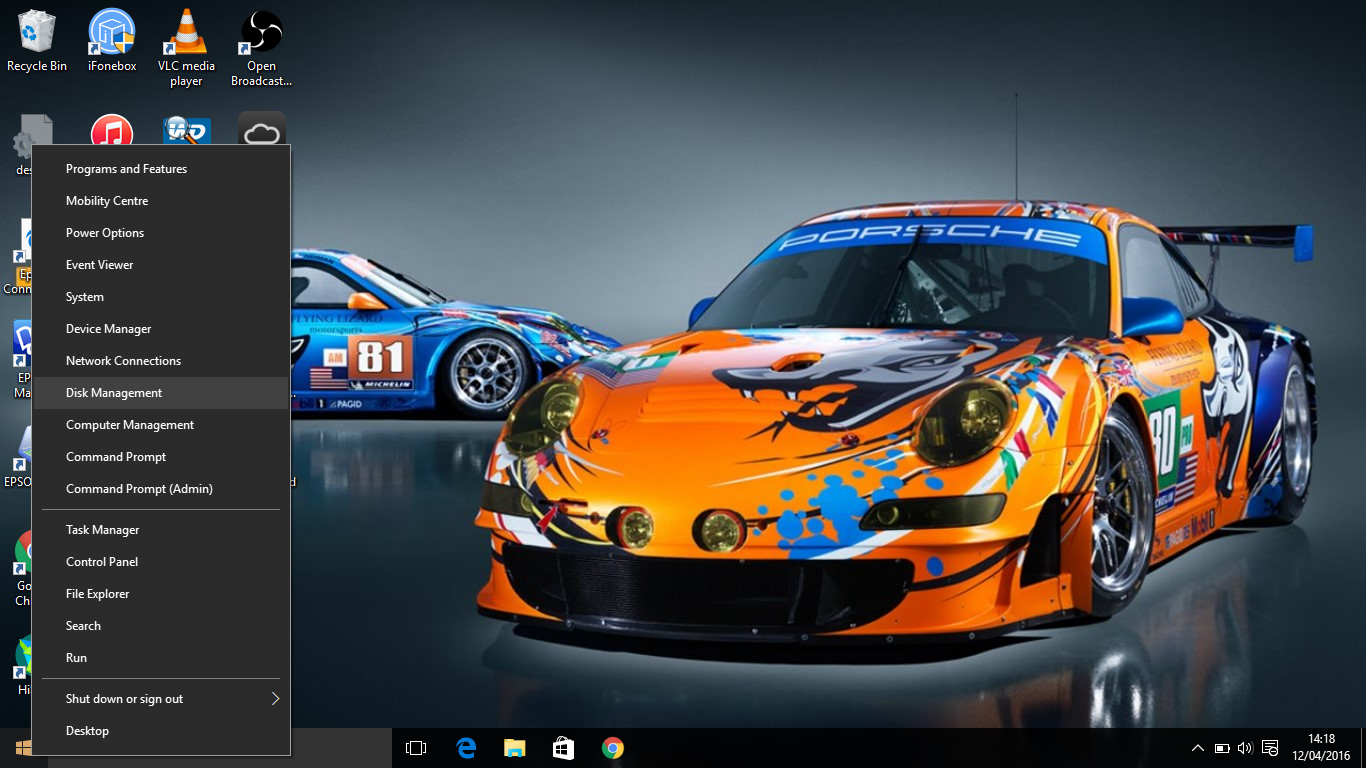
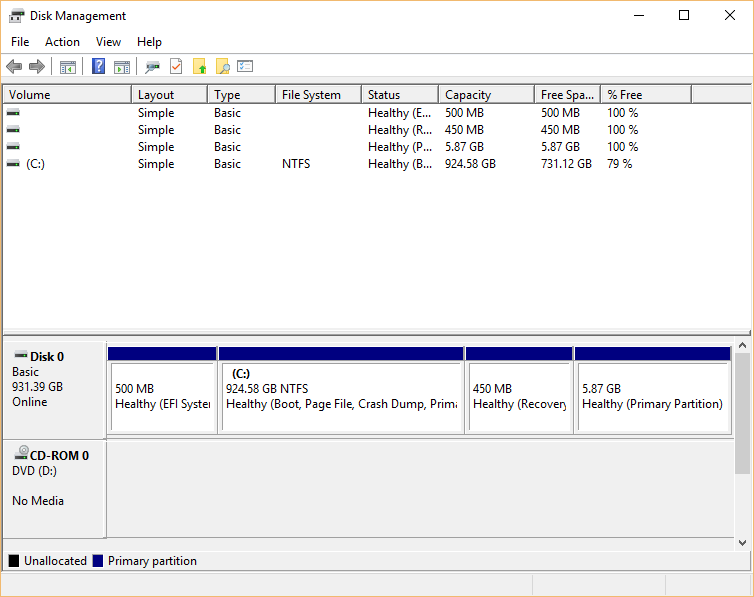
Right click on the start button and when the menu appears choose "Disk Management".
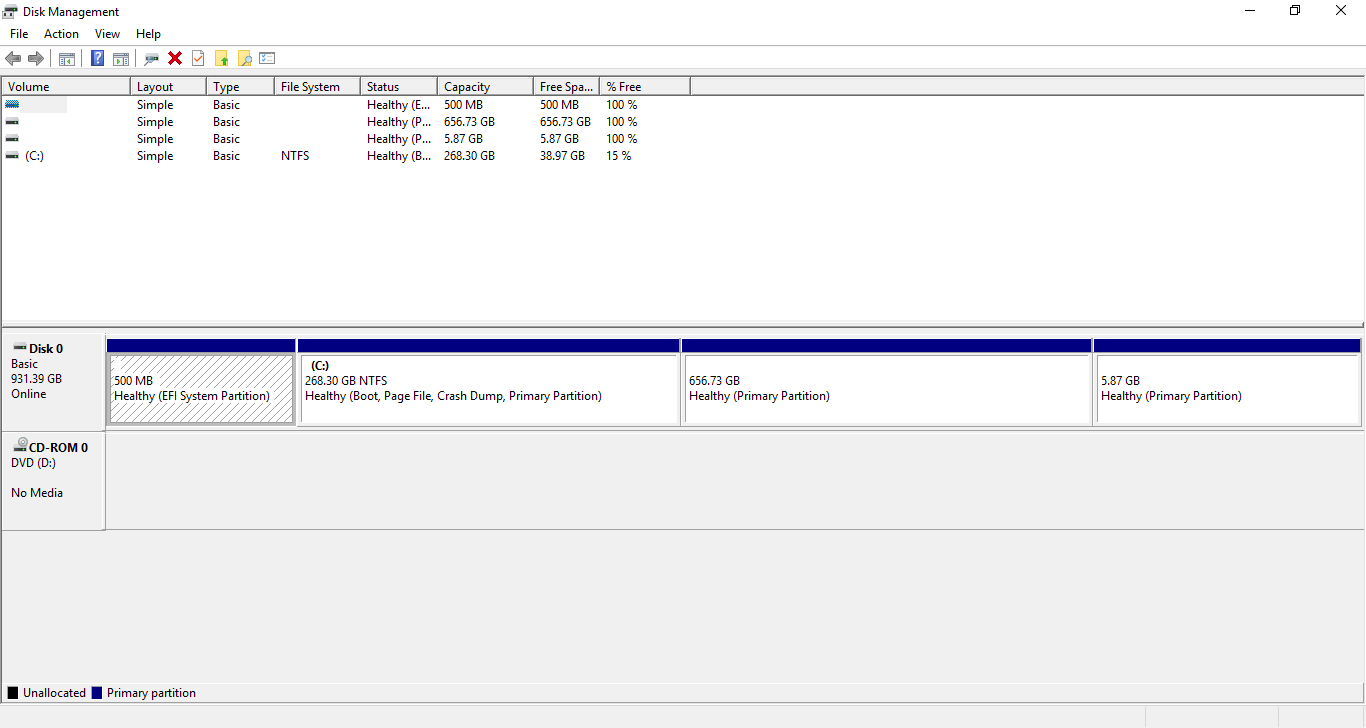
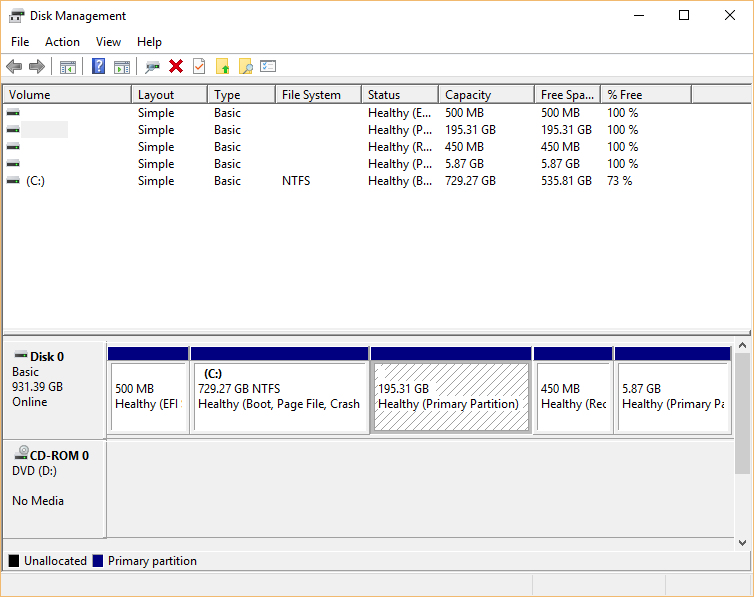
The image above shows how the disks on my laptop were partitioned prior to me changing them.
Quite frankly they are ridiculous and I suspect other people who have bought laptops also have poorly thought out installations by the manufacturers.
Disk 0 represents the 128 gigabyte SSD and Disk 1 represents the 1 gigabyte hard drive.
So Why is this disk layout ridiculous?
The best performance you will get is when you are reading from the SSD. There are 2 recovery partitions installed on that very same SSD.
The whole point of recovery partitions is that they sit out of the way and are only read when you are up a creek without a paddle.
Therefore there is over 20 gigabytes of SSD totally wasted. There is also a recovery area on the hard drive which takes up over 70 gigabytes.
I think it is sensible to have recovery partitions on the hard drive as although they waste space they are wasting space on the drive you want to use least.
I use Windows very infrequently so I don't need the Windows recovery partitions. I therefore decided to get rid of the Windows recovery partitions and keep the 1 gigabyte OEM partition and the recovery partition on the hard drive. This means I can always do a factory restore. (I have Windows 10 on a USB drive so there really isn't any need for me to keep this really either).
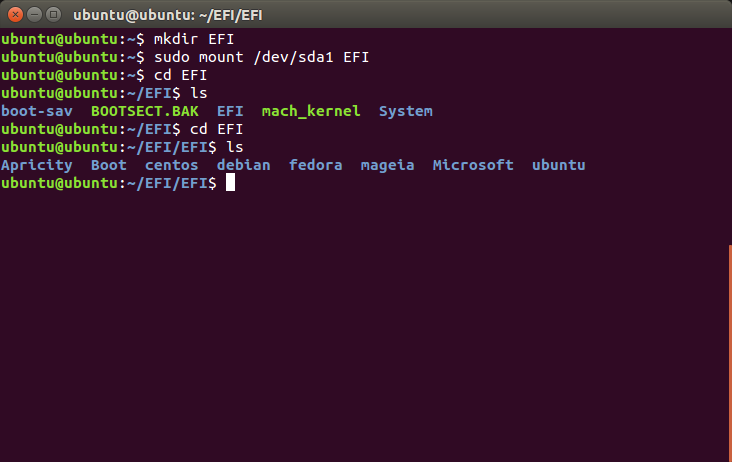
To remove the recovery partitions I opened an administrators command prompt by right clicking on the start button and choosing "Command Prompt (Admin)" from the menu.
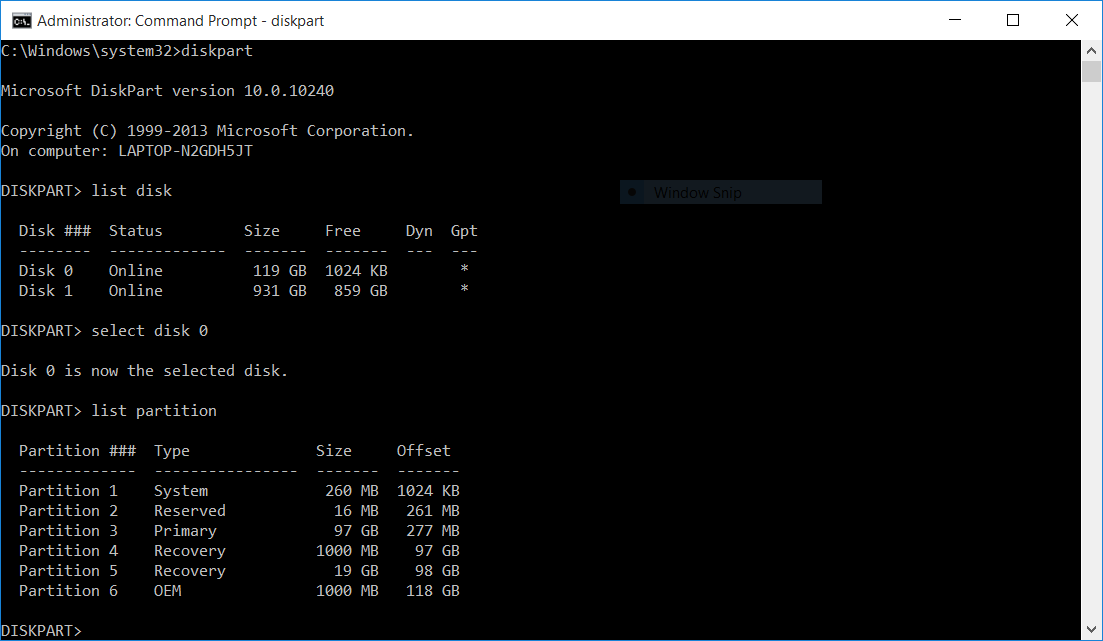
The command line tool I used is called diskpart.
To run diskpart simply type diskpart into the command window.
You can view the disks on the computer by typing list disk.
From the image above you will see that disk 0 and disk 1 were returned.
The disk I wanted to work on was disk 0 which is the SSD. To select the disk you wish to amend type select disk n where n is the number of the disk.
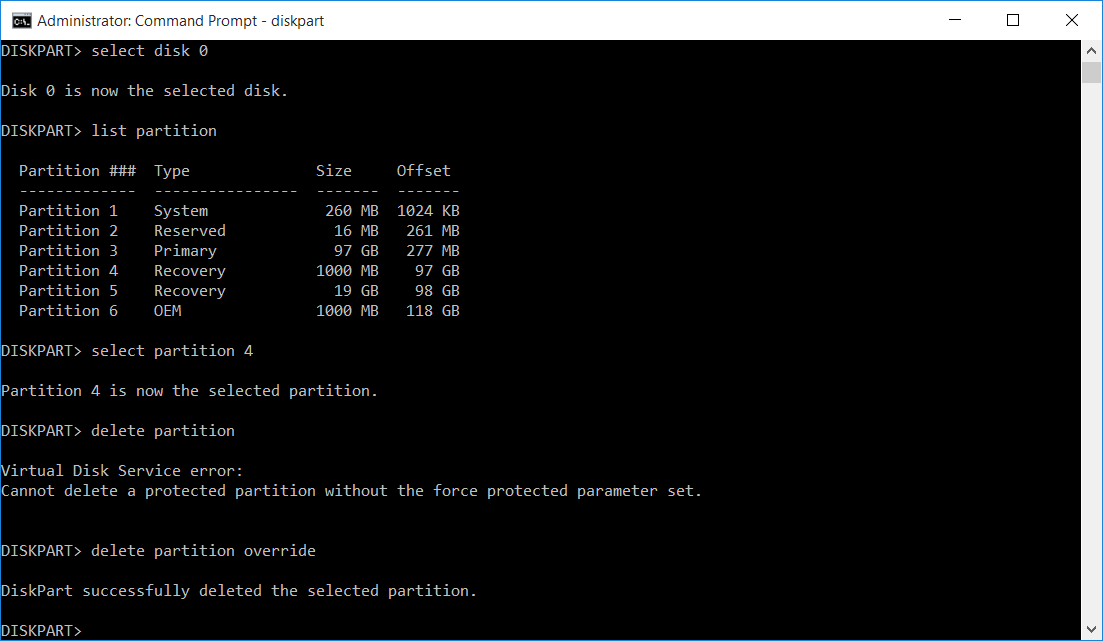
To see the partitions on a disk type list partition.
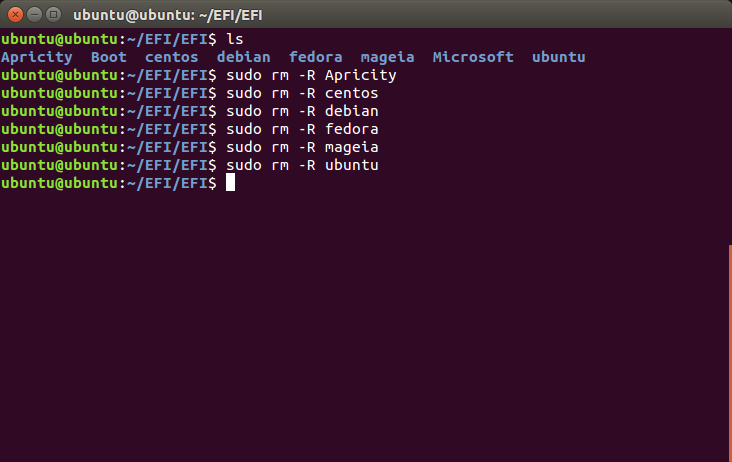
As you can see I have 6 partitions listed. I wanted to remove partition 4 and partition 5 which were the recovery partitions.
To select a partition the command to use is select partition n where n is the number of the partition.
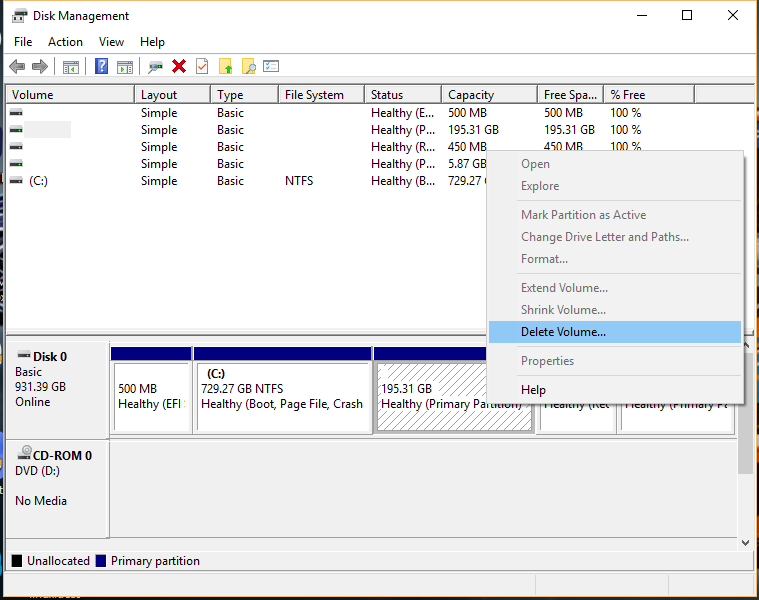
Normally to delete a partition all you have to do is type delete partition.
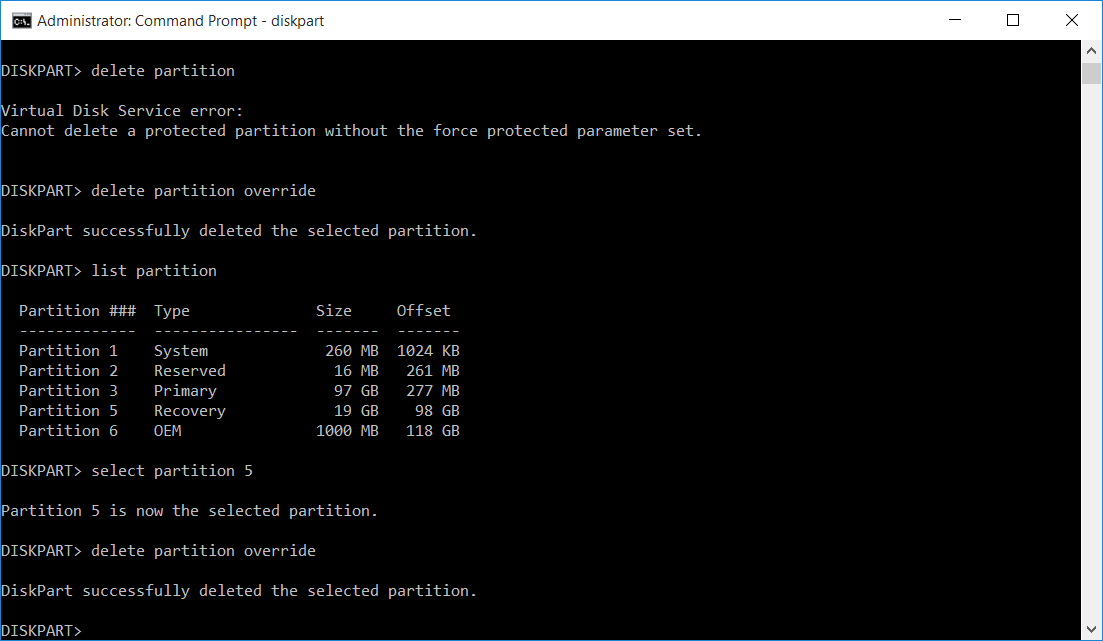
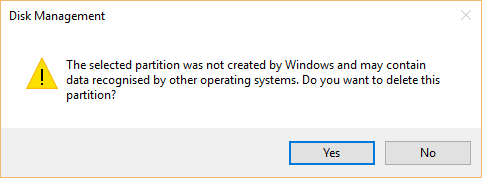
Recovery partitions are special though and are protected from deletion. You can force the deletion of the partition by typing delete partition override.
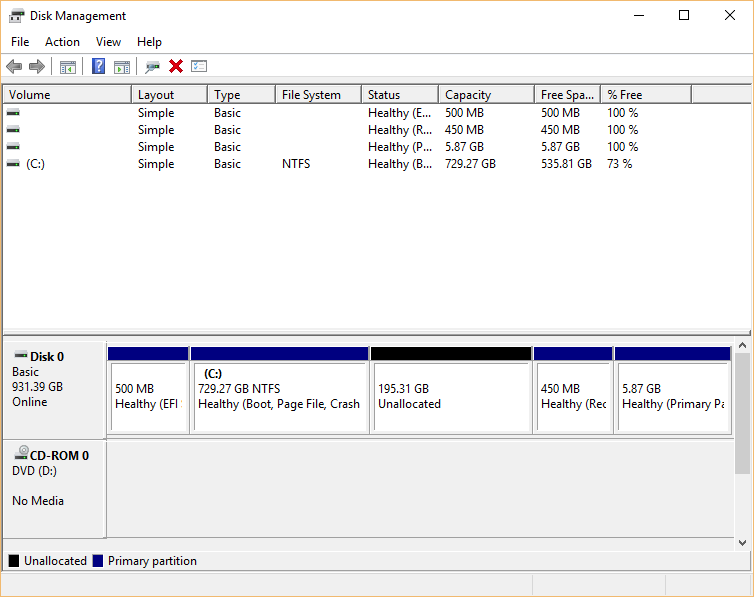
The above image shows my disk after removing the recovery partitions.
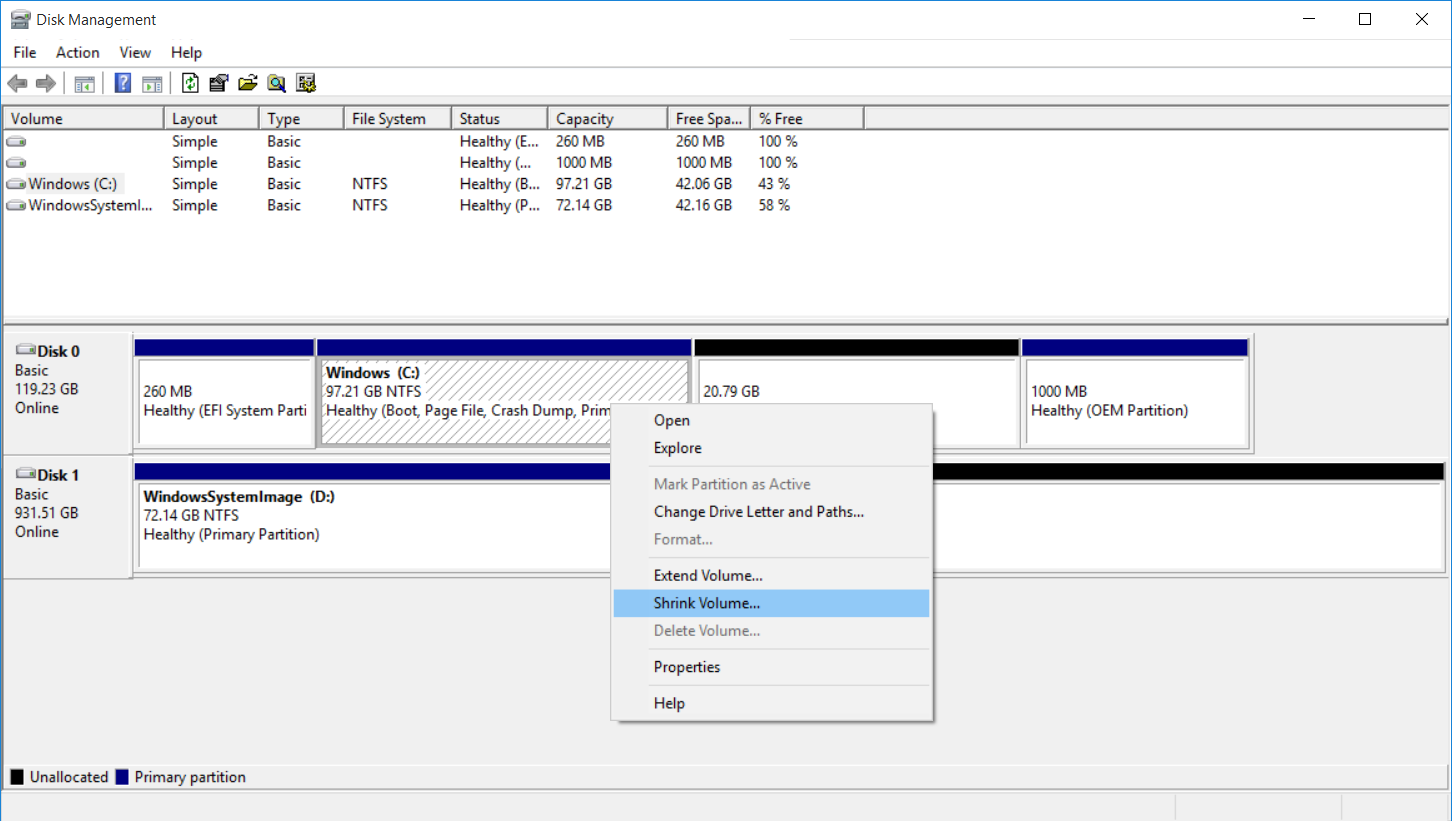
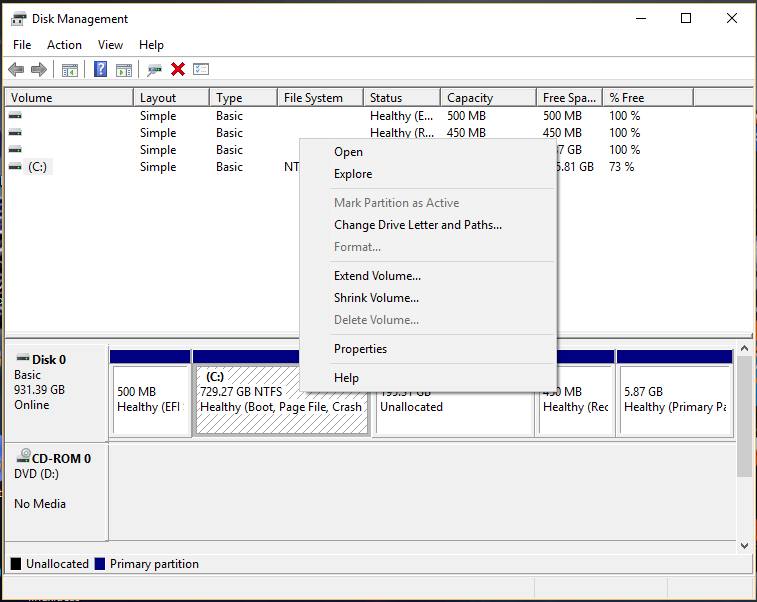
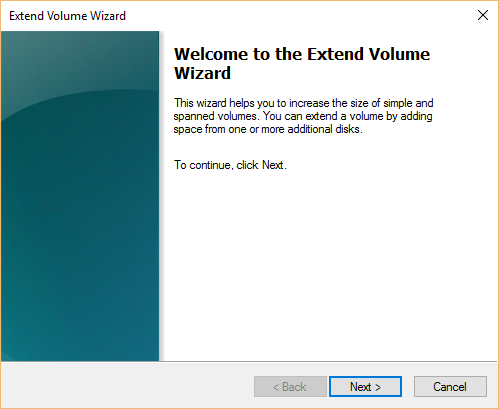
Now 20 gigabytes is just about enough for Ubuntu but I wanted more so I reduced the size of the Windows partition as follows.
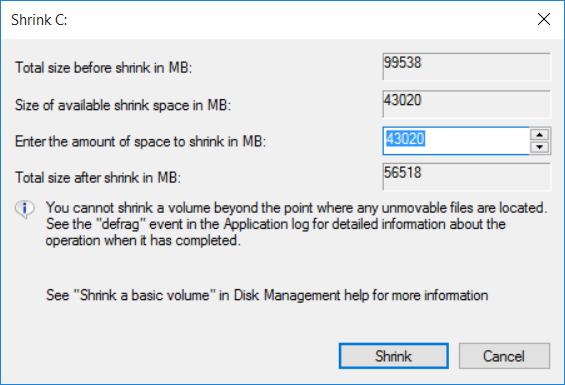
To shrink a partition right click on it and choose "Shrink Volume" from the menu.
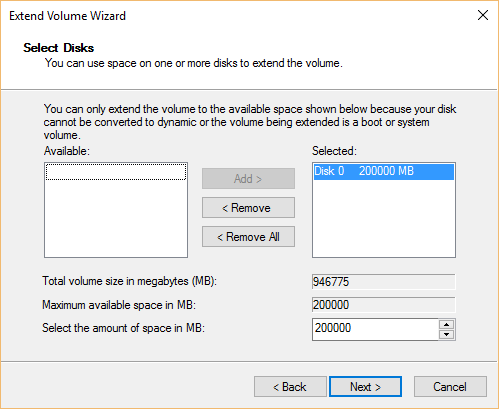
A window will appear and it will show you how much you can afford to shrink Windows by. You can choose less than the amount specified but never more.
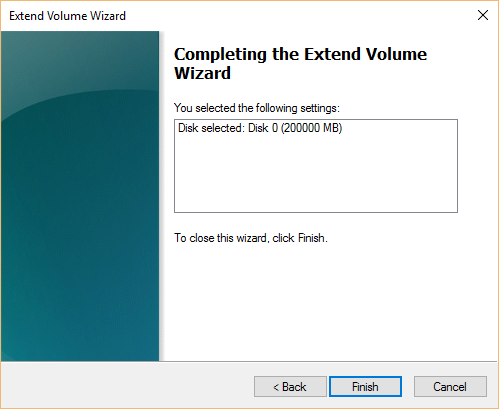
When you feel you have enough space click "Shrink". I went for the default option.
As you can see I now have nearly 60 gigabytes free for installing Ubuntu to on the SSD.
Power Options
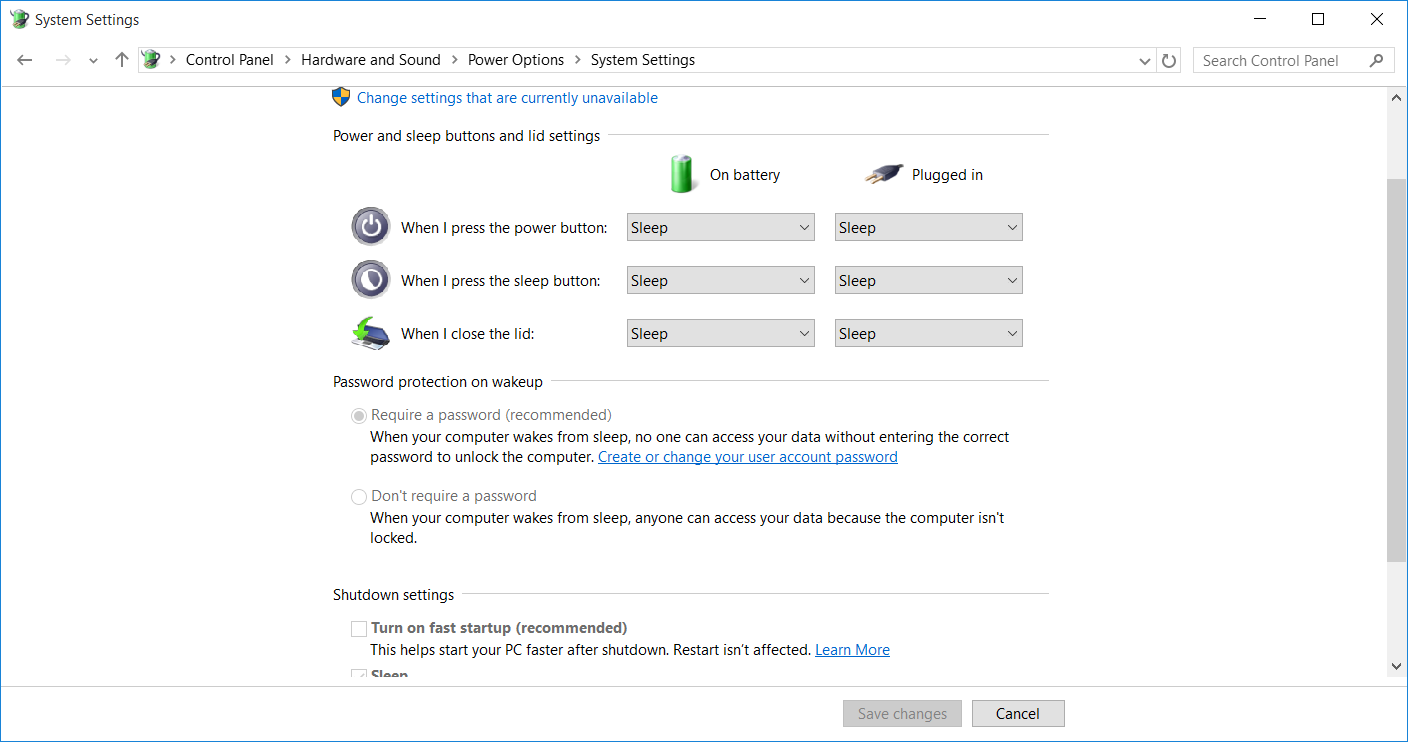
To be able to boot into Ubuntu you will need to adjust the power options so that your computer can boot from the USB drive.
Right click on the start button and choose "Power Options".
From the menu click on the option "Choose what the power option does".
At the top of the screen you will see a link with the words "Change settings that are currently unavailable".
Now scroll down and make sure the "Turn on fast startup" does not have tick in it. If it does click on it until it doesn't.
Click "Save Changes".
Boot Into Ubuntu Live
To boot into Ubuntu hold down the shift key whilst logged into Windows. Reboot the computer whilst holding down the shift key.
A window will appear with UEFI boot settings. Choose to boot from an external device and choose boot from EFI device.
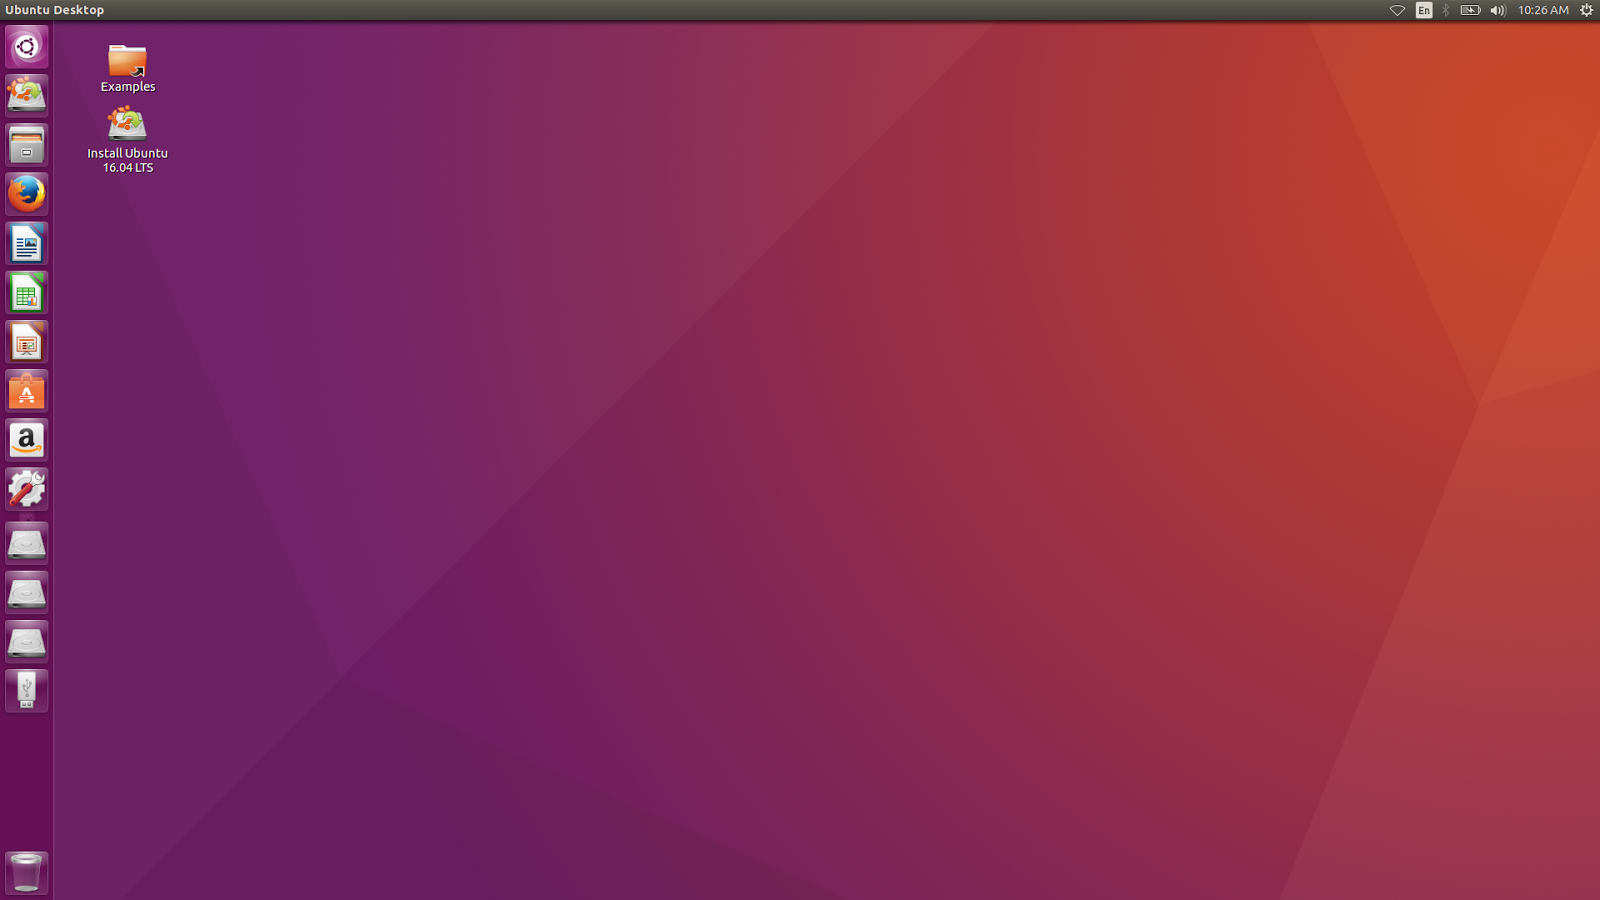
You should now boot into a live session of Ubuntu.
Install Ubuntu
If you want to be able to install updates during the installation click on the network icon in the top right corner and choose your wireless network. Enter the security key when requested.
If you are happy to wait until after the installation before installing updates do not worry about connecting to the internet.
If you have a poor internet connection I recommend not installing updates until after the installation has completed.
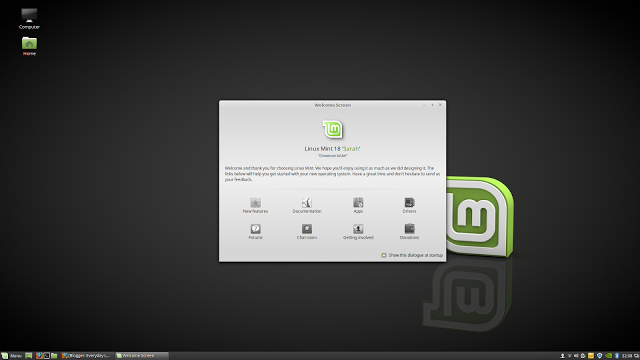
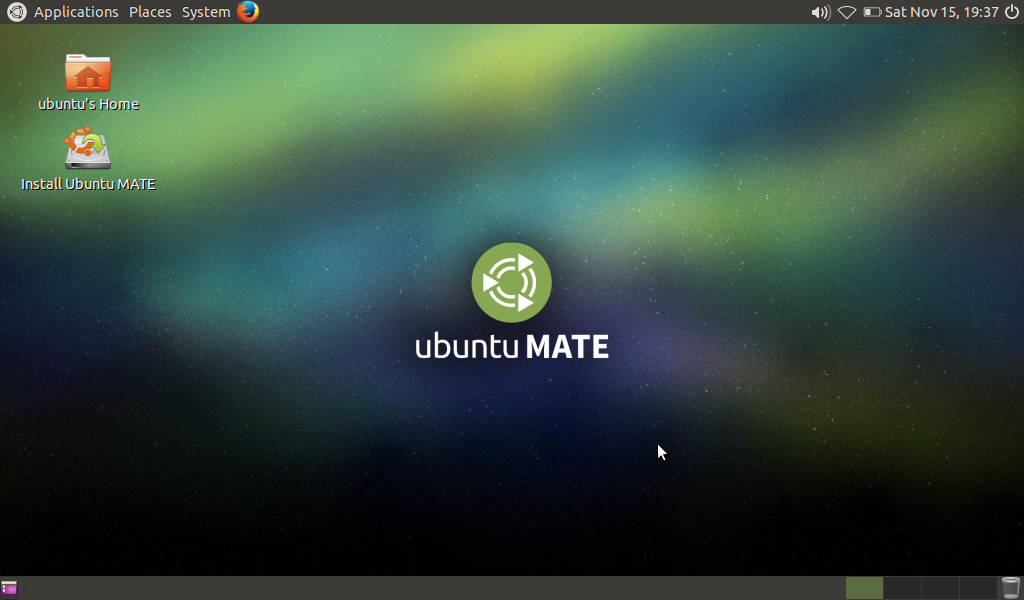
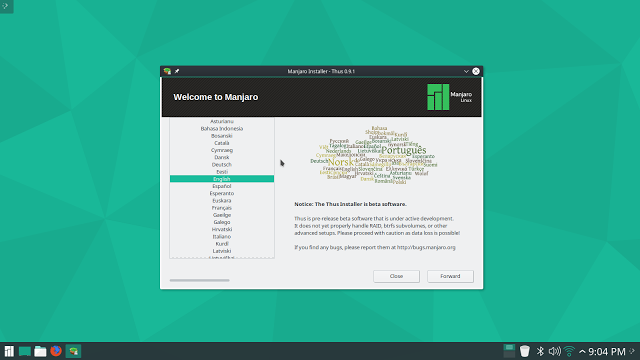
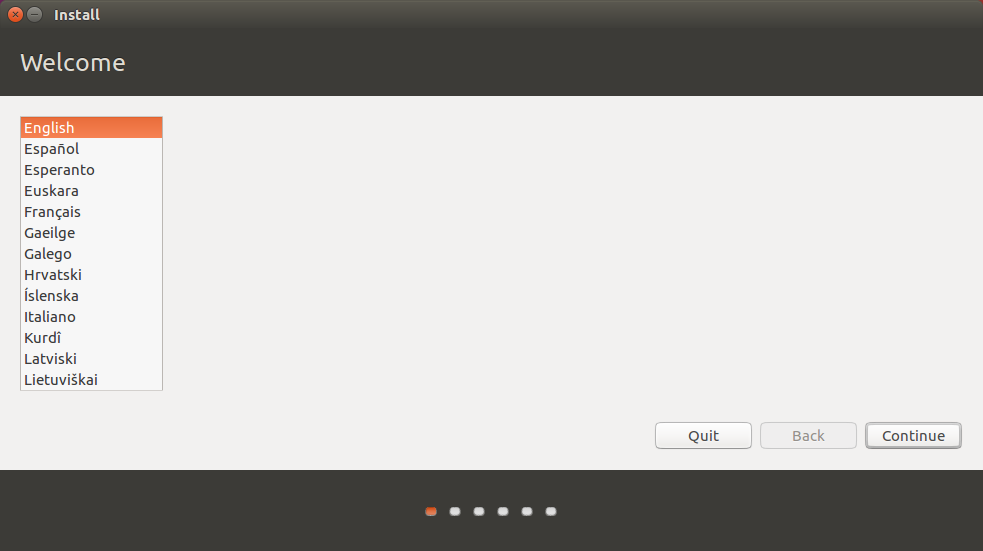
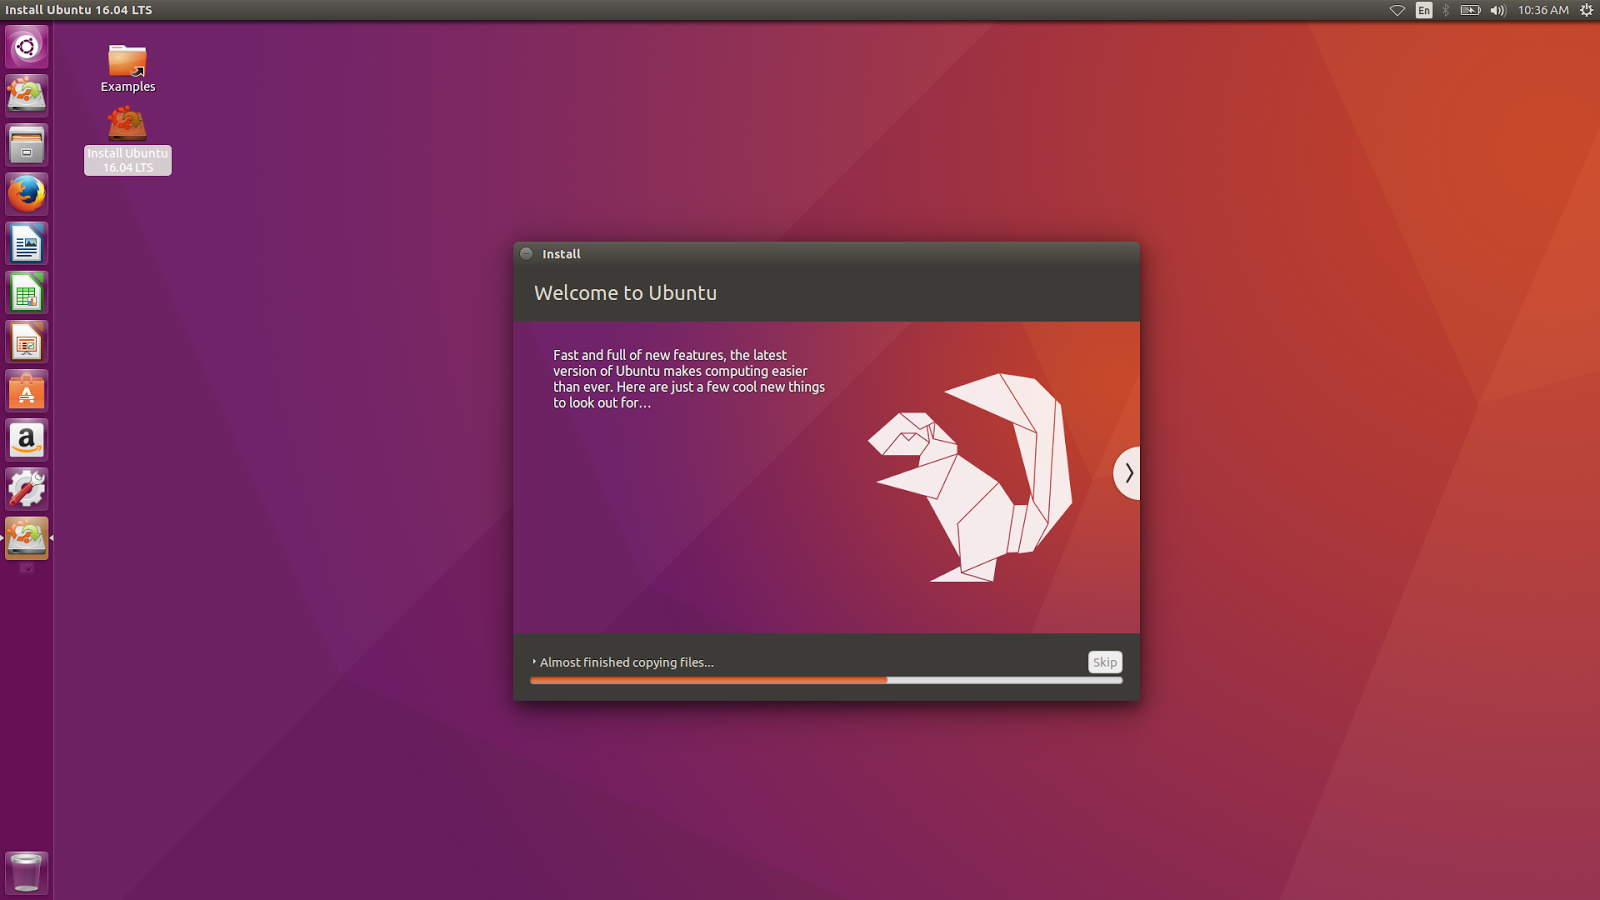
Double click on the install icon on the desktop. The above welcome message should appear.
Choose your installation language and click "Continue".
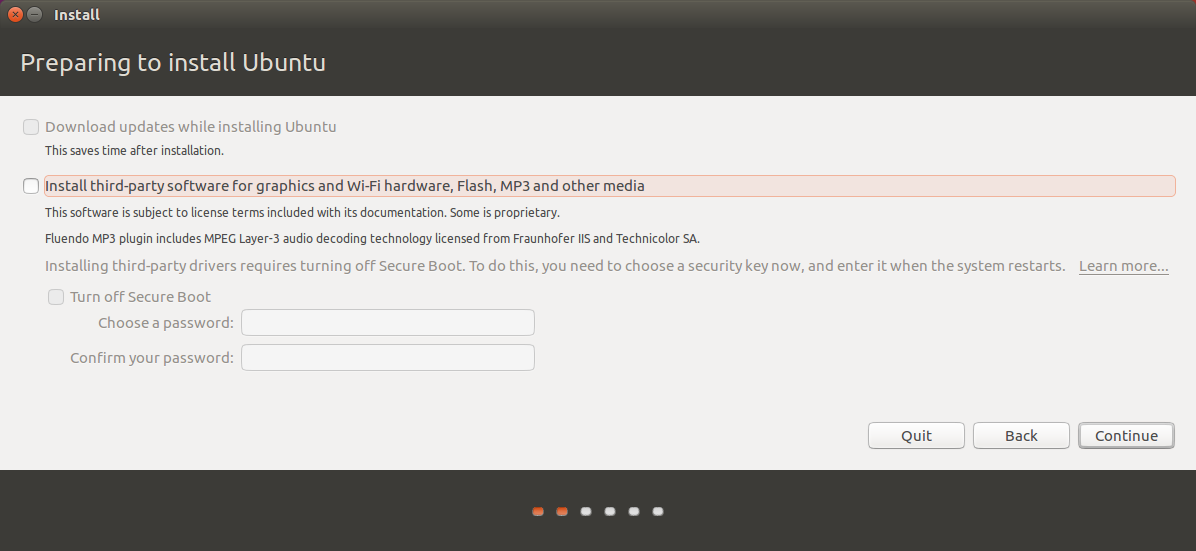
If you haven't connected to the internet then the download updates option will be greyed out but if you have connected you can choose to download updates.
Also on this screen you can choose to install third party codecs which make it possible to play MP3 audio.
Note the option that says that you need to turn off secure boot to install the codecs. It is actually easier to not install codecs now and do it post installation whereby you won't have to do anything with secure boot.
Click "Continue".
Rather strangely I was asked whether I wanted to unmount the SSD before installing. I clicked "No" to this option.
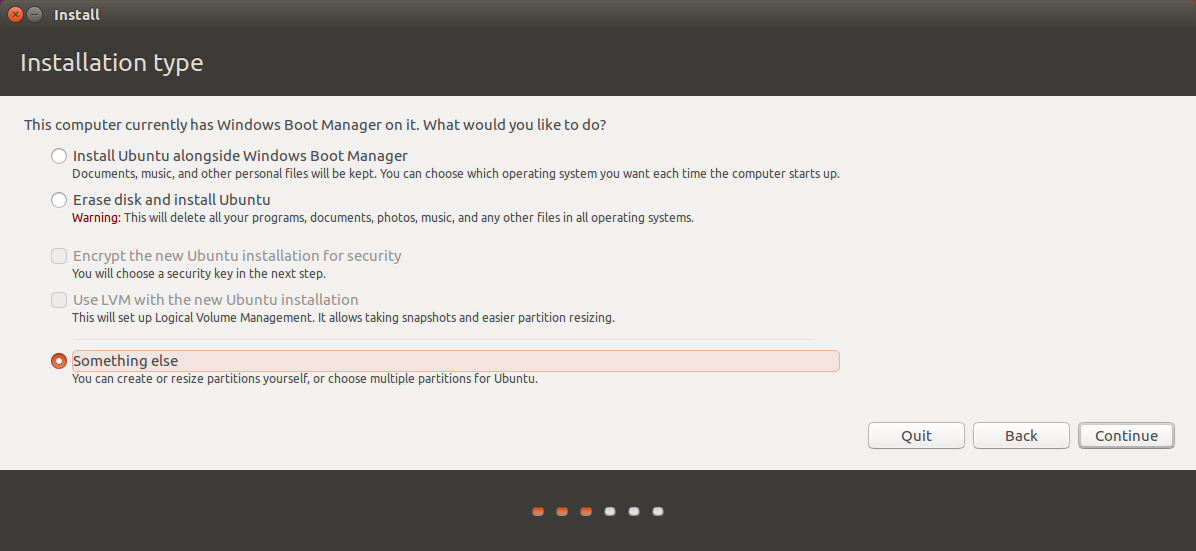
Normally at this stage I would say to choose the "Install Ubuntu alongside Windows Boot Manager" option but because I want to show how to partition the drive manually I suggest using the "Something Else" option. This allows you to specify where each partition is located.
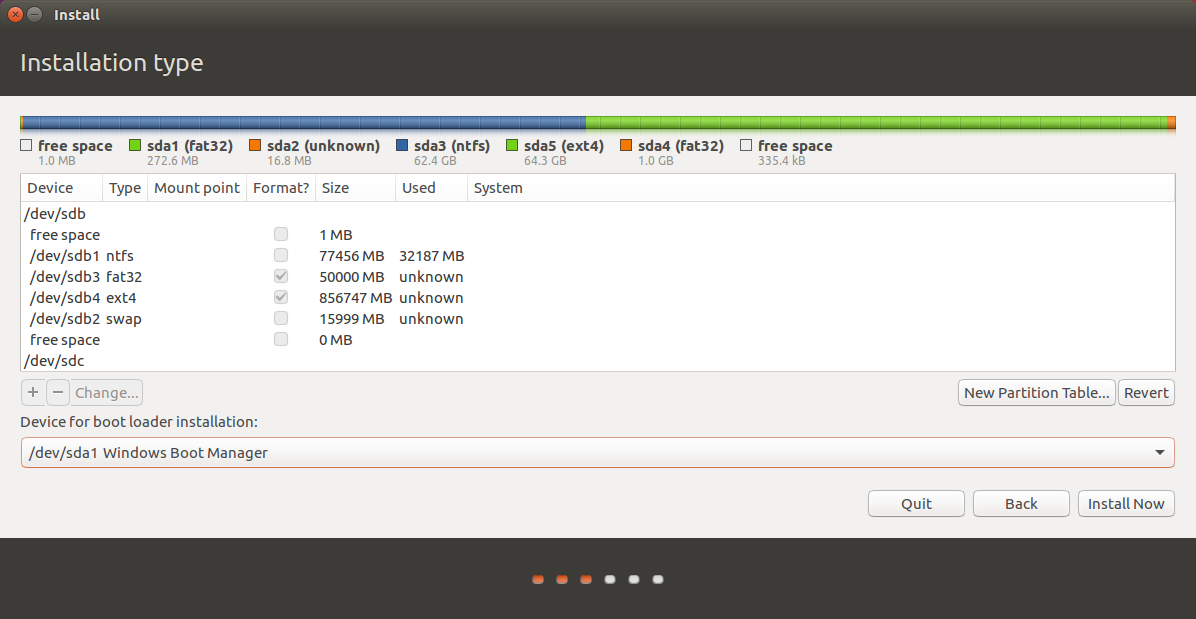
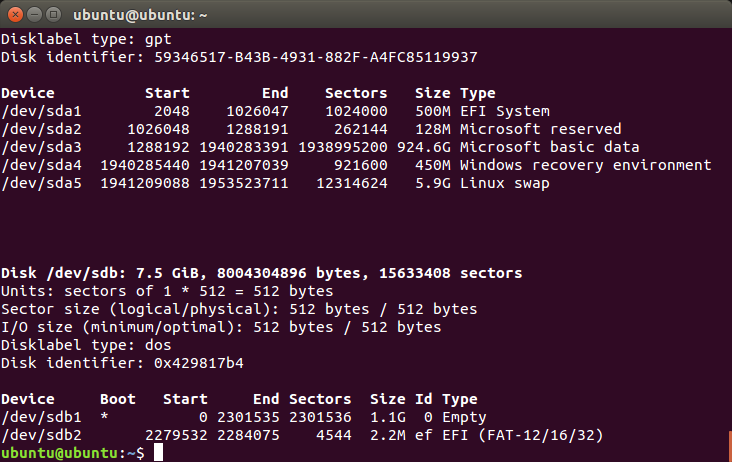
The next screen shows the layout of your disks. In my case there are partitions on /dev/sda and /dev/sdb.
What you are looking for is the free/unallocated space on /dev/sda which is the SSD and free/unallocated space on /dev/sdb which is the hard drive.
I chose to go for a full install of Ubuntu on the SSD as I will be using this regularly. I also decided to create a swap partition although with 16 gigabytes of RAM this is probably wasted disk space. I therefore put the swap partition on the hard drive.
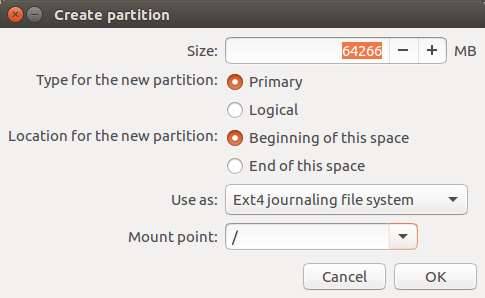
To create a partition click on the free space on /dev/sda and press the plus symbol.
For the size I chose the whole of the space on the SSD. It is a primary partition and I want to use the beginning of the space (although it doesn't really matter because I am choosing all the space).
I chose EXT4 as the file system and / as the mount point. Clicking OK creates the partition and returns you to the disk layout screen.
With the SSD now completely allocated I moved on to the hard drive.
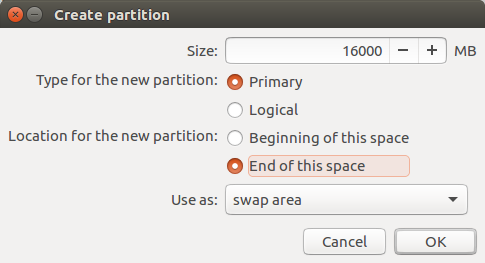
To create a swap partition I clicked on the free space on /dev/sdb and press the button with the plus symbol again.
I went for the full 16 gigabytes to match the amount of RAM in my machine. This is severely overkill but as I wasn't limited for disk space I went for it anyway.
Again I set the partition to primary but note that I chose to use the end of the space. In theory as this should be hardly used moving it to the end of the disk seems a sensible idea.
The only other thing to note is that I set the use as drop down list to "swap area". Clicking OK takes me back to the disk layout screen.
The rest of the hard drive is still an empty block of free space so what should I do with it?
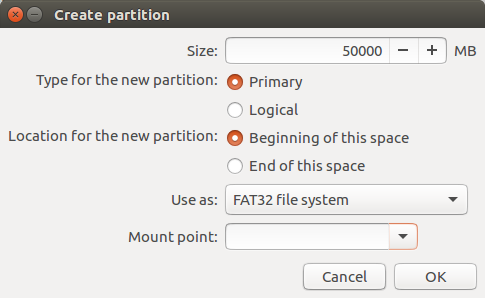
I chose to create a 50 gigabyte FAT32 partition which gives me a nice area to share files between Linux and Windows without worrying about one not being overly happy with NTFS and the other not being at all happy with EXT4.
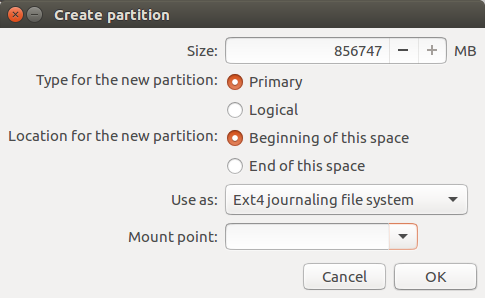
The rest I partitioned as a large block of space as an EXT4 partition. This is where I will store all of my larger files that I won't use regularly. Things like movies would fit well into this space.
Note that for these partitions I didn't choose a mount point. I did that later on in the Ubuntu disks tool as it is more user friendly.
With both of the disks now fully allocated I clicked the "Install Now" button. A message appears showing the partitions that will be created. Just continue past this screen.
The rest of the installation is fairly ordinary.
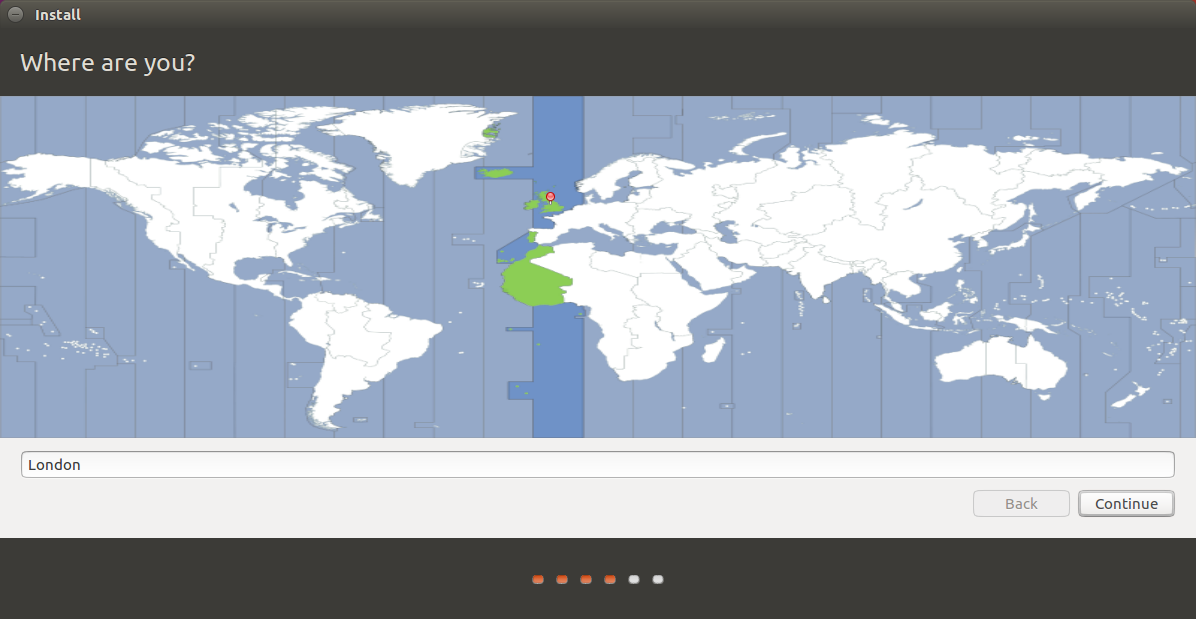
Select where you live by clicking on the map. This will set the time correctly on your computer.
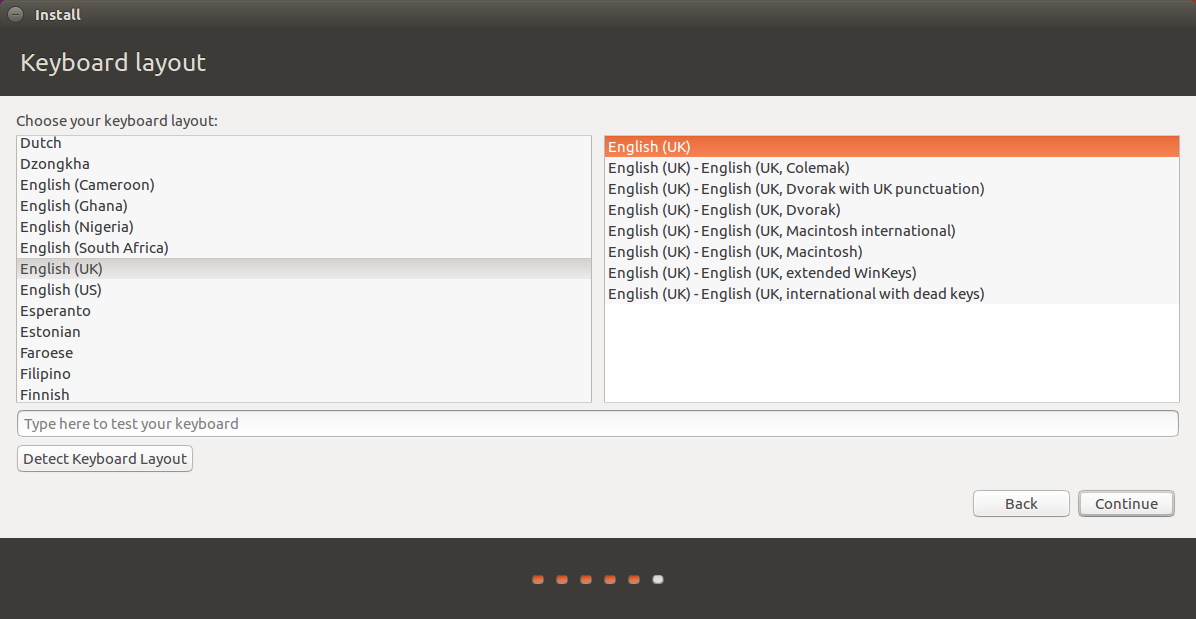
Choose your keyboard layout by selecting the language in the left pane and the layout in the right pane.
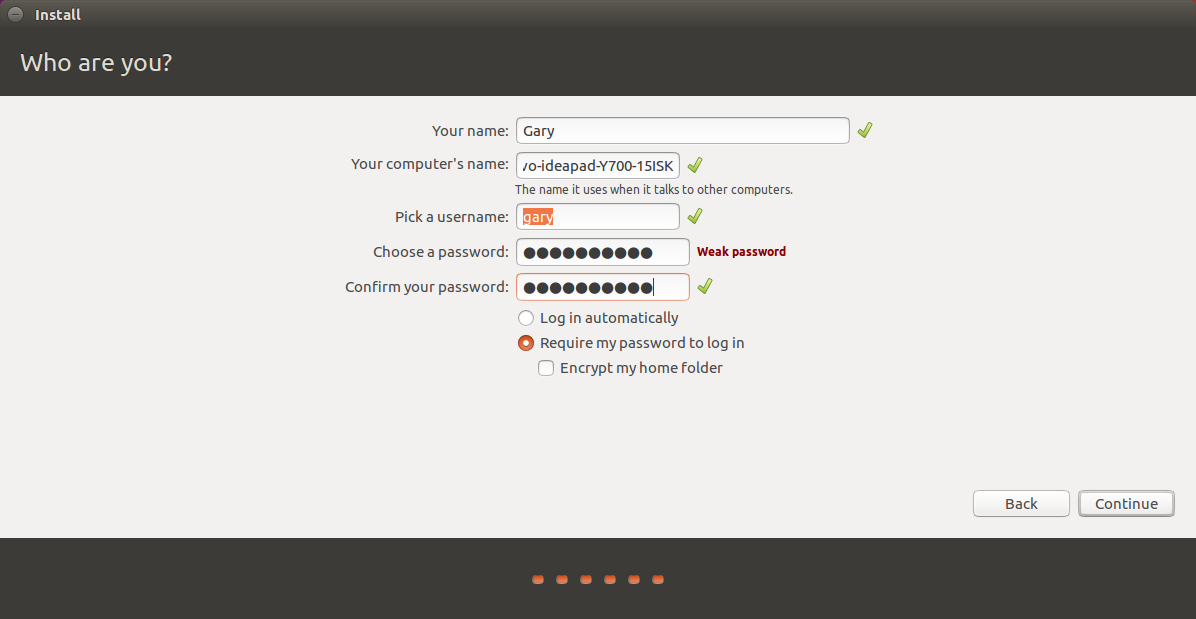
Finally create a user. Enter your name and a name for your computer.
Then enter a user name and choose a password and repeat it.
By default the setup requires you to log in every time you boot but you can get your computer to log in automatically by selecting the option but I don't recommend this.
Click "Continue".
The files will now be copied across and the system will be installed.
Finally you will be asked whether you want to continue testing or restart now.
You can try rebooting and if the computer boots straight to Windows reinsert the USB drive and hold down the shift key and reboot back to the UEFI boot screen as you did before to get into the live version of Ubuntu.
Summary
I am not saying my way is the only way to format the SSD and I welcome comments and suggestions in regards to this area.
The current layout is working well for me however.
Troubleshooting
If Ubuntu still will not boot after running EFI Boot Manager try reading this guide which aims to help with UEFI boot issues.
Introduction
In this guide I am going to show you how I dual booted Ubuntu and Windows 10 on my Lenovo Y700 Ideapad which contains a 128 gigabyte SSD and a 1 terabyte hard drive.
I have dedicated a whole new post for this guide as there is enough information to warrant it but there are links to other guides for areas that cross over.
Backup Your Computer
I always start with this option because you need to know that you can get back to where you started should something go awry.
Create A Bootable Ubuntu USB Drive
In order to install Ubuntu you will need a bootable Ubuntu USB drive.
Disk Management
This is where the major part of the guide differs from the previous one.
Right click on the start button and when the menu appears choose "Disk Management".
The image above shows how the disks on my laptop were partitioned prior to me changing them.
Quite frankly they are ridiculous and I suspect other people who have bought laptops also have poorly thought out installations by the manufacturers.
Disk 0 represents the 128 gigabyte SSD and Disk 1 represents the 1 gigabyte hard drive.
So Why is this disk layout ridiculous?
The best performance you will get is when you are reading from the SSD. There are 2 recovery partitions installed on that very same SSD.
The whole point of recovery partitions is that they sit out of the way and are only read when you are up a creek without a paddle.
Therefore there is over 20 gigabytes of SSD totally wasted. There is also a recovery area on the hard drive which takes up over 70 gigabytes.
I think it is sensible to have recovery partitions on the hard drive as although they waste space they are wasting space on the drive you want to use least.
I use Windows very infrequently so I don't need the Windows recovery partitions. I therefore decided to get rid of the Windows recovery partitions and keep the 1 gigabyte OEM partition and the recovery partition on the hard drive. This means I can always do a factory restore. (I have Windows 10 on a USB drive so there really isn't any need for me to keep this really either).
To remove the recovery partitions I opened an administrators command prompt by right clicking on the start button and choosing "Command Prompt (Admin)" from the menu.
The command line tool I used is called diskpart.
To run diskpart simply type diskpart into the command window.
You can view the disks on the computer by typing list disk.
From the image above you will see that disk 0 and disk 1 were returned.
The disk I wanted to work on was disk 0 which is the SSD. To select the disk you wish to amend type select disk n where n is the number of the disk.
To see the partitions on a disk type list partition.
As you can see I have 6 partitions listed. I wanted to remove partition 4 and partition 5 which were the recovery partitions.
To select a partition the command to use is select partition n where n is the number of the partition.
Normally to delete a partition all you have to do is type delete partition.
Recovery partitions are special though and are protected from deletion. You can force the deletion of the partition by typing delete partition override.
The above image shows my disk after removing the recovery partitions.
Now 20 gigabytes is just about enough for Ubuntu but I wanted more so I reduced the size of the Windows partition as follows.
To shrink a partition right click on it and choose "Shrink Volume" from the menu.
A window will appear and it will show you how much you can afford to shrink Windows by. You can choose less than the amount specified but never more.
When you feel you have enough space click "Shrink". I went for the default option.
As you can see I now have nearly 60 gigabytes free for installing Ubuntu to on the SSD.
Power Options
To be able to boot into Ubuntu you will need to adjust the power options so that your computer can boot from the USB drive.
Right click on the start button and choose "Power Options".
From the menu click on the option "Choose what the power option does".
At the top of the screen you will see a link with the words "Change settings that are currently unavailable".
Now scroll down and make sure the "Turn on fast startup" does not have tick in it. If it does click on it until it doesn't.
Click "Save Changes".
Boot Into Ubuntu Live
To boot into Ubuntu hold down the shift key whilst logged into Windows. Reboot the computer whilst holding down the shift key.
A window will appear with UEFI boot settings. Choose to boot from an external device and choose boot from EFI device.
You should now boot into a live session of Ubuntu.
Install Ubuntu
If you want to be able to install updates during the installation click on the network icon in the top right corner and choose your wireless network. Enter the security key when requested.
If you are happy to wait until after the installation before installing updates do not worry about connecting to the internet.
If you have a poor internet connection I recommend not installing updates until after the installation has completed.
Double click on the install icon on the desktop. The above welcome message should appear.
Choose your installation language and click "Continue".
If you haven't connected to the internet then the download updates option will be greyed out but if you have connected you can choose to download updates.
Also on this screen you can choose to install third party codecs which make it possible to play MP3 audio.
Note the option that says that you need to turn off secure boot to install the codecs. It is actually easier to not install codecs now and do it post installation whereby you won't have to do anything with secure boot.
Click "Continue".
Rather strangely I was asked whether I wanted to unmount the SSD before installing. I clicked "No" to this option.
Normally at this stage I would say to choose the "Install Ubuntu alongside Windows Boot Manager" option but because I want to show how to partition the drive manually I suggest using the "Something Else" option. This allows you to specify where each partition is located.
The next screen shows the layout of your disks. In my case there are partitions on /dev/sda and /dev/sdb.
What you are looking for is the free/unallocated space on /dev/sda which is the SSD and free/unallocated space on /dev/sdb which is the hard drive.
I chose to go for a full install of Ubuntu on the SSD as I will be using this regularly. I also decided to create a swap partition although with 16 gigabytes of RAM this is probably wasted disk space. I therefore put the swap partition on the hard drive.
To create a partition click on the free space on /dev/sda and press the plus symbol.
For the size I chose the whole of the space on the SSD. It is a primary partition and I want to use the beginning of the space (although it doesn't really matter because I am choosing all the space).
I chose EXT4 as the file system and / as the mount point. Clicking OK creates the partition and returns you to the disk layout screen.
With the SSD now completely allocated I moved on to the hard drive.
To create a swap partition I clicked on the free space on /dev/sdb and press the button with the plus symbol again.
I went for the full 16 gigabytes to match the amount of RAM in my machine. This is severely overkill but as I wasn't limited for disk space I went for it anyway.
Again I set the partition to primary but note that I chose to use the end of the space. In theory as this should be hardly used moving it to the end of the disk seems a sensible idea.
The only other thing to note is that I set the use as drop down list to "swap area". Clicking OK takes me back to the disk layout screen.
The rest of the hard drive is still an empty block of free space so what should I do with it?
I chose to create a 50 gigabyte FAT32 partition which gives me a nice area to share files between Linux and Windows without worrying about one not being overly happy with NTFS and the other not being at all happy with EXT4.
The rest I partitioned as a large block of space as an EXT4 partition. This is where I will store all of my larger files that I won't use regularly. Things like movies would fit well into this space.
Note that for these partitions I didn't choose a mount point. I did that later on in the Ubuntu disks tool as it is more user friendly.
With both of the disks now fully allocated I clicked the "Install Now" button. A message appears showing the partitions that will be created. Just continue past this screen.
The rest of the installation is fairly ordinary.
Select where you live by clicking on the map. This will set the time correctly on your computer.
Choose your keyboard layout by selecting the language in the left pane and the layout in the right pane.
Finally create a user. Enter your name and a name for your computer.
Then enter a user name and choose a password and repeat it.
By default the setup requires you to log in every time you boot but you can get your computer to log in automatically by selecting the option but I don't recommend this.
Click "Continue".
The files will now be copied across and the system will be installed.
Finally you will be asked whether you want to continue testing or restart now.
You can try rebooting and if the computer boots straight to Windows reinsert the USB drive and hold down the shift key and reboot back to the UEFI boot screen as you did before to get into the live version of Ubuntu.
Summary
I am not saying my way is the only way to format the SSD and I welcome comments and suggestions in regards to this area.
The current layout is working well for me however.
Troubleshooting
If Ubuntu still will not boot after running EFI Boot Manager try reading this guide which aims to help with UEFI boot issues.
Posted at 19:28 | by
Gary Newell