Sunday, 27 January 2013

Everyday Linux User Review of Linux Lite

Introduction

I like lightweight Linux distributions. For me an operating system should sit in the background and make it as easy as possible to do what it is I want to do.

I don't need flashy cubes which make you go "ooh" or hotspots and gestures which make you go "aah".

Last week I wrote a review of Manjaro and for me the whole experience was brilliant. The system was highly responsive despite being an older laptop with fairly low specifications. The navigation system was great. For more experienced Linux users who are happy to see a terminal screen every now and then Manjaro is perfect.

This week's review is about Linux Lite which falls into the same lightweight category as distributions such as Zorin OS Lite, Peppermint Linux and Xubuntu.

So what is the purpose of Linux Lite. The following quote comes from the original distribution release notes.
"This distro was created for three reasons. One, to show people just how easy it can be to use a Linux-based operating system and to dispel myths about how scary Linux operating systems are. Two, to help create awareness about Linux-based operating systems. And three, to help promote this community. Linux Lite is free for everyone to use and share, and suitable for people who are new to Linux or for people who want a lightweight environment that is also fully functional.
From the above statement you can assume two things:
  1. Linux Lite is easy to use
  2. Linux Lite should work on older hardware and is not resource intensive

Installation

Linux Lite can be downloaded from sourceforge.net/projects/linuxlite/files/. If your internet connection is slow or you have a download limit you can also buy a Linux Lite DVD from .

Once downloaded you can use unetbootin to install the ISO to a USB drive or you can use any disc burning software to burn the image to a DVD.

When you insert the USB drive or DVD you will be able to boot to either a live environment or install directly to the hard drive. I always try the live version out first to make sure there aren't any obvious show stoppers.

Linux Lite runs very well in a live environment and I was able to get online and test the software that was loaded as part of the live install.

I don't however tend to do reviews in a live environment. I prefer to install the operating system to the hard drive. On the desktop there is an icon called "Install". Clicking this icon brings up the Ubiquity installer which is common amongst Ubuntu based distributions.

The installer is easy to follow.

The first thing to do is choose whether you want to install Linux Lite over any existing operating system (IE use the whole disk) or alongside an existing operating system.

Now choose whether you want to download updates as you go and whether you want third party software installed. The third party software enables you to watch flash videos and listen to MP3s.

When you click next to install the files start copying from the DVD or USB drive and you can get on with choosing the username you wish to use to log in to Linux Lite and the locale and timezone.

Depending whether you choose to install updates or not the installation time is about 15 minutes. If you choose to download updates then it depends on your internet connection how long the updates take.

When everything is installed you are able to continue using the live environment or you can reboot the computer into the newly installed Linux Lite operating system.

First Impressions


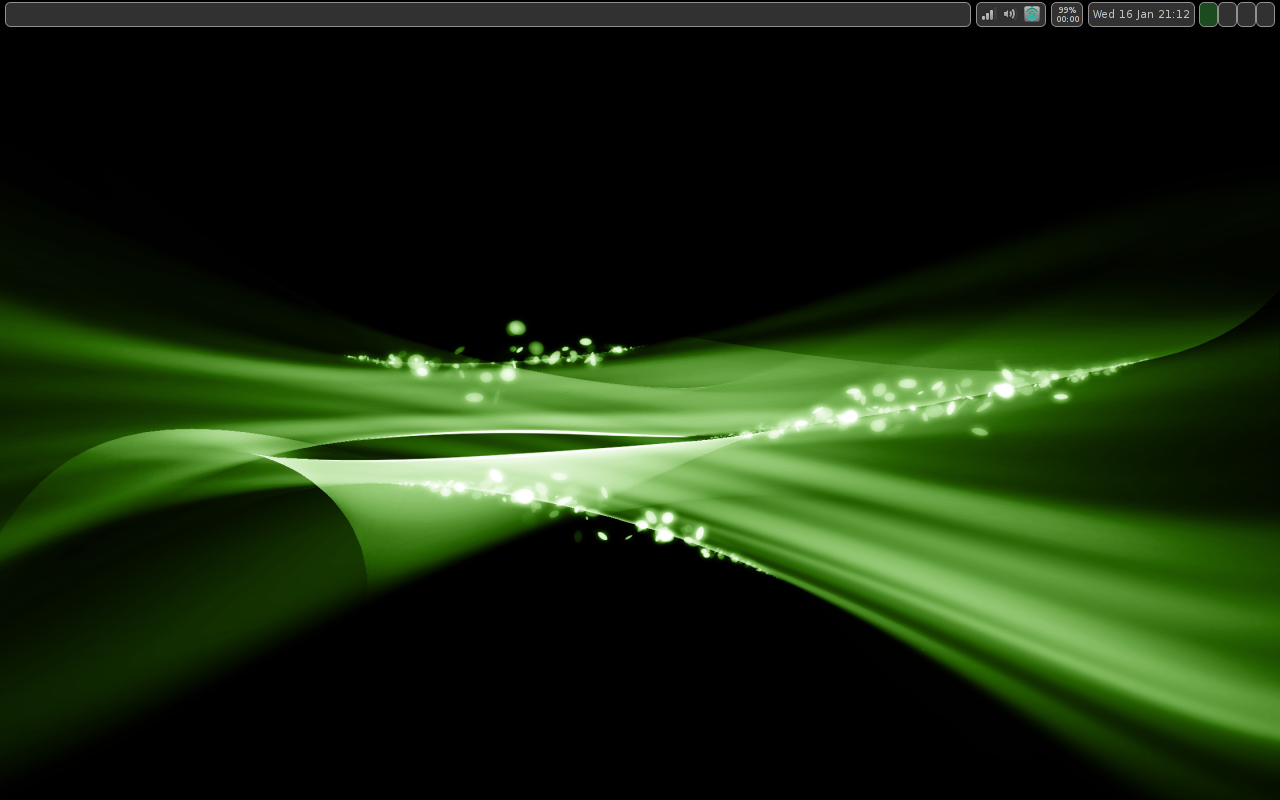
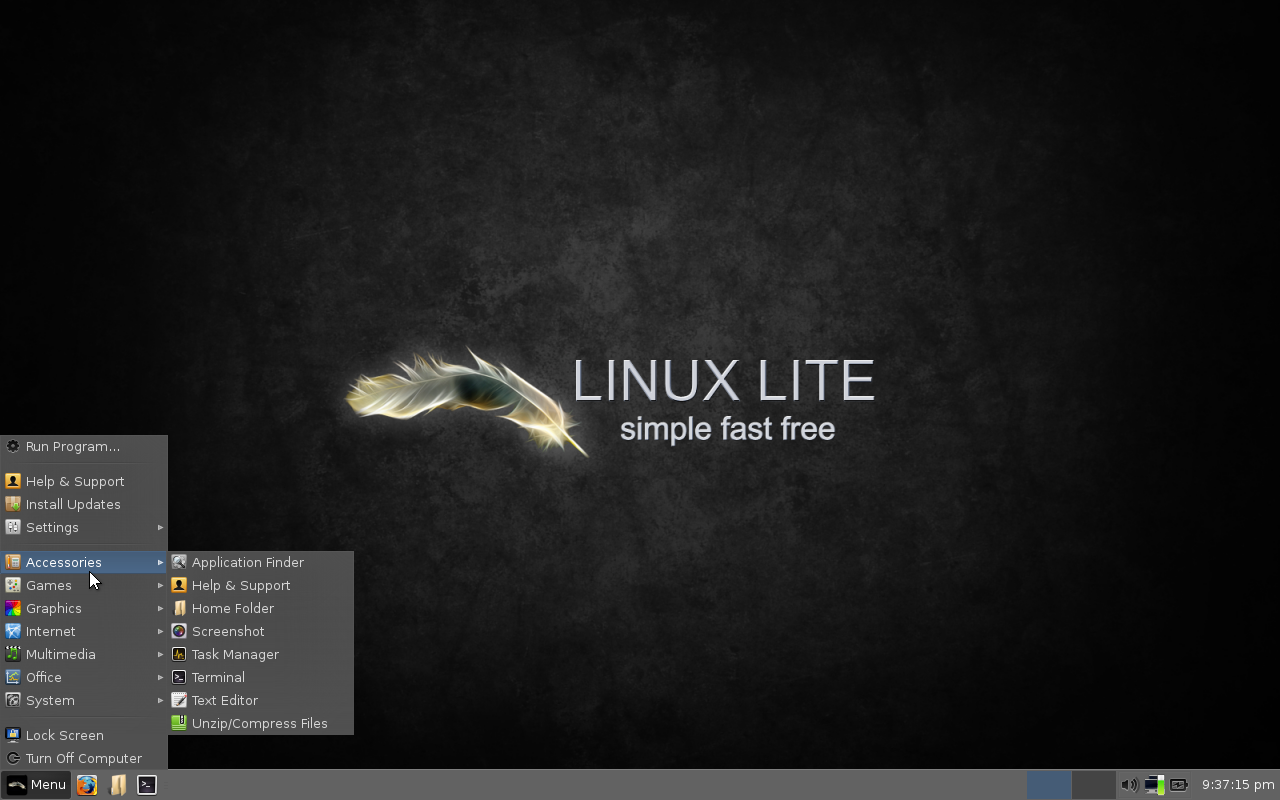
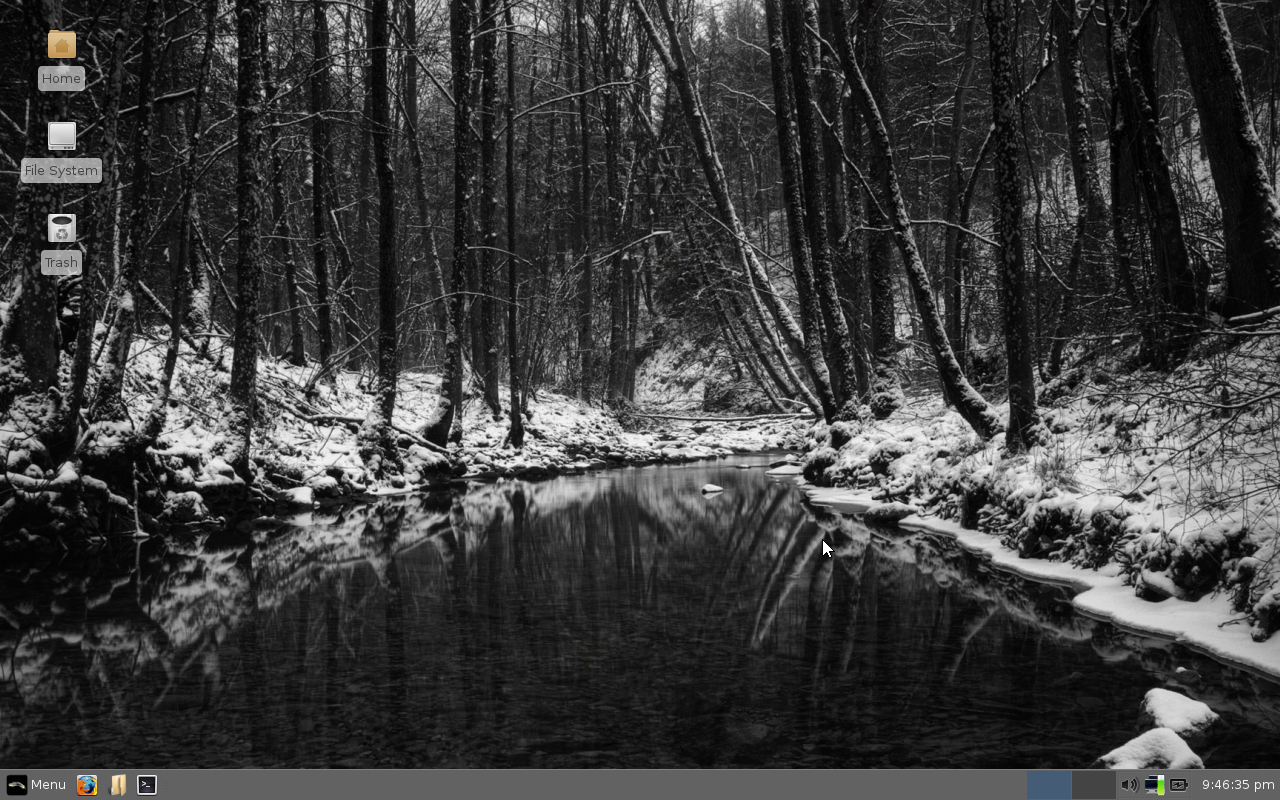
Linux Lite loads into a black background with the Linux Lite logo. There is a taskbar as the bottom with a menu, launch bar and system tray.

I once tried Crunchbang and I have deliberately not written a review of it because my mind hasn't worked its way past the scarily black background which says more about my psychy than it does about Crunchbang. I do plan to review Crunchbang properly in the future.

The black background for Linux Lite is broken up by the logo which makes it look smart and professional.


The taskbar has a menu icon, three icons in the quick launch section which are Firefox, Thunar file manager and Terminal. The system tray has an icon for virtual workspaces, a network icon, a battery icon and a clock.

The desktop environment for Linux Lite is XFCE. If you don't like the look and feel of Linux Lite you can always follow this tutorial to customise the XFCE desktop.


Windows users will feel somewhat familiar with the Linux Lite system. Everything is pretty much in the same place for Linux Lite as it is for Windows. Zorin OS and Linux Mint with the Cinnamon desktop also provide a familiar look and feel for Windows users.

Connecting to the internet

To connect to the internet click the network icon in the system tray. (looks like 2 monitors). Alternatively click the Menu icon and select Internet -> Network Manager.

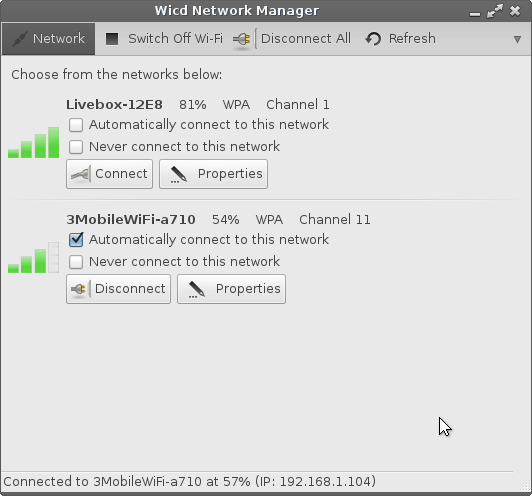
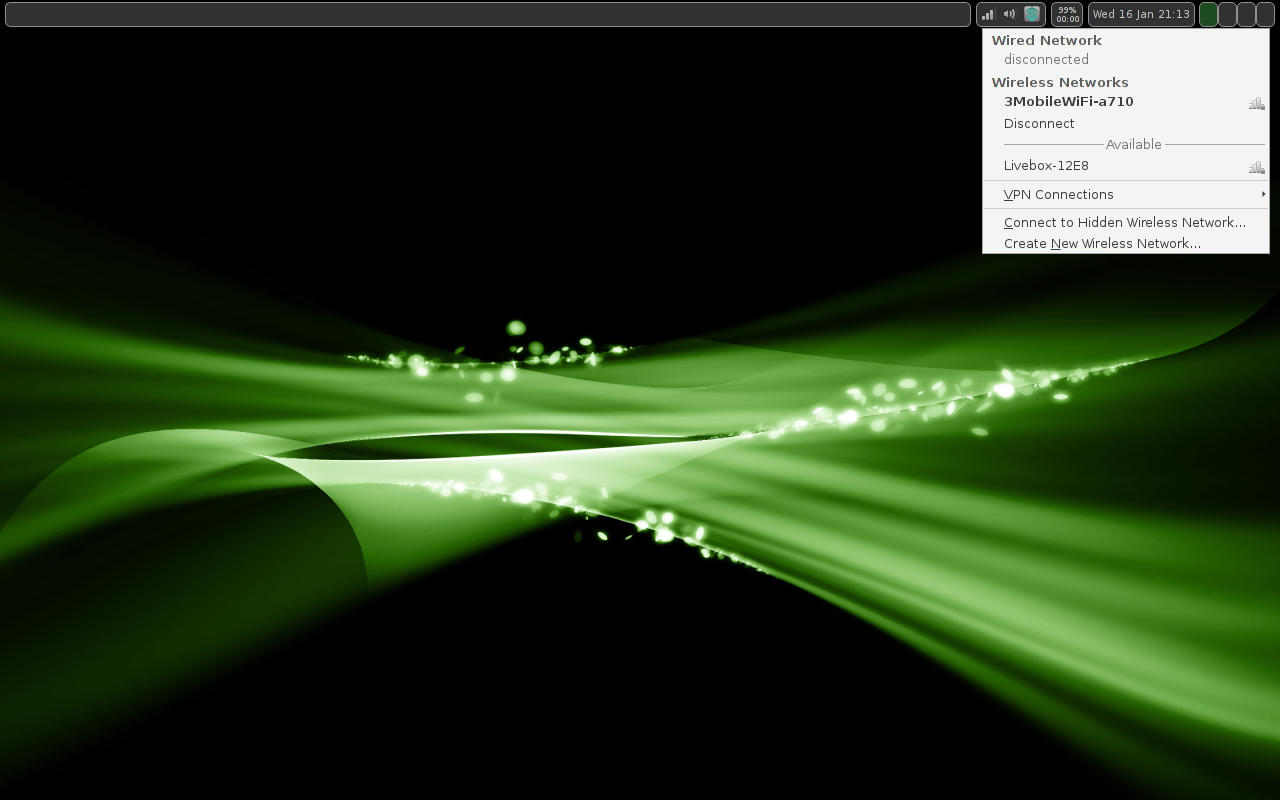
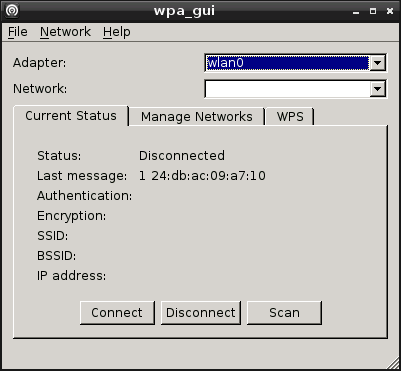
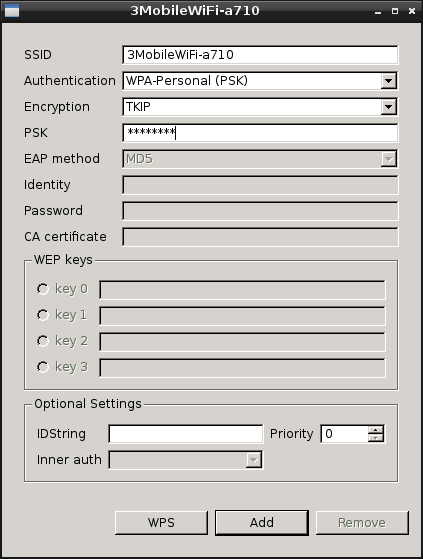
The Wicd Network Manager application will appear with a list of all available wireless networks.

If your wireless requires an encryption key then you will need to click the properties button next to the network you wish to connect to.


The Wicd application is fairly smart and should pick the correct encryption method for your network.

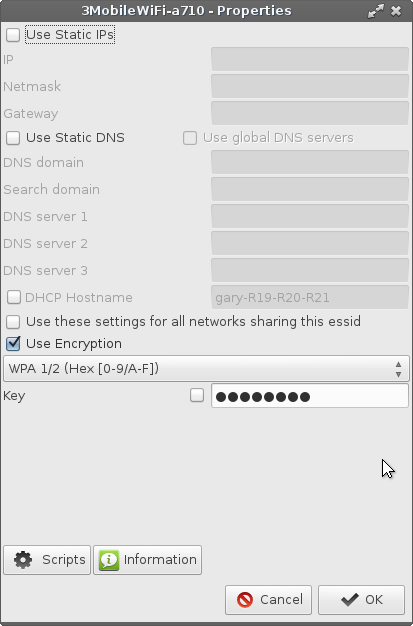
All you need to do is enter the encryption key into the Key field.

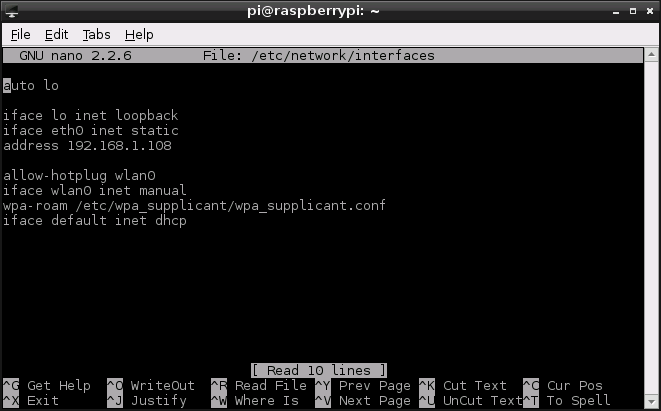
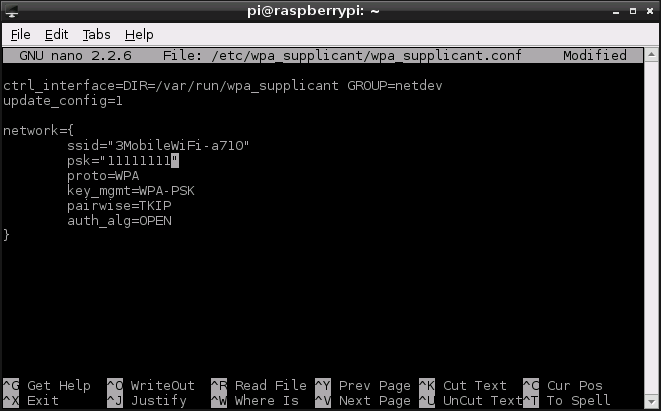
Now at this point I want to mention something that happened to me. It might be local to my particular laptop which is a Samsung R20 but it might also be a problem on other Samsung computers or indeed other makes and models.

It is worth checking the box next to the Key field to see what is actually being entered into the Key field as opposed to showing asterisks (*). The reason I say this is that certain characters on my keyboard showed up as different characters. For example the 0 key became a forward slash (/).

To get around this all I had to do was to press the FN key and F11. This key sequence may be different for other makes and models. You are basically looking for the function lock.

When you have correctly entered the security key click OK to return to the main WICD screen and press connect to connect to the network. You can also check the automatically connect to this network checkbox if you always want to connect to the same network.

The default browser installed with Linux Lite is Firefox.

Installing Software


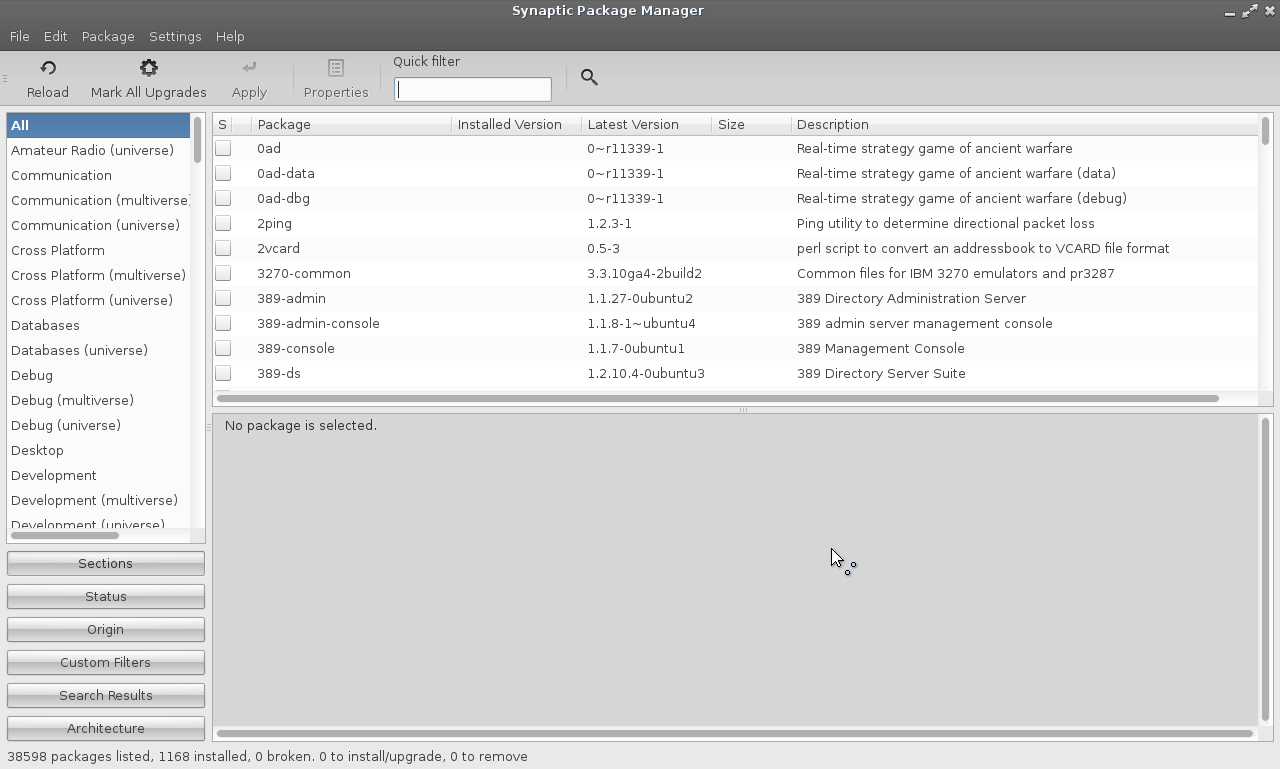
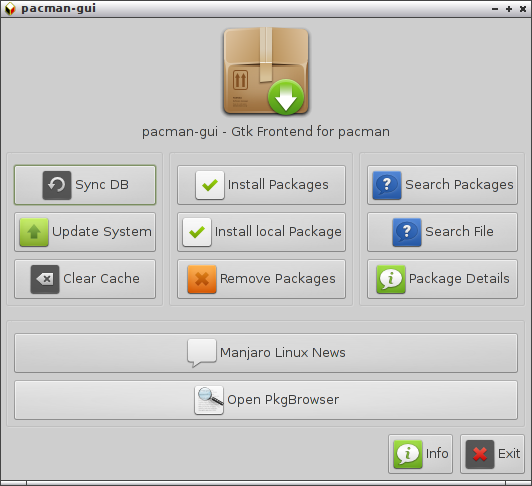
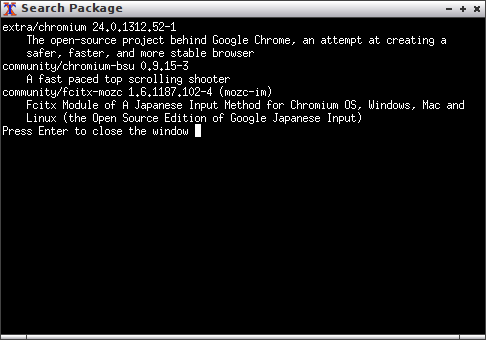
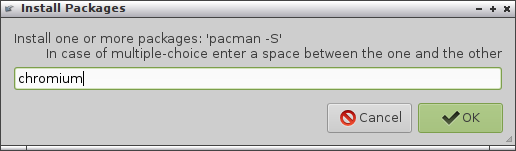
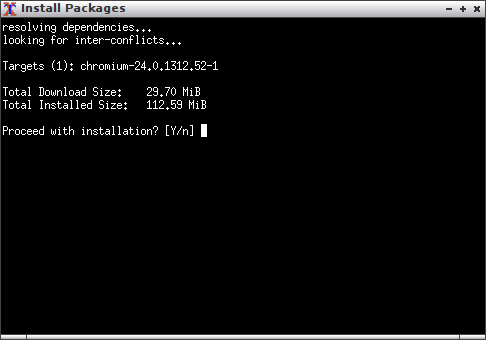
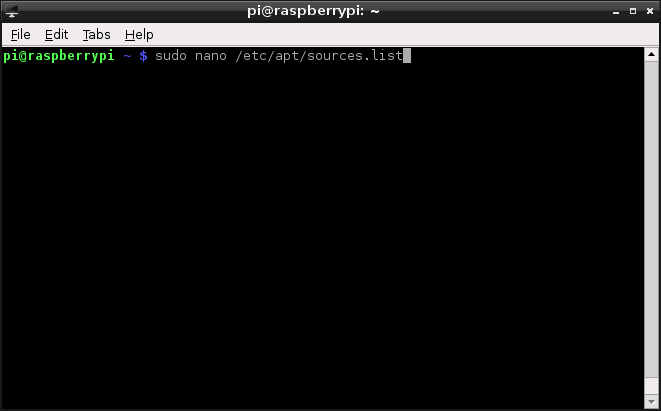
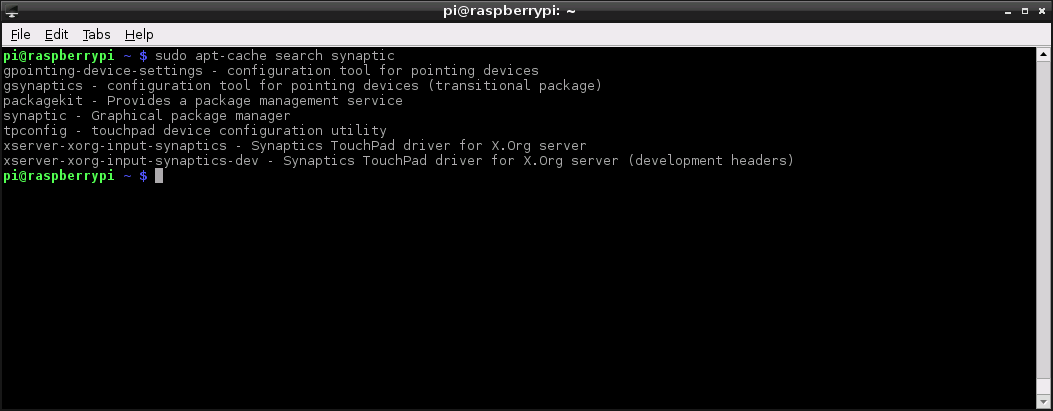
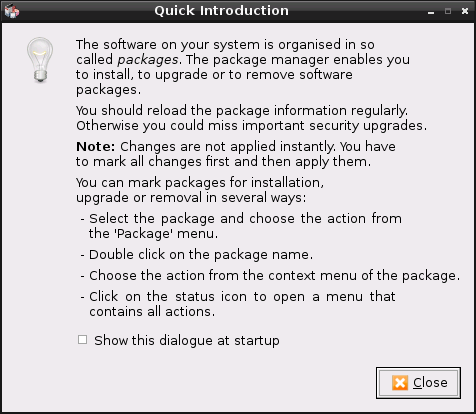
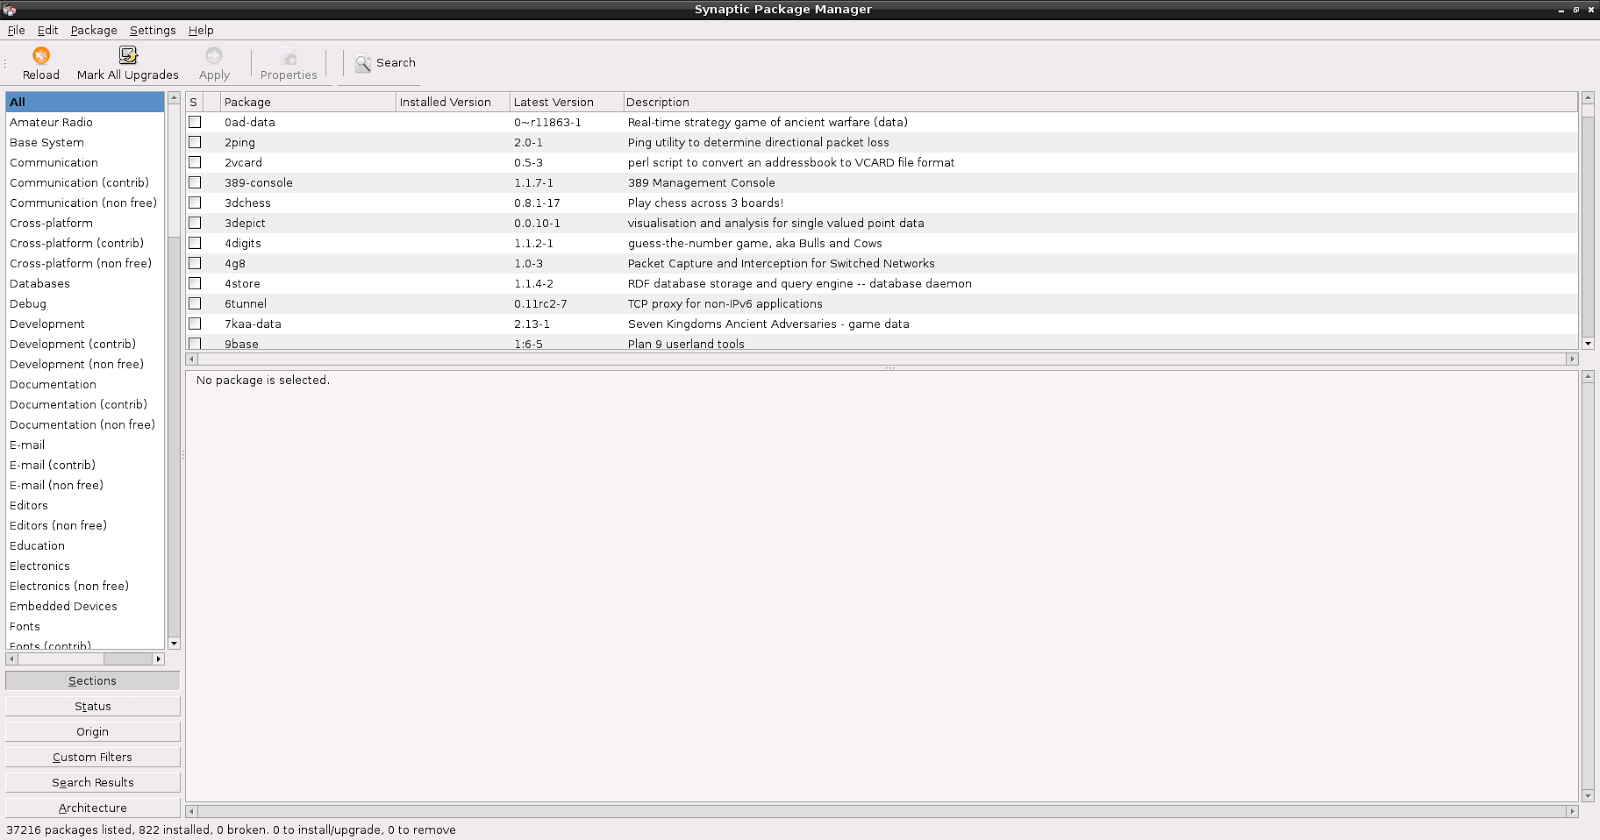
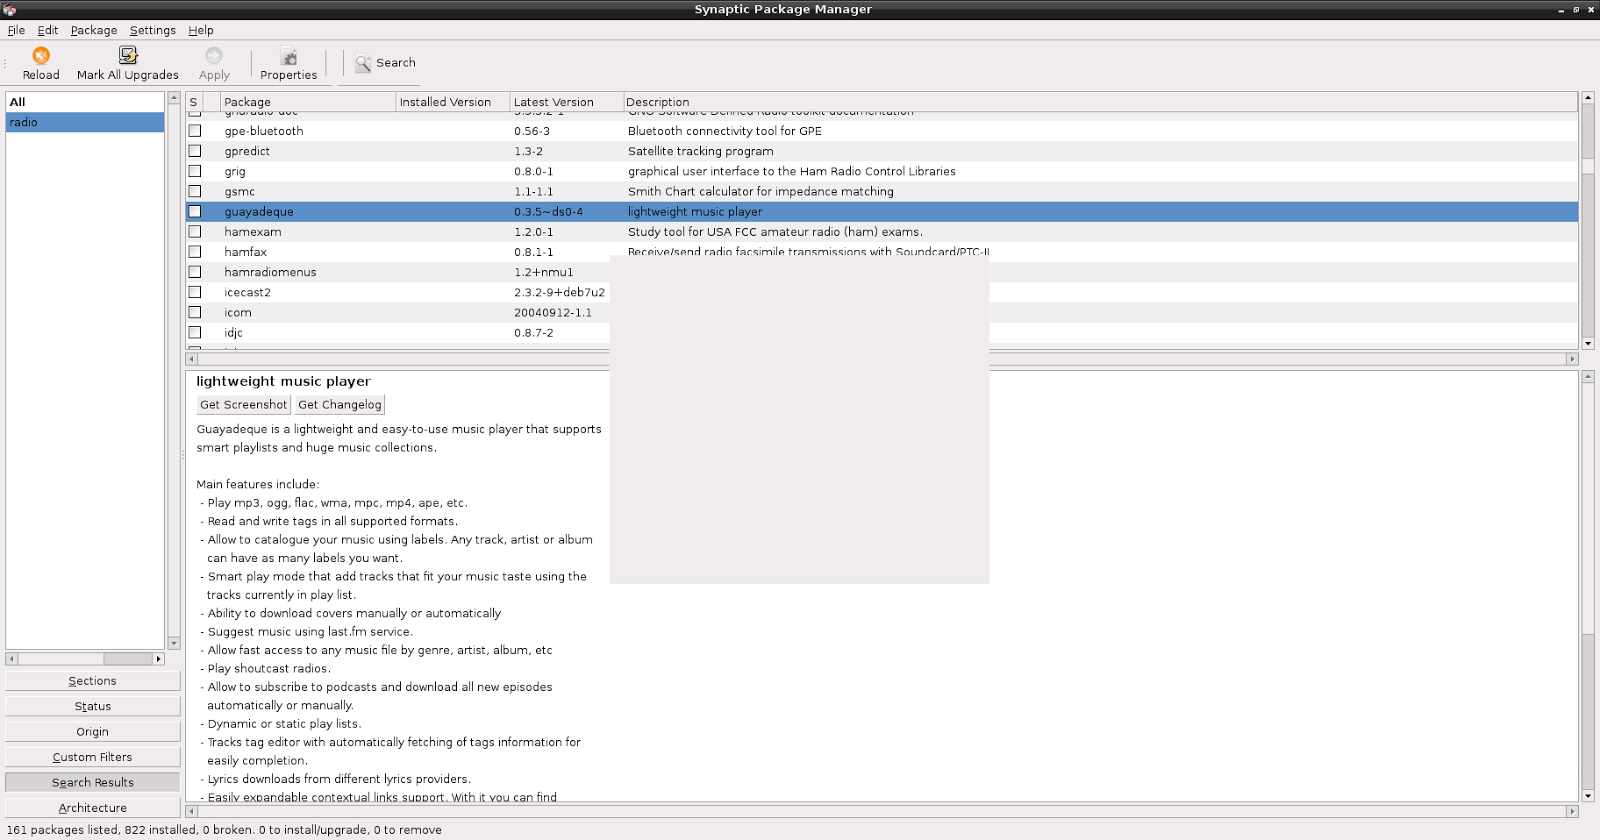
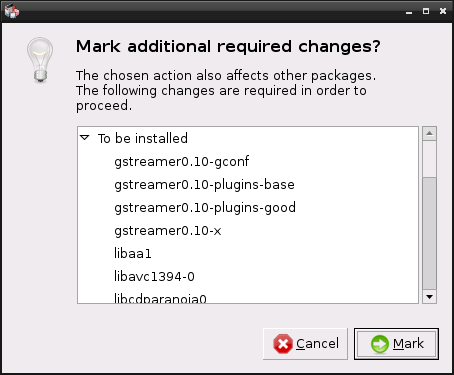
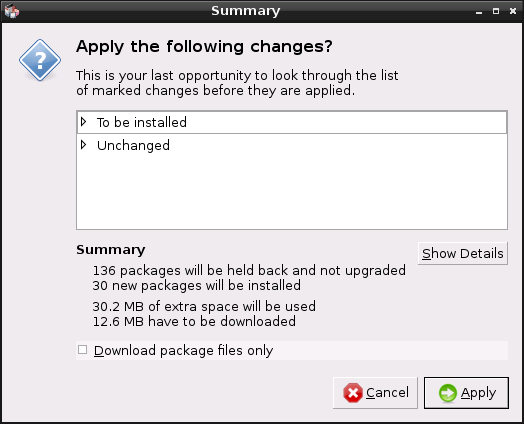
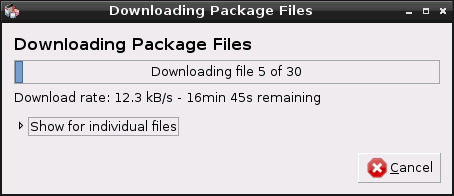
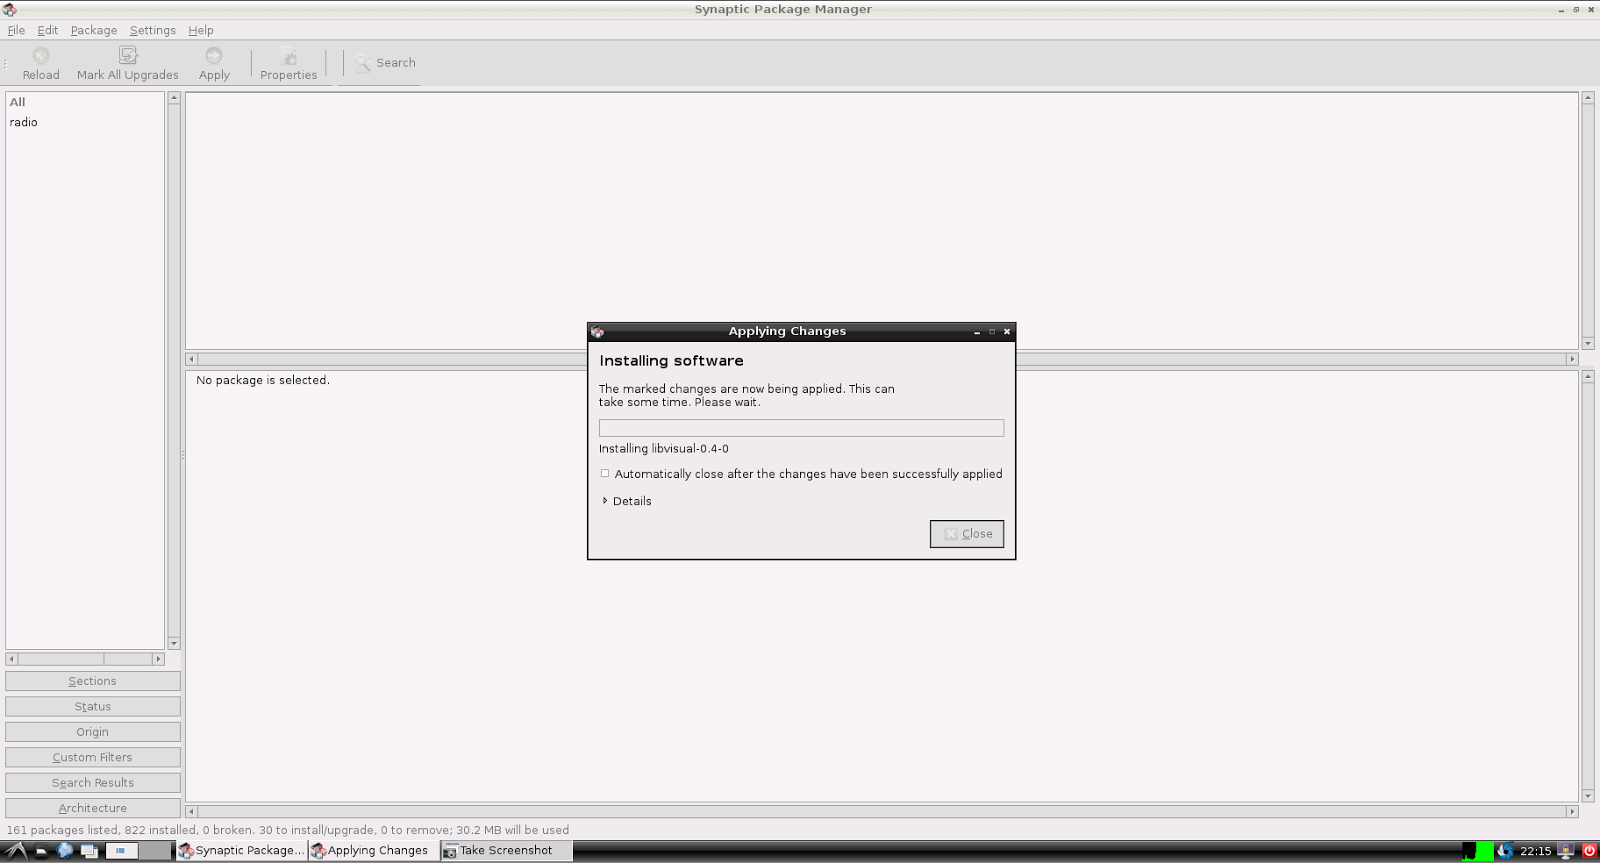
To install software click Menu -> Settings -> Install/Remove software. The Synaptic package manager loads and you are able to search for software to install.

Within Synaptic to install software you first mark the software for installation and then click apply to actually install it. This means you can mark multiple applications for installation and then install them all at once. You will also be told of any libraries or applications that your chosen applications depend on.


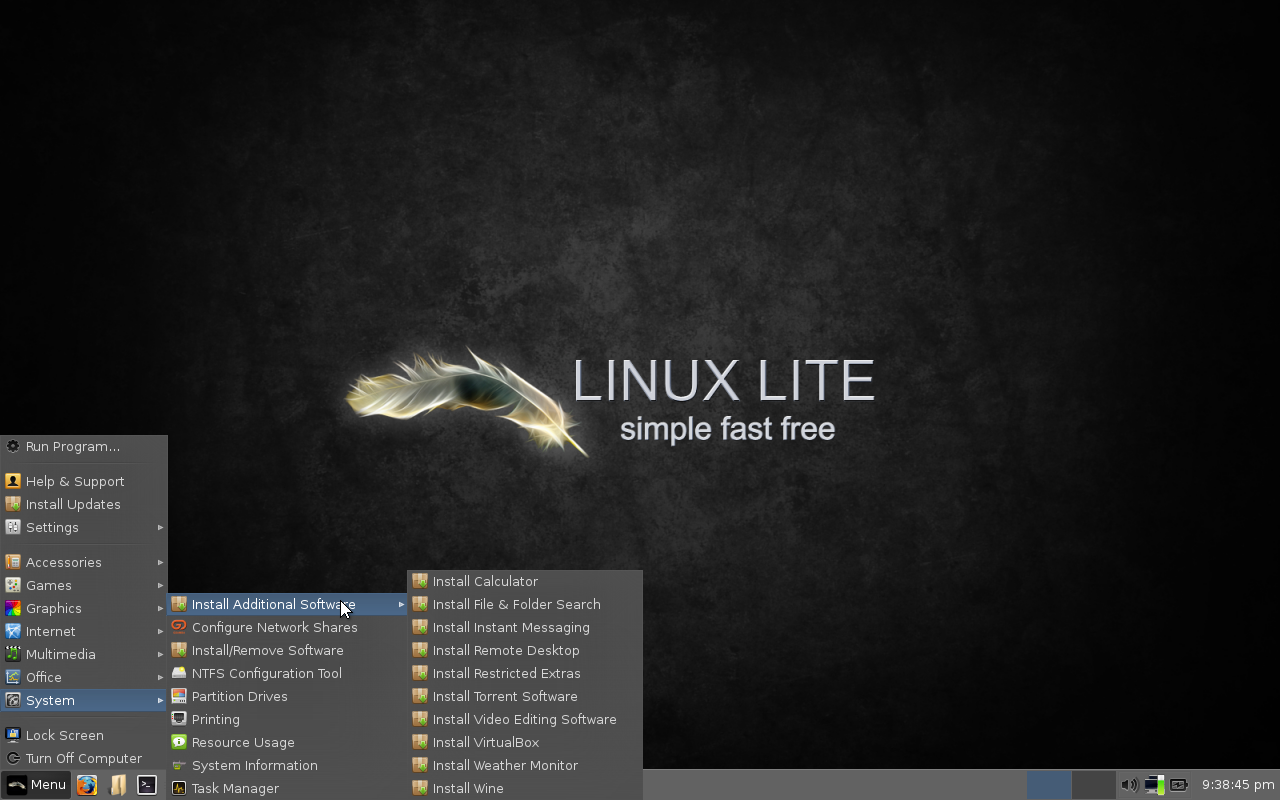
As well as Synaptic, Linux Lite also provides a menu to install more common applications.

To access the list click the menu icon and then Install Additional Software.

You can now install a calculator, file and folder search, instant messenging, remote desktop, restricted extras, torrent software, video editing, virtualbox, weather monitor and/or Wine.


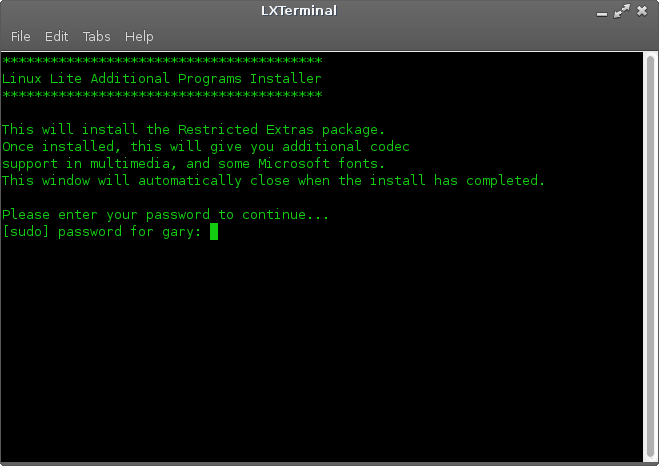
The restricted extras package includes proprietary libraries and applications which enable the use of Truetype Fonts, Java, Flash and the ability to playback MP3s.

If you chose the install third party software option when installing Linux Lite you might not need to install the restricted extras package but if you find Flash and MP3 playback doesn't work then installing the restricted extras package will fix this.

Installing Virtualbox enables you to install other operating systems in virtual machines.

Installing Wine enables you to run Windows programs within Linux Lite.
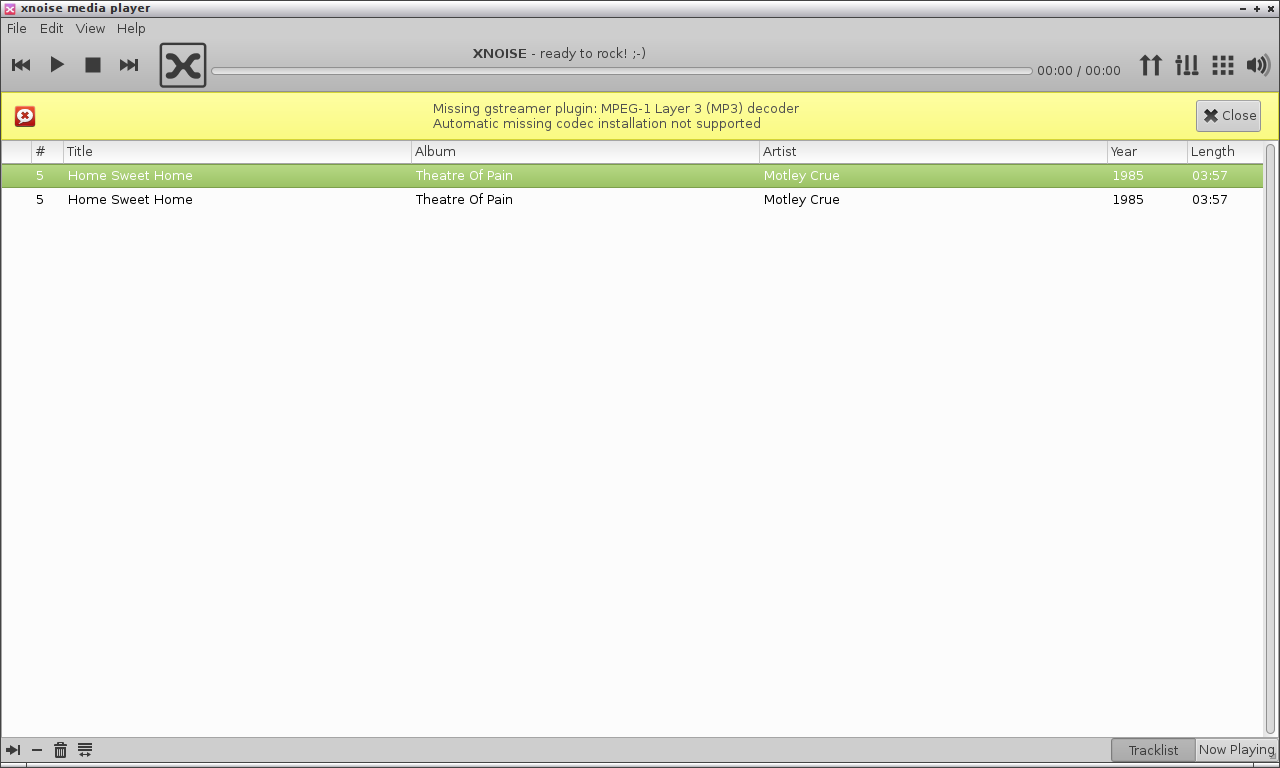
Flash and MP3


I didn't check the install third party files option when installing Linux Lite so I went straight for the restricted extras package.

After installing the restricted extras package I was able to watch Eden Hazard's assault of a ball boy during the league cup semi-final on Wednesday night.

For listening to MP3s I noticed a glaring exclusion in the list of pre-installed applications. There isn't a music player installed. (Although VLC is available).

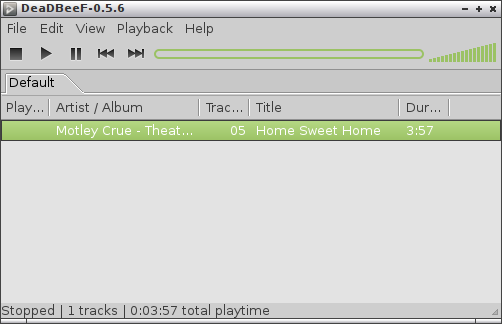
To get around this problem I installed Guayadeque which I have to say has grown on me as an application in the last month as I use this as my default music player on the Raspberry PI.


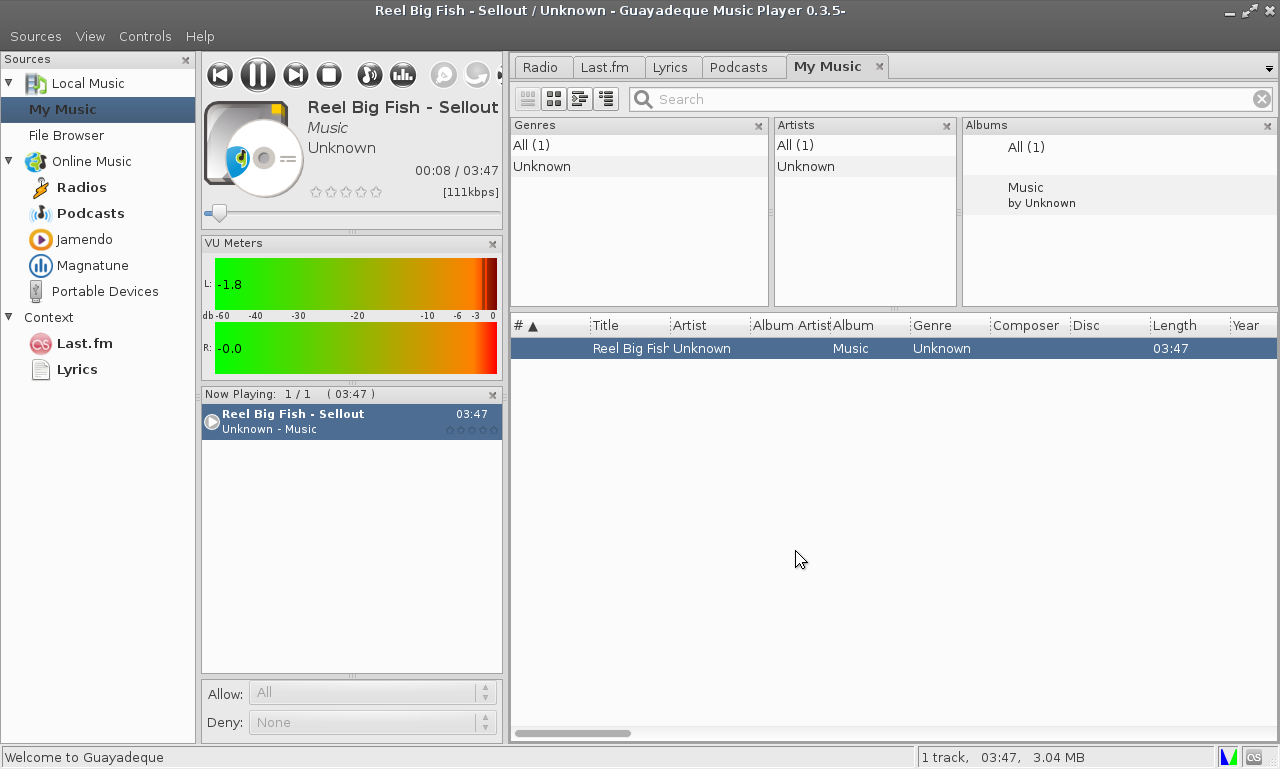
The MP3s on my computer played back perfectly with no GStreamer errors which is normally the case when MP3 codecs aren't installed.

Customising the desktop

To change the background right click on the desktop and choose desktop settings.

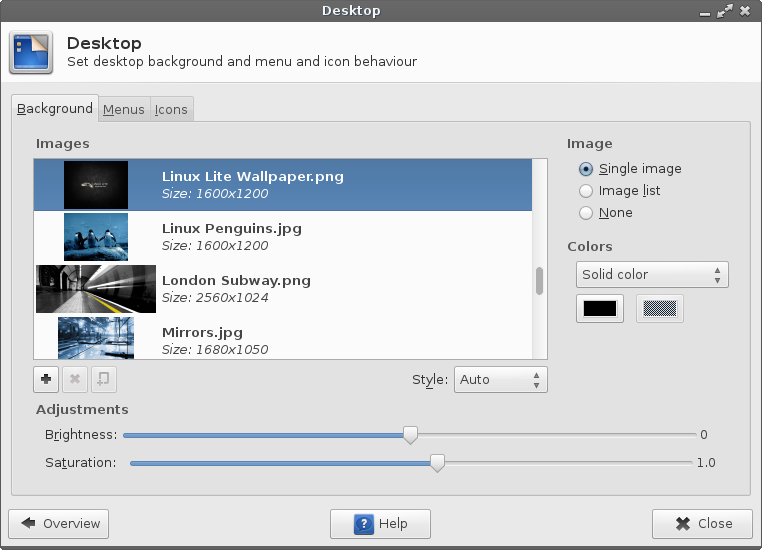
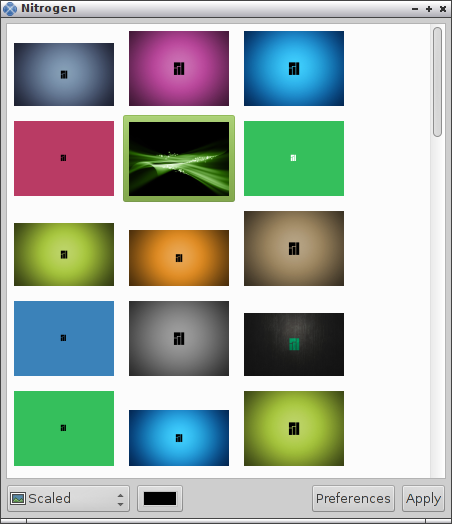
A settings window will open and you can choose to change the background to one of the pre-installed backgrounds or you can choose one that you downloaded.


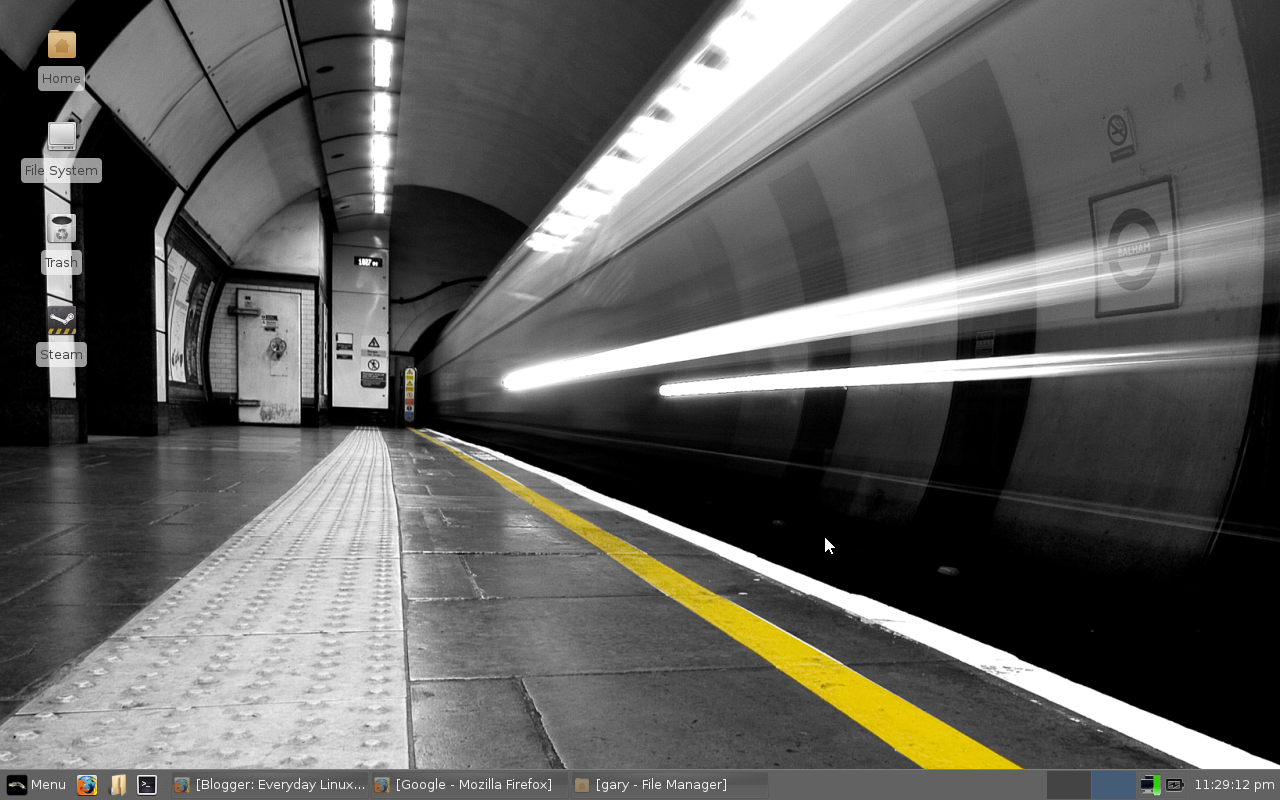
There you have it, something a little more colourful although still a bit drab. If you don't like that one there is actually a really nice set of images provided with Linux Lite as the next image shows.


Applications

Accessories

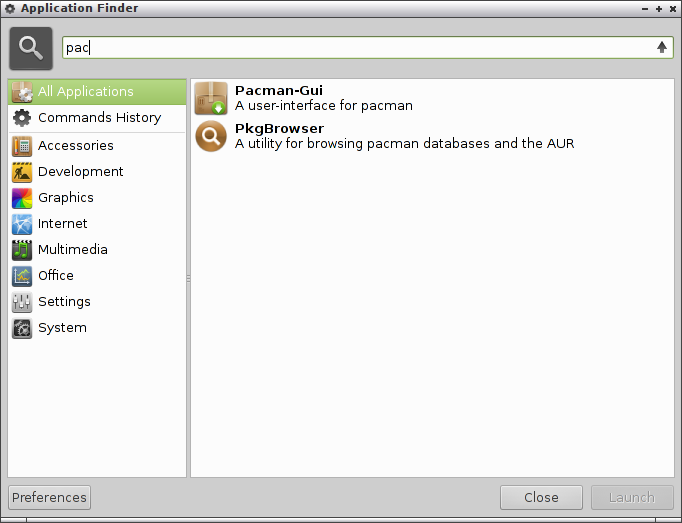
  • Application Finder - Makes it easy to find applications
  • Screenshot - Screenshot capturing
  • Task Manager - Task Manager similar to the one in Windows
  • Terminal - Terminal
  • Leafpad - Text Editor
  • XArchiver - File Compression

Games

  • Steam
  • Link to buy Humble Bundle games

Graphics

  • GIMP - Image Editor
  • Ristretto - Image Viewer

Internet 

  • Firefox - Web Browser
  • Mumble - Voice Chat
  • Thunderbird - Email Client (Similar to Outlook)
  • Network Manager - Set up wireless connections
  • XChat - IRC Chat

Multimedia

  • Xfburn - CD/DVD burning
  • Audio Mixer - ALSA audio mixer
  • PulseAudio Volume Control - PulseAudio volume control
  • VLC Media Player - Video player

Office

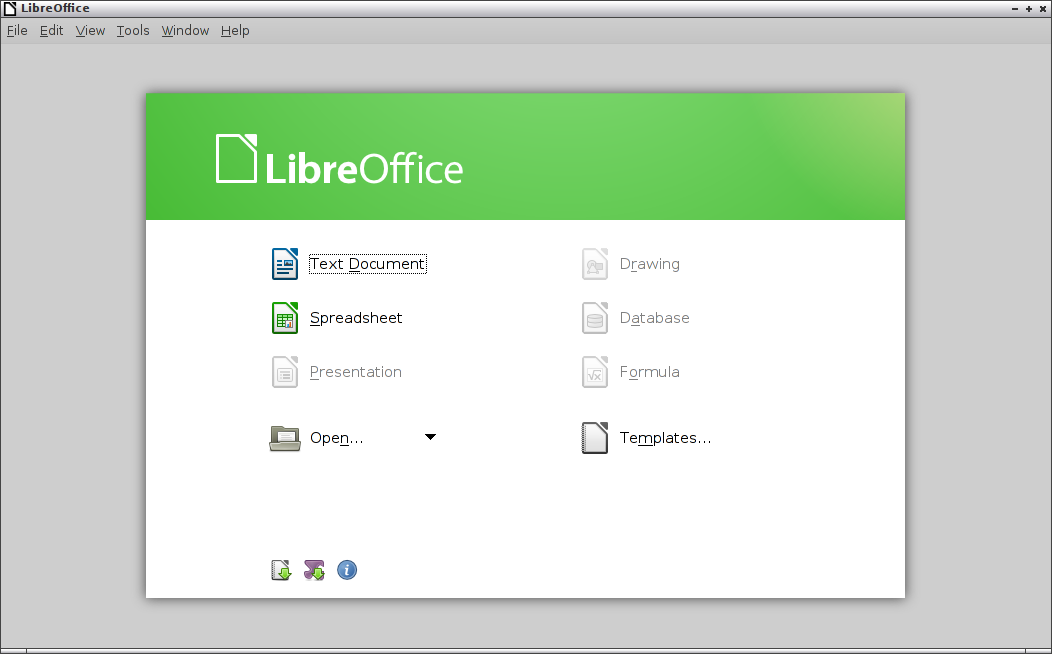
  • LibreOffice Write - Word Processor
  • LibreOffice Calc - Spreadsheet
  • LibreOffice Impress - Presentation
  • PDF Viewer - PDF Viewer

Summary

At the beginning of the article I made mention of the fact that Linux Lite is supposed to be easy to use and lightweight in nature.


If you are coming from a Windows environment you will feel instantly familiar with Linux Lite and it will certainly breed new life into older hardware.

Connecting to the internet is easy and Firefox is an adequate web browser although not as good as Chromium (in my opinion).

By default you will have most of the applications installed that you need for common activities including LibreOffice and GIMP. There is also a quick access list to install other applications. Synaptic is also a very good tool for searching and installing applications from the Ubuntu repositories.

The list of installed applications is a bit eclectic. I wouldn't particularly say any of them are lightweight so really the only lightweight part of the system is the use of XFCE. There is also the glaring lack of an audio package.

Linux Lite is very responsive. The boot times are good and I feel very comfortable using Linux Lite in the same way I feel comfortable using Zorin OS Lite or Peppermint OS.

I also have to mention that Linux Lite is very stable. No crashes and no real issues have been encountered thus far and I have been using Linux Lite for a week.

All in all Linux Lite is still in its infancy at version 1.0.4 so its true place on the Linux landscape has yet to be determined but it is has a good starting point to build from.

Thankyou for reading.

Click here to download Linux Lite


To make it easier for everyone who wants to read my Ubuntu based articles and tutorials I have formatted them, rewritten them and added extra content which has resulted in the eBook "From Windows To Ubuntu".

The book isn't massive like a SAMS guide so it isn't going to take you forever to read it but there is certainly a lot of content.


Thursday, 17 January 2013

Everyday Linux User Review of Manjaro Linux

Introduction

It is the middle of January and I realise that it has been almost a month since my last distro review which was a review about the latest version of Slacko.

There have been a number of new releases announced since the beginning of the year but the one that caught my eye was Manjaro Linux Openbox edition.

Manjaro welcomes another addition to the family in the form of our brand-new Openbox flavour. Designed and built exclusively by the Manjaro team, this lightweight, sleek, and super-fast flavour comes with a unique twist - traditional menus are not used to find and launch applications. Instead, the heart of the desktop is Synapse. At first glance comparable to a typical menu search bar, Synapse is in fact a very powerful and versatile tool that boasts a wide range of useful features, particularly due to the optional plugins available. Some of these features include: locating and launching applications faster than menus; accessing specific file types such as documents, pictures and movies....
I have never tried an Arch based distribution before so this was a step into the unknown which is what this year is going to be about for me. I am going to step out of the comfort zone and learn some stuff.

Installation

I downloaded the Manjaro ISO from http://sourceforge.net/projects/manjarolinux/files/release/. There are a number of different versions available. I went for the OpenBox version as this was the version the developers were excited about on Distrowatch.

My usual method for installing a distribution is to use Unetbootin to put the distribution onto a USB drive and then boot the live image onto the machine that the distribution will be installed to. Then I install the operating system to the hard drive.

This didn't really go to plan with Manjaro. The download went fine as did installing the distribution onto the USB drive. Unfortunately when I booted the Samsung R20 laptop it showed the Unetbootin menu for Manjaro but would not go any further. I did a quick search on Google and it seems other people have experienced this problem as well.

I therefore went for "Plan B" which was to burn the image to a CD and boot from there. This worked perfectly and the system booted into a live version of Manjaro. I had a quick play with the live version and then went for the Install (to do this I had to right click on the desktop and choose Install).

There are two installers available, one is described as stable and the other not so stable. The not so stable option handles things such as EFI. I went for the stable option.

The install process is actually fairly intuitive. The first thing is to choose the language and timezone. Then you set up the partitioning. You can choose to use assisted partitioning or you can partition the drives yourself. I went for the assisted partitioning option whereby I was asked which drive to use and the sizes for boot, home and swap partitions as well as the file system to use. I generally went for the default options.

The next step was to install the system. This was just a case of waiting for the files to be extracted and installed. 

There were various optional configuration options that were available such as setting locales and keyboard layouts but these were already set for my preference.

The final step is to install a bootloader. I installed GRUB. 

The whole installation is menu based and you go through the menu options one by one until the system is installed. It really isn't any more difficult than installing Ubuntu except you have a more command line based installer as opposed to a graphical installer. I can imagine for people new to Linux that this would appear more daunting than it actually is, especially when it comes to working out the partitioning.


First Impressions


The first few seconds of the boot up were a little bit unnerving. I selected Manjaro from the boot menu and what can only be described as hieroglyphics scrolled up the screen. There was nothing to worry about however because after about 10 seconds the above screen appeared.

The boot time is very impressive. I have been using the system for a number of days now and it consistently boots up within 10 to 15 seconds.

Other than the stylish wallpaper there is a task bar at the top split into sections. The first section of the taskbar is used to highlight the applications that are currently running. The second section has icons for network connectivity, audio settings and an icon for the Synapse search tool which will be described later on. Following this there is a section which provides the battery status and a calendar. Finally there are 4 boxes to indicate the individual virtual desktops that are available.

Connecting to the internet


Manjaro set up my wireless card for me and this meant my home broadband and wireless broadband were available straight away.

All I had to do to get online was to click the network icon on the task bar, choose the network I wanted to connect to and enter the appropriate security key.

The default browser in Manjaro is Midori which is common among lightweight Linux distributions.

Installing Applications

When it comes to doing anything on the internet I prefer to use Chromium which brings us onto the subject of how to install applications.

Manjaro is very easy to navigate and I'll come onto this in more detail later on.

Right clicking anywhere on the desktop brings up a menu which has an option called AppFinder which provides list of applications. If you scroll down the list you will find Pacman which is used for managing packages within Manjaro.

The main Pacman-gui screen has a number of buttons for doing various tasks. 


The first button I clicked was the one marked "Open PkgBrowser". Unfortunately whilst the application opened I received a number of Python errors.

At this point I looked back at the Pacman-gui screen and spotted the "Sync DB" button. Pressing this button caused the update of the repositories within Manjaro. When I pressed the "Open PkgBrowser" button again there were no further Python errors.

The PkgBrowser utility enables you to search the repositories to see what applications are available.

In the top left window is a list of categories to search. These are structured by the different repository groups rather than standard categories. So instead of browsing by Audio, Games, Office etc you browse by Extras, Foreign, Community, Platform etc.

The easiest way to search for applications is to enter a search term. The search tool is very powerful. You can search by simple keywords or you can use regular expressions. You can choose to search by application name or by description and various other values. It is also possible to search by scope such as only search for applications already installed or search for applications not installed.

When you press the search button a list of applications appear in the top right hand corner. If you click on an item then a description appears in the bottom right hand corner. 

The one thing I couldn't actually work out within Pkgbrowser is how to actually install an application. I looked through the help file but it gave no clue. Perhaps this isn't an option which would be a shame as it means after finding the application you want to install you have to use another tool to actually install it.

At this point I decided to exit the Pkgbrowser and look at some of the other options within the Pacman-gui. Another way to search for packages is to click the "Search packages" button.


A much more simple interface appears. Simply enter a name or keyword of the program you want to install and click the "OK" button.


Ubuntu users might get a slight shiver at this point as the results appear in a terminal window. Functionally wise of course there is no difference. The terminal window shows you all the packages that are available and there is a clear instruction that to finish searching all you need to do is press enter on the keyboard.

To actually install packages you have to press the "Install Packages" button on the Pacman-gui screen.


Similarly to the search function the install packages function enables you to search by name or keyword. If you search for a term such as "Gnome" and press "OK" a list of packages will appear that contain the keyword "Gnome".

In my case I wanted Chromium so I entered Chromium in the search box and pressed "OK".

A list of targets appeared along with the total download size and the total installation size.

After pressing "Y" to proceed with the installation the packages were downloaded and installed.


Flash


Flash is installed by default within Manjaro and so once Chromium was installed I was instantly able to go online and watch videos.

Audio

I had problems with the default music package in Manjaro which is XNoise.

I tried to play a few MP3 files but I received the error "Missing gstreamer plugin: MPEG-1 layer 3 (MP3) decoder. Automatic missing codec installation not supported".


My first thought was to check the repositories to see whether I had the GStreamer plugins installed, specifically the bad and ugly packages. They are both installed by default so that was not the problem. I then searched the web but unfortunately I have not yet found a resolution to this issue.

All was not lost however because instead I decided to install another music player called DeaDBeef which had no issues at all with playing the MP3s.


Navigating Manjaro


I think my favourite thing about Manjaro is the ease of navigation. When the computer first boots in Manjaro you are shown the Synapse search tool.

In this search tool you can enter the name of an application, a document, a music file, a movie, a picture or just a basic internet search term. Synapse will find all the files that match your search and will load the relevant application.

For instance if you type "Chromium" into the search box then Chromium will load when you press enter. If you search for "Looks that kill" (Motley Crue, 1980s) then the default music player will load and the track will start playing. 

The way Manjaro is set up I can start from cold boot and be logged in to Blogger in 15 seconds within the Chromium browser. That is truly impressive. Who needs a hibernate mode?


Of course if you are new to Manjaro you might not know which applications are installed and so the search tool might not help all that much. To see which applications are installed right click on the desktop and choose AppFinder.

The Application Finder is a simple to use graphical tool to find the applications that are installed within Manjaro.

The left hand pane has a list of categories and the right hand pane shows the applications within each category.

You can use the search tool at the top to enter a keyword such as "audio" or the name of an application such as "DeaDBeef".


Applications

The following applications are installed by default within Manjaro. 

Accessories:

AppFinder - Used to launch applications
BulkRename - Rename multiple files
Leafpad - Text editor
Synapse - Search tool
Thunar - File manager

Development

DevHelp - Developer's help program
Qt Assistant - QT documentation and examples
Qt Designer - Design GUIs for QT applications
Qt Linguist - Add translations to Qt applications

Graphics

Viewnior - Image viewer

Internet

Avari SSH Server Browser - Browse for zeroconf-enabled SSH servers
Avari VNC Server Browser - Browse for zeroconf-enabled VNC servers
Midori - Web Browser

Multimedia

Audio Mixer - Volume control
Brasero - CD/DVD burner
PNMixer - System tray audio mixer
QT V4L2 test utility - Allow testing Video4Linux devices
Xnoise - Music player

Office

ePDFViewer - PDF Viewer

Other

There are also various other system tools and settings programs such as Pacman, GParted and XTerm.

Installing LibreOffice

LibreOffice is not installed by default but there is a LibreOffice installer available from the Synapse search tool.

You can choose which applications to install as well as the languages.

When you press continue the selected applications will be installed.

I read on another forum that this application did not work very well but I can confirm that in the Openbox version of Manjaro there is no issue whatsoever as can be seen by the screenshot below.


Customising the desktop

If you aren't happy with the default wallpaper you can customise it by right clicking on the desktop and choosing the change background option.

There are a number of different wallpapers available but most of them are the same theme but in different colours.

If you want to choose your own image click the preferences button and click the add button to choose the folder where your image resides. Your image will then appear in the window.

You can choose any of the wallpapers in the main window and when you click apply the desktop will change to your chosen image.


Summary

There are a lot of things to like about Manjaro Linux. First of all the boot time is amazing even on the ageing laptop that I have used to test it on. 

The search tool is really useful and the whole experience is fresh and clean. The taskbar at the top is unobtrusive and the AppFinder completes the set of tools needed to navigate the system.

The package management isn't quite as crisp as I'd like it. There are a number of tools that enable you to search the repositories but then do not provide a final install button. The "Install Package" option works perfectly well though.

For experienced Linux users Manjaro provides a clean and highly responsive system. It is unobtrusive and you spend more time doing the things you want to do and less time having to configure the system and work out hot keys, hot spots and gestures.

Thankyou for reading.


Wednesday, 9 January 2013

Everyday Linux User guide to installing applications on the Raspberry PI

Introduction


This guide shows you how to install applications from the available software repositories.

Step 1 - Use Apt

The method I like to use to install applications is via a tool called Synaptic which is  a graphical tool that enables you to search for applications by name or by type.

Unfortunately Synaptic isn't installed by default within Raspbian and so if you wish to use this application you need to install it first.

The first method I am therefore going to show you for installing applications is APT. (Advanced Package Tool).

This is not an in-depth guide for APT because for the everyday linux user the Synaptic GUI will work just fine.

This will however give you a little bit of a grounding of how to install applications if Synaptic is unavailable.

Open up a terminal window by clicking the LXTerminal icon on the desktop.


Type sudo /etc/apt/sources.list and press return.


The sources.list contains the list of repositories that will be used by the APT application to build up the database of applications that can be downloaded and installed onto the Raspberry PI.

Each line contains a different repository location. Therefore looking at the default sources.list you will see there is just one line as follows:

deb http://mirrordirector.raspbian.org/raspbian wheezy main contrib non-free api

So what does it all mean? Well "deb" is the type of repository which in this case means it is a debian repository. Other types include RPM and Repomd but for the Raspberry Pi running Raspbian we only care about debian packages.

The next part is the location (URL) of the repository.

Following that is the distribution which in our case is Wheezy.

The rest of the items are categories under which applications are based.

You don't need to do anything with this file. This is just a little bit of information which lets you know where APT is getting its data from.

Press CTRL and X to exit.


So the real point of this section is to learn how to download packages using APT so that you can download Synaptic.

The first thing to do is to make sure the APT database is up to date. You can do this by typing sudo apt-get update into the terminal window.


To search within APT you can use the command sudo apt-cache search x where X is the search term. 

Therefore to search for Synaptic you would type sudo apt-cache search synaptic. This will return a list of packages with Synaptic in the name or description.


To install Synaptic all you need to do is type sudo apt-get install synaptic.

In the image above you can see that I have decided to install the Chromium web browser instead. This is because I already have Synaptic installed.

When you use the apt-get install command you will get a message telling you exactly which packages will downloaded and installed and how big they are.

If you are happy to continue installing Synaptic press Y to continue.

Text will scroll up the screen showing you what is going on. Basically this will include several packages being downloaded and then installed.

When the process is finished type exit to close the terminal window.

On the menu under System there should be an option for Synaptic.

Step 2 - Using Synaptic


Run Synaptic by selecting it from the menu.

You will be greeted by a login window. You will need to enter the password you set up for the pi user and press ok.


Synaptic will load in the background but the message above will be displayed telling you the purpose of Synaptic and package management in general. Notice that there is a "show this dialogue at startup" checkbox. If you do not want to see this message every time you run Synaptic uncheck the box and then click the close button.


Synaptic provides a much more visual way of viewing the packages that are available in the Raspbian repositories.

On the left hand side is a list of categories and on the right the packages that are available in the selected category.


If you want to find a particular application by name or by description click the search button.

A little dialog box will appear. Enter the name of the application or a description of the application and click search.

On the Raspberry PI it takes a little while to search the repositories and progress can be monitored in the bottom right hand corner of the screen in the style of a blue progress bar.


A list of available packages will appear in the right pane which matches the search term.

To get more information about a package click it once with the left mouse button.

A description of the application will appear in the bottom pane.

To mark an application for installation click the checkbox next to the application. You can queue multiple installs by checking boxes next to all the applications you wish to install.

When you are ready to install the application or applications click Apply.


A window will appear showing you which applications will be installed and any required dependencies that will need to be installed as well as the applications you have chosen.

To continue the install click the Mark button.


You get one last chance to cancel the install at this point. The above window will appear showing how big the download is and the list of packages that will be installed. If you are happy to continue click Apply.


A window will appear showing you the progress of the downloads and how long it is expected to take.


When the downloads are complete another window will load showing you the progress of the actual installation.

Finally once all this is done your chosen applications will be installed.

The PI Store

If you want to try some homebrew applications then check out the Raspberry PI store


Summary

For seasoned Linux users downloading applications is second nature but for people coming to Linux for the first time and especially users whose first experience of Linux is the Raspberry PI it isn't necessarily obvious how to install new applications.

I hope this guide goes someway to helping you with your Raspberry PI experience.

Thanks for reading.


Monday, 7 January 2013

Everyday Linux User Guide To Setting Up The Internet On The Raspberry PI

Introduction

In my last article I showed you how to set up a Raspberry PI for first time use. This will have hopefully helped you to get a working system.

If you are a novice with regards to Linux then you may have had a play around with the applications that have been installed but you might be stumped when connecting to the internet.

The article shows two ways to connect to the internet using the Raspberry PI. The first way uses the graphical tool provided. The second way shows how to connect to the internet using the command line. Whilst ordinarily I would recommend using the GUI sometimes it isn't available and so knowing both ways helps in the long run.

Connecting to the internet using the WIFI config tool

This guide assumes that you are running the Raspbian operating system.


Setting up a WiFi connection is relatively easy.

First click the WIFI Config icon as highlighted in the image above.


The wpa_gui tool will load. If you have a wireless USB dongle plugged in to your USB hub then you should see an adapter in the adapter dropdown. Make sure that the adapter is selected. It probably says wlan0.

Now click scan.


The scan results should show all the wireless networks in your vicinity. As you can see from the image above I have two networks available.

It is worth taking a note of the values in the flags column as it is useful for the next step.

Double click the wireless network you wish to connect to.


What do all the boxes mean?

SSID: This is the public name for the network.
Authentication Method: Open, WEP, WPA or WPA2. For home use you are likely to need WPA_Personal (PSK) or WPA2-Personal (PSK). 
Encryption: TKIP or CCMP. For WPA it is likely to be TKIP and for WPA2 CCMP.
PSK: The encrypion key (Only use for personal, not enterprise)
EAP Method: You only need to worry about this if you are using WPA Enterprise or WPA2 Enterprise but this is the authentication protocol used for the network you are connecting to.
Identity: The identity required to connect to the network (Enterprise only)
Password: The password required to connect to the network (Enterprise only)
CA Certificate: The certificate authority (Enterprise only)
WEP Keys: If the authentication method is WEP then this is the key required to connect to the network. (WEP Only)

Now all of that is probably very confusing. The simple way to know what to set is to look at the flags column in the scan results screen.

The flags column tells you what you already need to know. For me it says WPA-PSK which lets me know that I need to choose WPA_Personal. It also has TKIP in the flags column which tells me I need to set the encryption method to TKIP.

Now all I need to do is enter the security code into the PSK box.

Had the flags column said WEP then I know I'd have needed to select WEP and entered the key into the WEP keys box. Had the flags column shown CCMP instead of TKIP I know I would have had to set the Encryption dropdown to CCMP.


The wpa_gui screen should now have networks available in the dropdown list. Change the network dropdown so that you see the network that you set up in the previous step.

Click Connect.

At this point you should now have an internet connection.

To test it out run the Midori browser from the desktop and try loading www.everydaylinuxuser.com.

Connecting to the Internet using WPA_Supplicant

The method shown in the previous step works for Raspbian but if you run other versions of Linux then there might be other graphical tools that are supplied for connecting to the internet. Most of the graphical tools are easy to use but with the Raspberry PI it is likely that you will connect to the same network every time as it isn't really a mobile device like a phone or a tablet. With this in mind do you really need a GUI to set up the internet? Wouldn't it be better to learn one way of connecting to the internet that will work on most versions of Linux?

This little guide will show you what the GUI was doing in the background to connect to the internet so that if you ever needed to you can create a wireless connection from the command line.

Note that if you have followed the first part of the tutorial then the configuration files will probably already be set up with all the correct settings so you will not need to edit the files at all but you can still view them for reference purposes.

First of all load up the terminal. To do this click the LXTerminal icon on the Raspbian desktop.


The first thing we are going to do is set up the network interface. Enter the following text into the terminal window:

sudo nano /etc/network/interfaces


In my interface configuration I have given the Raspberry PI a static network address so that I can connect to it using SSH and I will know that the address will be the same every time. That however is for a different article that will come later on.

The lines you are interested in are really the last 4. So make sure your file has the following lines in it.

auto lo
iface lo inet loopback

allow-hotplug eth0
iface eth0 inet dhcp

allow-hotplug wlan0
iface wlan0 inet manual
    wpa-roam /etc/wpa_supplicant/wpa_supplicant.conf
iface default inet dhcp

So what does it all mean?

Well the two sections you are really interested in are the ones starting allow-hotplug eth0 and allow-hotplug wlan0.

The allow-hotplug eth0 will detect when an ethernet cable is plugged into the Raspberry PI and connected to the router. When this happens the iface etho0 inet dhcp will use DHCP to connect to the network. In its simplest form the internet connection will be created via the ethernet cable.

The allow-hotplug wlan0 will detect a wireless interface and will use wpa-roam with the configuration file in /etc/wpa_supplicant/wpa_supplicant.conf.

Using this information you will hopefully realise that you need to add some more settings to the file /etc/wpa_supplicant/wpa_supplicant.conf.

Press Ctrl and O to save the /etc/network/interfaces file and press CTRL and X to exit nano. (Nano is the editor)

Now type sudo nano /etc/wpa_supplicant/wpa_supplicant.conf into the terminal.


You will need to enter the lines of code from the image above into your terminal window.

It isn't a simple copy and paste though as you will need to replace the ssid with the name of your network and the psk with the security key used to connect to the internet.

Proto will be one of RSN or WPA. The key_mgmt will be set to either WPA_PSK or WPA_EAP and depends on your router. Pairwise will be set to CCMP or TKIP. Finally auth_alg can be either OPEN, SHARED or LEAP. This is the same information as highlighted in the GUI section of this article earlier.

If you followed the first part of this tutorial to set up the wireless using the WIFI config tool it is highly likely that most of the information is already entered into this file (if not all of it). Just keep a copy of this file safe and if you choose to install a different version of LINUX to connect to the same internet connection you can just copy the file into the /etc/wpa_supplicant folder.

Now press CTRL and O to save the file and then CTRL and X to exit the file.

Close the terminal and reboot your Raspberry PI. Your internet connection will start automatically every time.

Summary

For a lot of people the WIFI Config tool will be perfectly adequate for connecting to the internet but by knowing what the tool is doing in the background you can use this knowledge for future reference as the GUI tools might not always be available.

In the example above the WIFI Config tool will have amended the /etc/network/interfaces file and placed a link to the wpa_supplicant.conf file with all the correct settings as specified within the GUI. If the config tool had not been available you would have needed to edit the network interfaces file and the wpa_supplicant configuration file yourself.

I hope this article has been useful.

Thankyou for reading.