
Introduction
This is part of a series of articles showing in the easiest possible terms how to download, install and use Linux.
The reason for doing this is that there are a large number of users that are using older versions of Windows who for whatever reason haven't yet upgraded to Windows 7 or Windows 8.
Windows Vista may not have run out of time yet but it is certainly not high in the list of priorities for Microsoft.
Linux is a very viable option for Windows Vista users not ready to upgrade their computers.
In this article I will show you how to create a DVD containing a live version of Linux (and in particular PCLinuxOS) that you can use on your computer without replacing Windows. You will be able to use the PCLinuxOS DVD to evaluate its features and subsequently to install PCLinuxOS on your computer.
What you will need to follow this guide
To follow this guide you will need:
- A computer with at least 512 MB RAM running Windows Vista
- A DVD writer
- A blank DVD
- A working internet connection
1. 32 bit or 64 bit
If you already know the answer to this then you can skip to step 2.
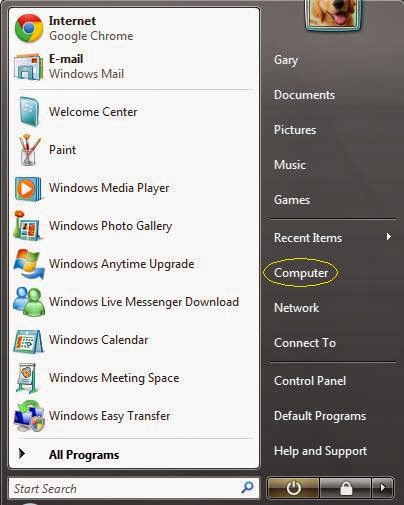
To find out if your computer is 32 bit or 64 bit press the Start button on your computer and choose the "Computer" option.
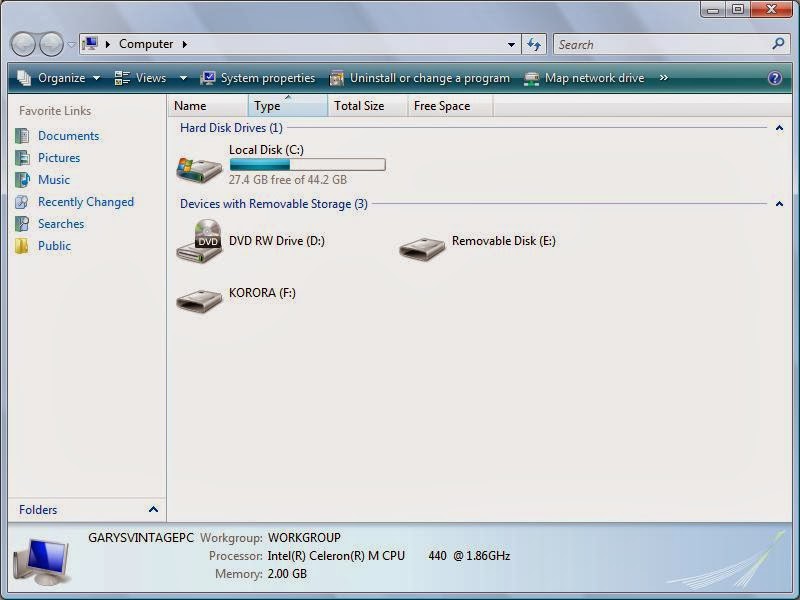
At the top of the "Computer" screen is a menu option which reads "System Properties". Click this link.
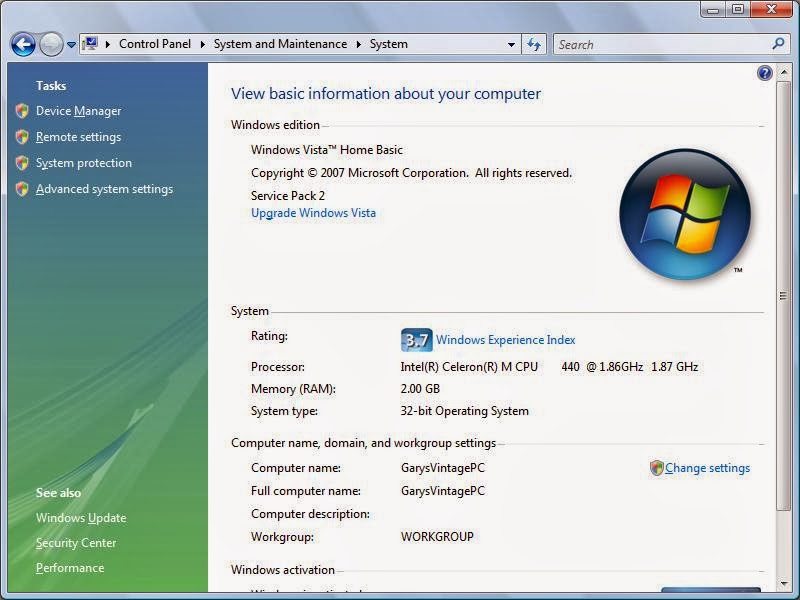
The system information screen tells you about your system, including the version of Windows you are using, and the computer's specifications.
The "System Type" will tell you whether you are using a 32-bit computer or a 64-bit computer.
2. Download PCLinuxOS
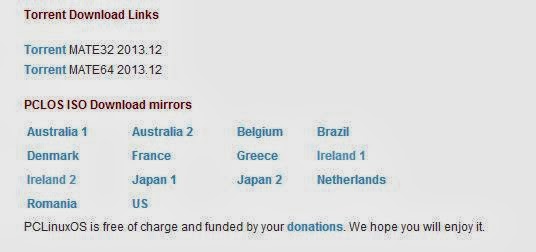
To download PCLinuxOS visit http://www.pclinuxos.com/get-pclinuxos/mate/#PCLOS mirrors
The version that I am recommending uses the MATE desktop as it is lighter on resources than the KDE default and is therefore more likely to work with any computer currently running Windows Vista.
If are used to using BitTorrent software then you can click on the relevant torrent link. (32 bit if you are installing on a 32 bit computer and 64 bit if you are installing on a 64 bit computer).
To download PCLinuxOS directly, click on the name of the country closest to you.
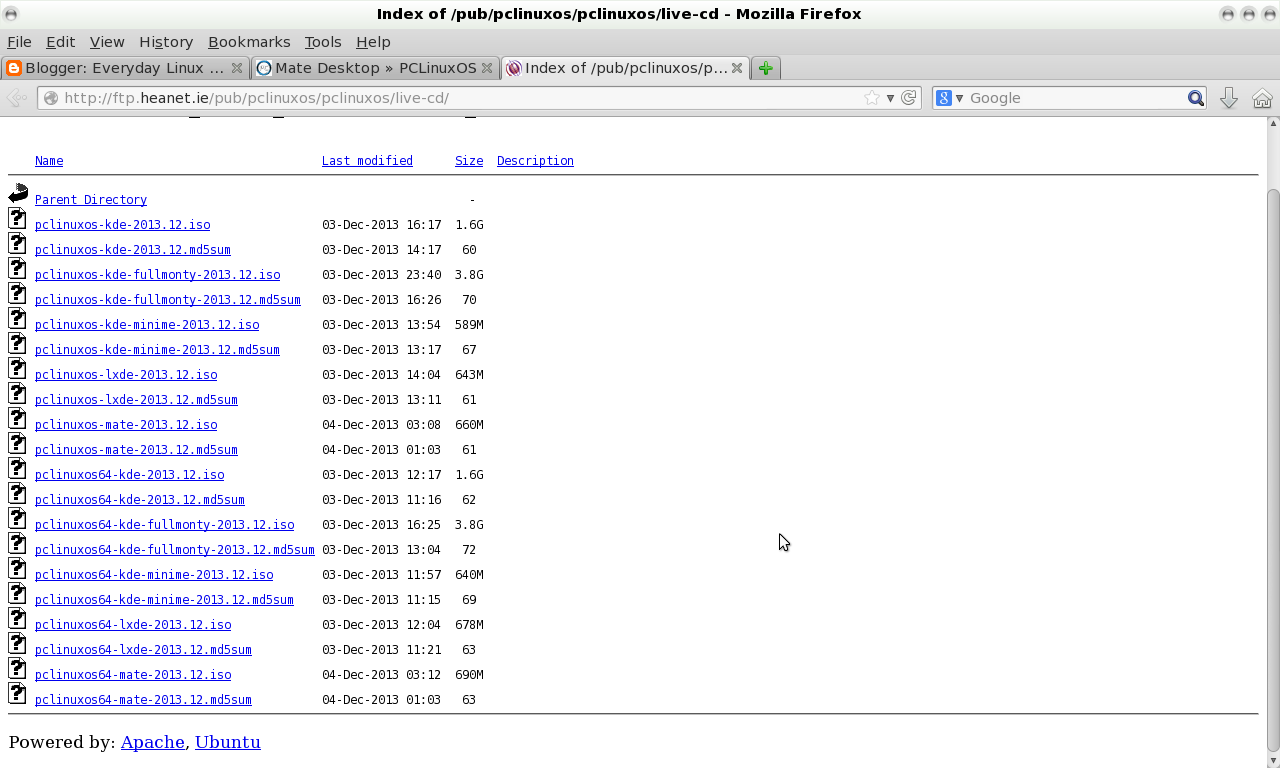
There are a lot of links on the download pages but the one that will work the best for most Windows XP users is the MATE version.
If you have a 64 bit computer click on the link that is something like the following:
- pclinuxos64-mate-2013.12.iso
If you have a 32 bit computer click on the link that is something like the following:
- pclinuxos-mate-2013.12.iso
The file should start to download.
(If you are using Internet Explorer then a little bar may appear at the top of the screen asking for permission to open the link, click on the bar and allow the link to be opened).
The file size is just 660 MB and so shouldn't take too long.
3. Install Disc Burning Software
To be able to create a DVD containing Linux you will need to use disc burning software.
It may be the case that you already have disc burning software on your computer but this guide assumes that you haven't and therefore this section looks at installing the software "CDBurnerXP" which can be downloaded and used for free.
To download CDBurnerXP, visit .
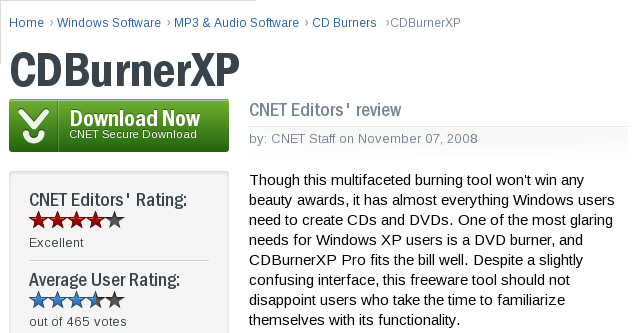
Click on the large "Download Now" button to begin the install.
Once the download has completed run the installer by double clicking on the downloaded file.
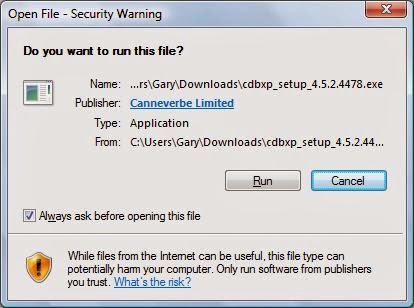
Vista shows a security warning to prevent you accidentally installing dodgy software. Click "Run" to continue.
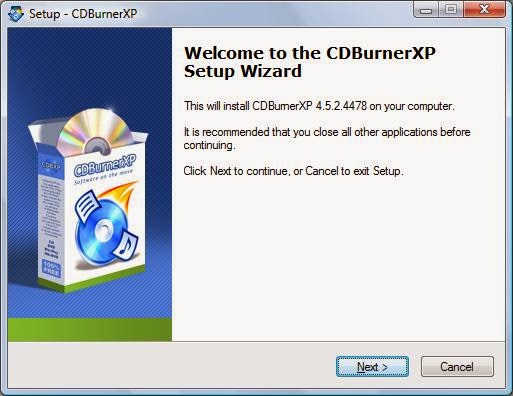
The first screen shows you a welcome message. Click "Next" to continue.
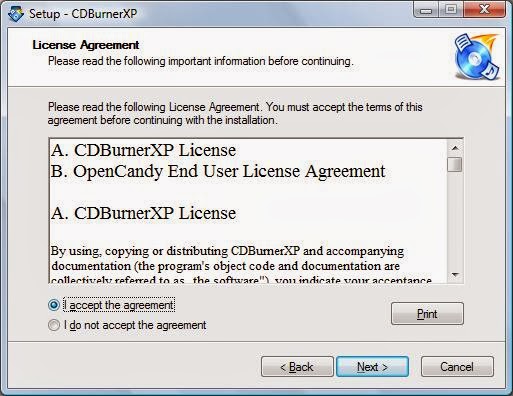
The second screen shows you the license agreement. You have to accept the agreement to continue so just click "Next".
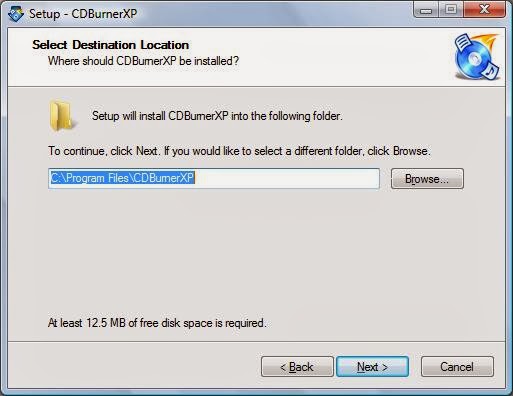
Choose the location where you want to install the software. Generally speaking you can leave the default location and just press "Next".
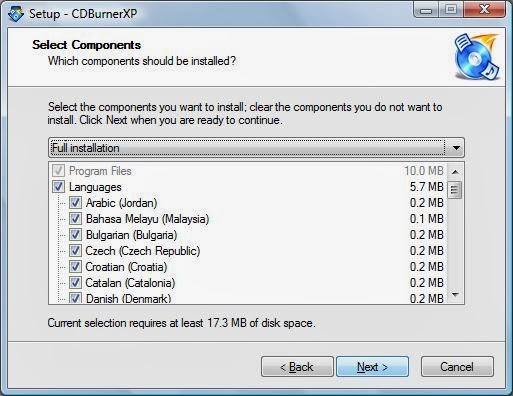
You can now choose to perform a full installation, custom installation or minimal installation.
The full installation installs all the language files. The application isn't that big so it won't take much disk space to install the whole thing.
Alternatively you can choose to remove the languages you don't need.
When you are ready to continue press "Next".
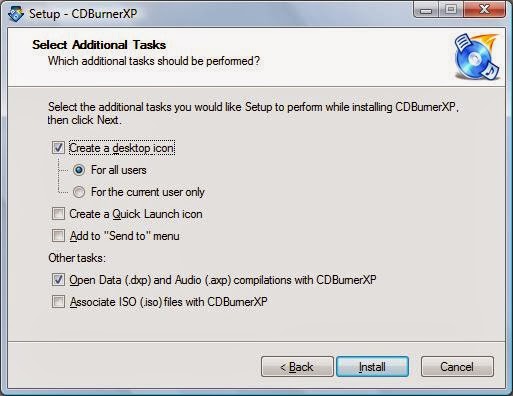
You will now be able to specify extra options such as whether an icon is placed on the desktop (and whether the icon appears for all users or just the current user).
You can also choose to create a quick launch icon which appears when you press the start button and you can add the CDBurnerXP application to the "Send To" menu.
The "Send To" menu appears when you right click on a file. Basically if you choose to include the "Send To" option when you right click on the ISO file that you downloaded you could choose "Send To CDBurnerXP" which will open the application.
The "Open-Data" option will open all files with the "dxp" and "axp" extension with CDBurnerXP.
Finally the "Associate ISO files with CDBurnerXP" will open all ISO files with CDBurnerXP.
It is up to you to choose the items you require. For the sake of this guide you can just accept the default options and click "Install".
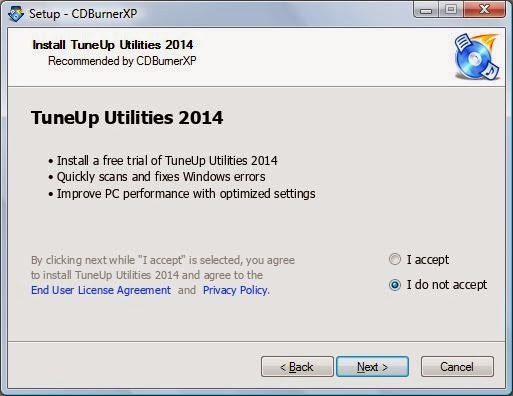
One of the downsides of free software nowadays is that they quite often bundle other applications as part of the installer.
CDBurnerXP has an option to install "TuneUp Utilities 2014".
Click "I do not accept" and choose "Next".
(Obviously if you decide you want the TuneUp Utilities software then feel free to accept the install but I cannot vouch for the quality of that software).
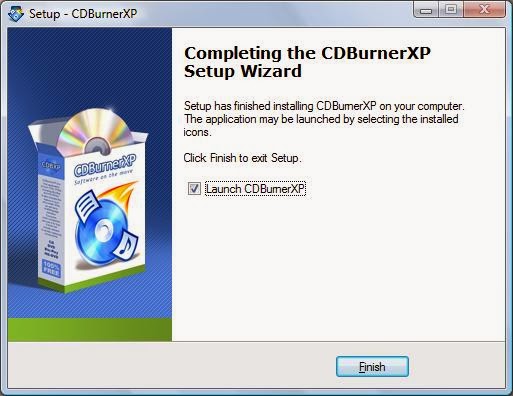
The software will now be installed and you can just click "Finish".
Note that there is a checkbox which will automatically start the CD Burning software.
4. Create the Linux DVD
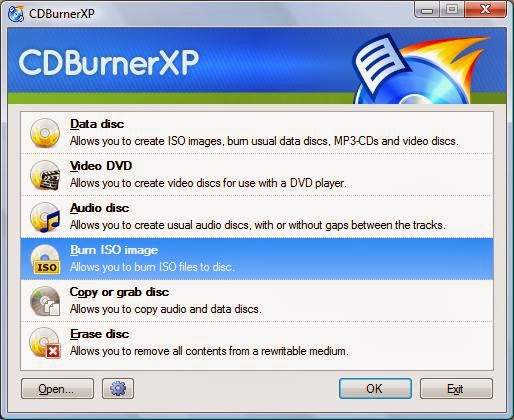
When the main set of options appears click on the option "Burn ISO image".
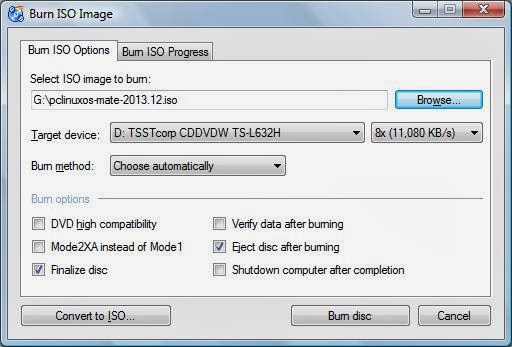
Click the "Browse" button and navigate to the folder where your ISO image was downloaded to.
Open your DVD drive and insert a blank DVD.
Now change the target device to point to your DVD drive.
Finally click on the option to "Burn disc".
The process will take a few minutes and you will see a progress bar. When the image has been installed on the disc the drive will open and you can remove and label the disc.
5. Test it out
Put the Disc back into your computer and reboot.
That is it.
Summary
You can continue to play in the live version of PCLinuxOS. Note that any programs that you install in the live version will be removed when you restart as there is no persistence to store the applications.
The performance of the live DVD will not be as good as the final installation.
This is just the first part of the process. Now that you have a working DVD you will be able to use it in the next part of this series which will be to show how to install Linux alongside Windows Vista.
To read the next tutorial as it is released bookmark this page or subscribe to the blog by entering your email address in the box above.
Thankyou for reading.

This comment has been removed by the author.
ReplyDelete