Introduction
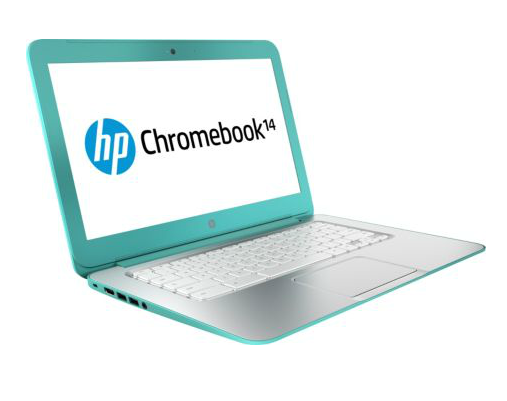
Google Chromebooks are becoming increasingly popular and this week I managed to get my hands on a HP Chromebook from
Argos.
With a 14 inch HD display, 16 gigabytes of SSD storage, 4 gigabytes of RAM and an Intel Celeron dual core processor this really is a fantastic bit of kit.
The device oozes class and the Google Chrome operating system is just amazingly stylish, simple and quick.
Chrome OS is excellent and really takes Linux up a level.
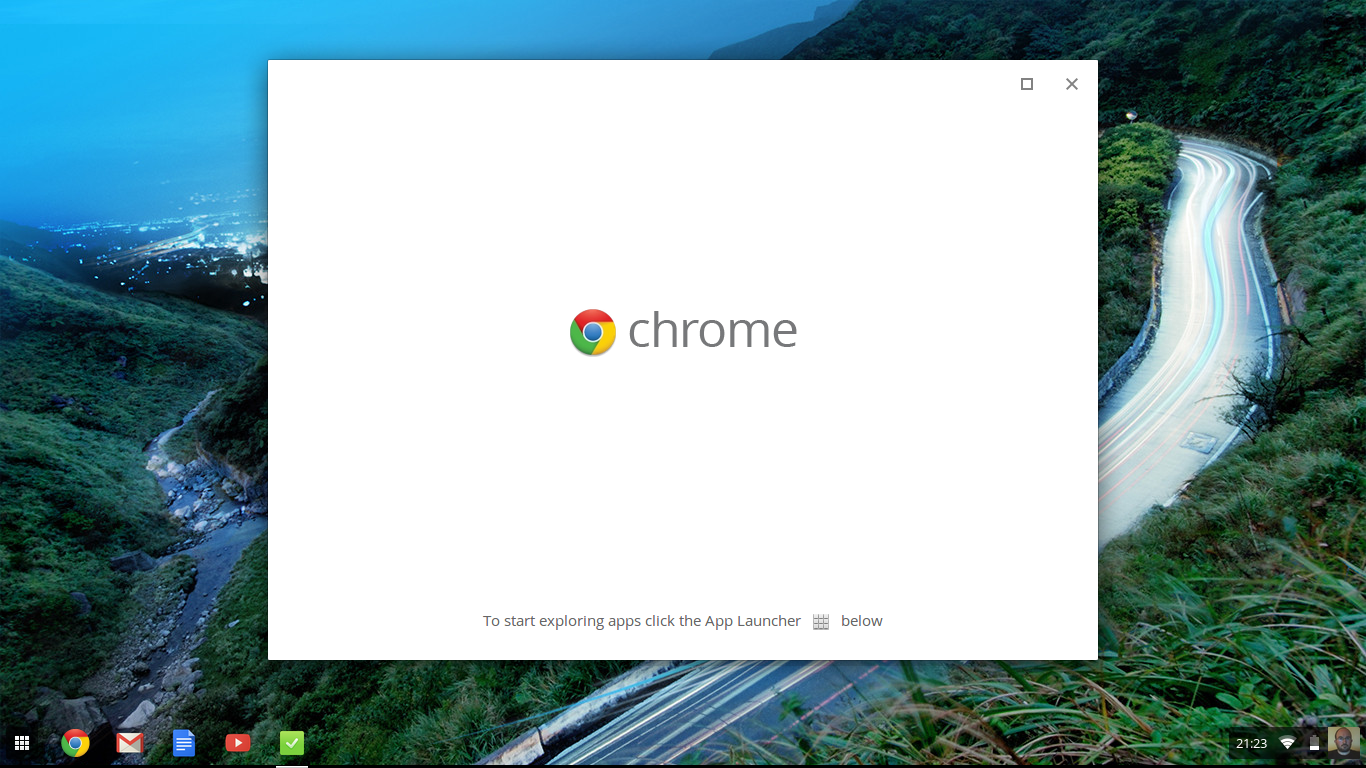
Everything about Chrome OS looks and feels incredibly professional. The boot up time is virtually instant, the performance of the applications is stunning and the look and feel is crisp and clean.
Setting up the Chromebook takes about 2 minutes. First of all you are asked to select your wireless network and enter the security key.
The second screen provides information about Chrome OS and the third screen asks you to log in with your Google credentials.
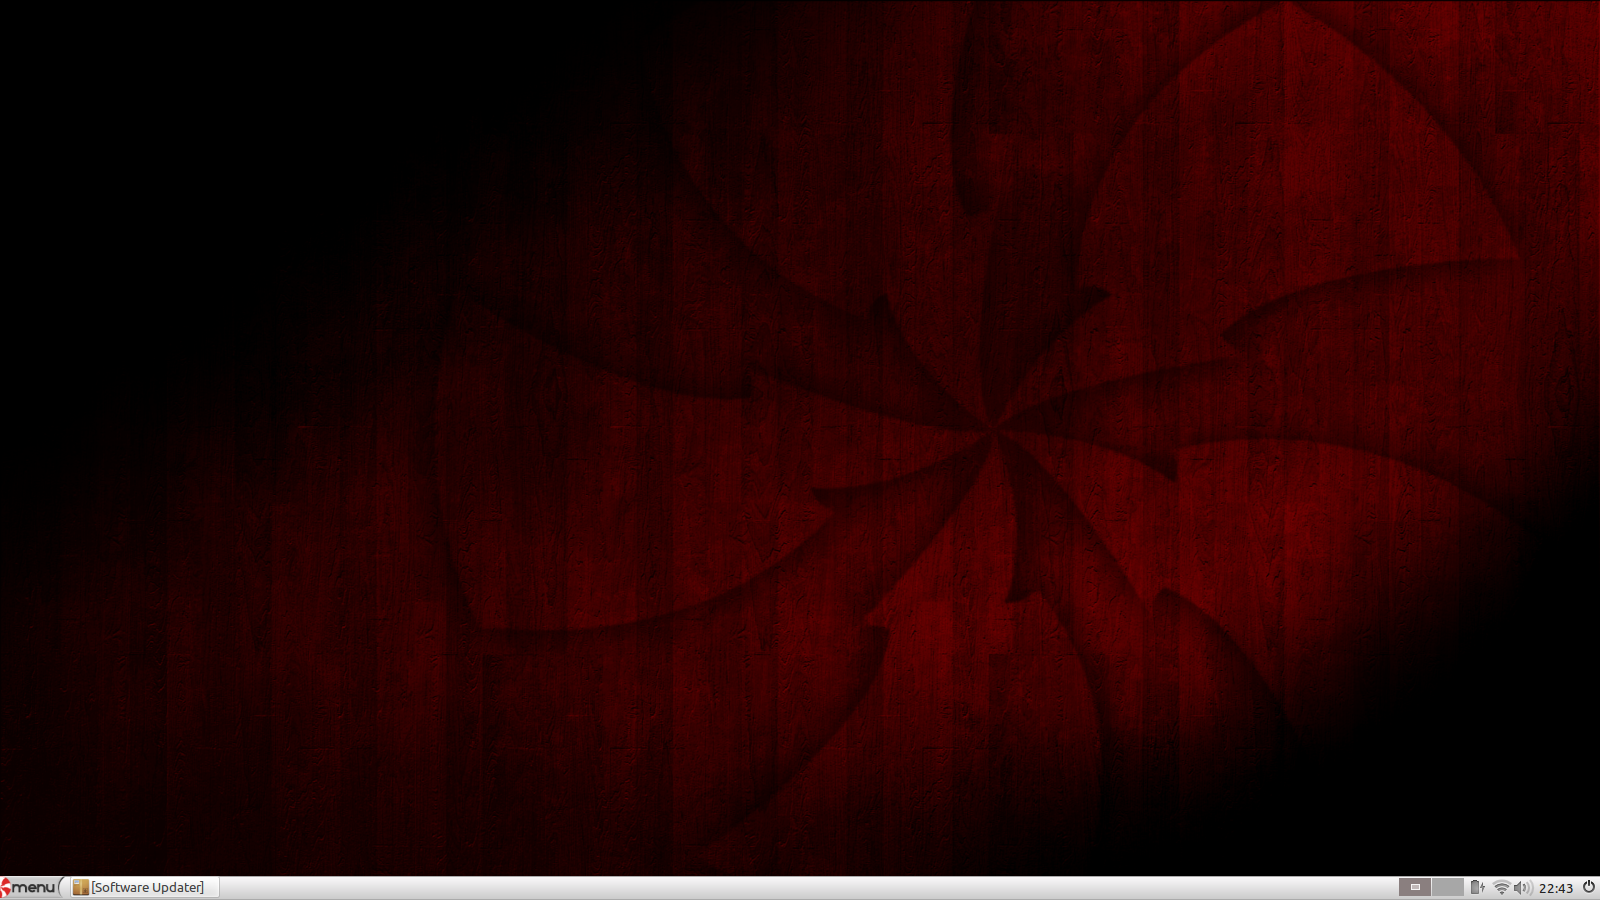
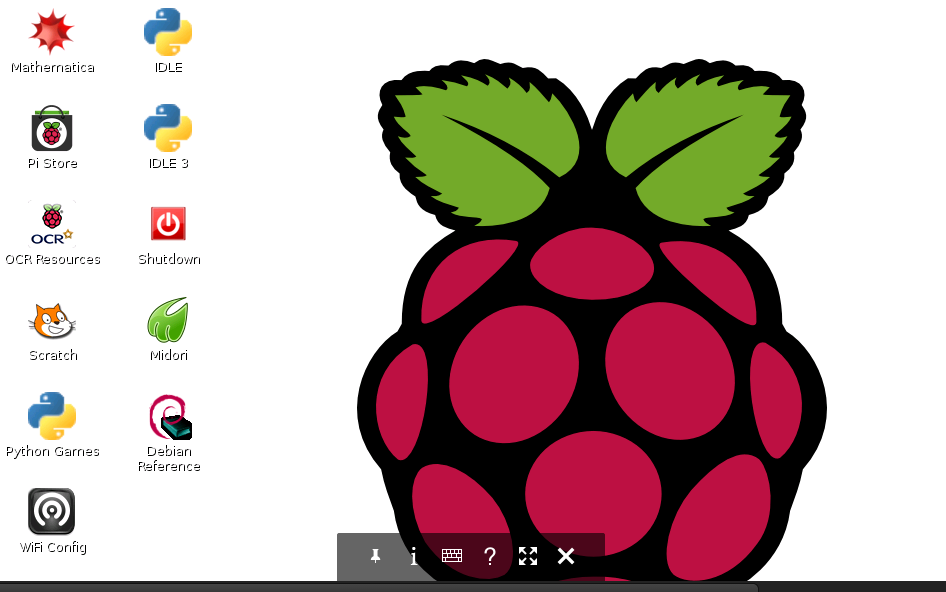
The Chrome OS desktop is very simple and most users will be able to get to grips with it in no time as all.
In the bottom left corner is the "app launcher". (The icon that looks like the face of a Rubik's cube. What do you mean you don't know what a Rubik's cube is?).
Next to the "app launcher" are icons for the applications Google expects you to use most. From left to right these include:
- Chrome web browser
- GMail
- Google Search
- Google Docs
- Youtube
In the bottom right corner are information icons and settings icons. From left to right the icons include:
- Notifications
- Clock
- Updates
- Wireless
- Power Settings
- User Account
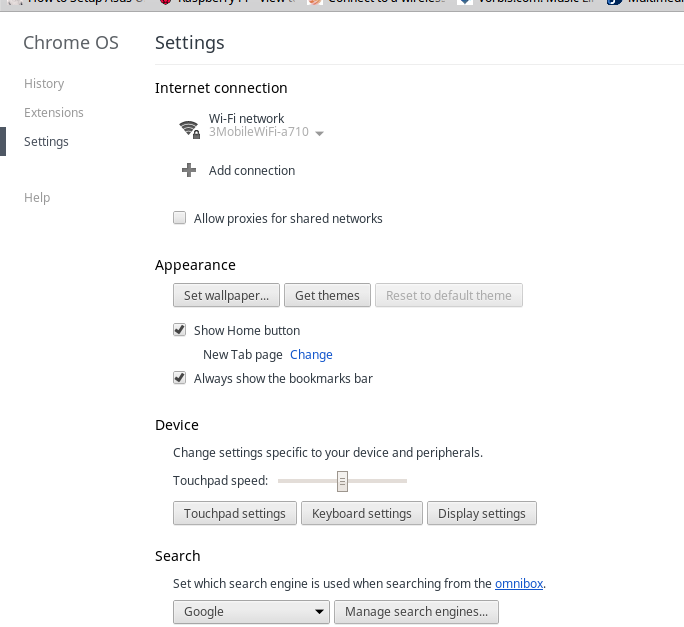
Clicking anywhere in the bottom right corner brings up the settings screen.
From the settings screen you can change the wireless connection, enable Bluetooth, adjust the volume, edit settings and if there are updates you can restart the Chromebook to install the updates. You can also sign out of Google.
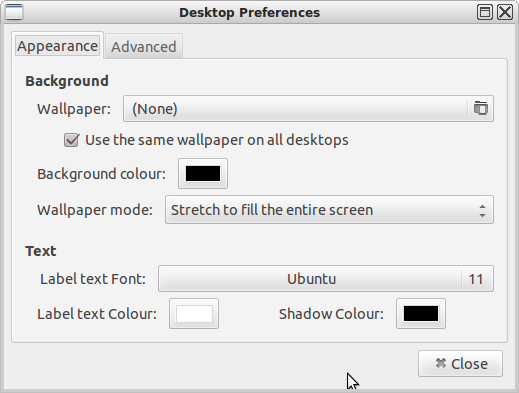
From the settings page you can choose to set the wallpaper, change themes, adjust the touchpad and choose the search engine.
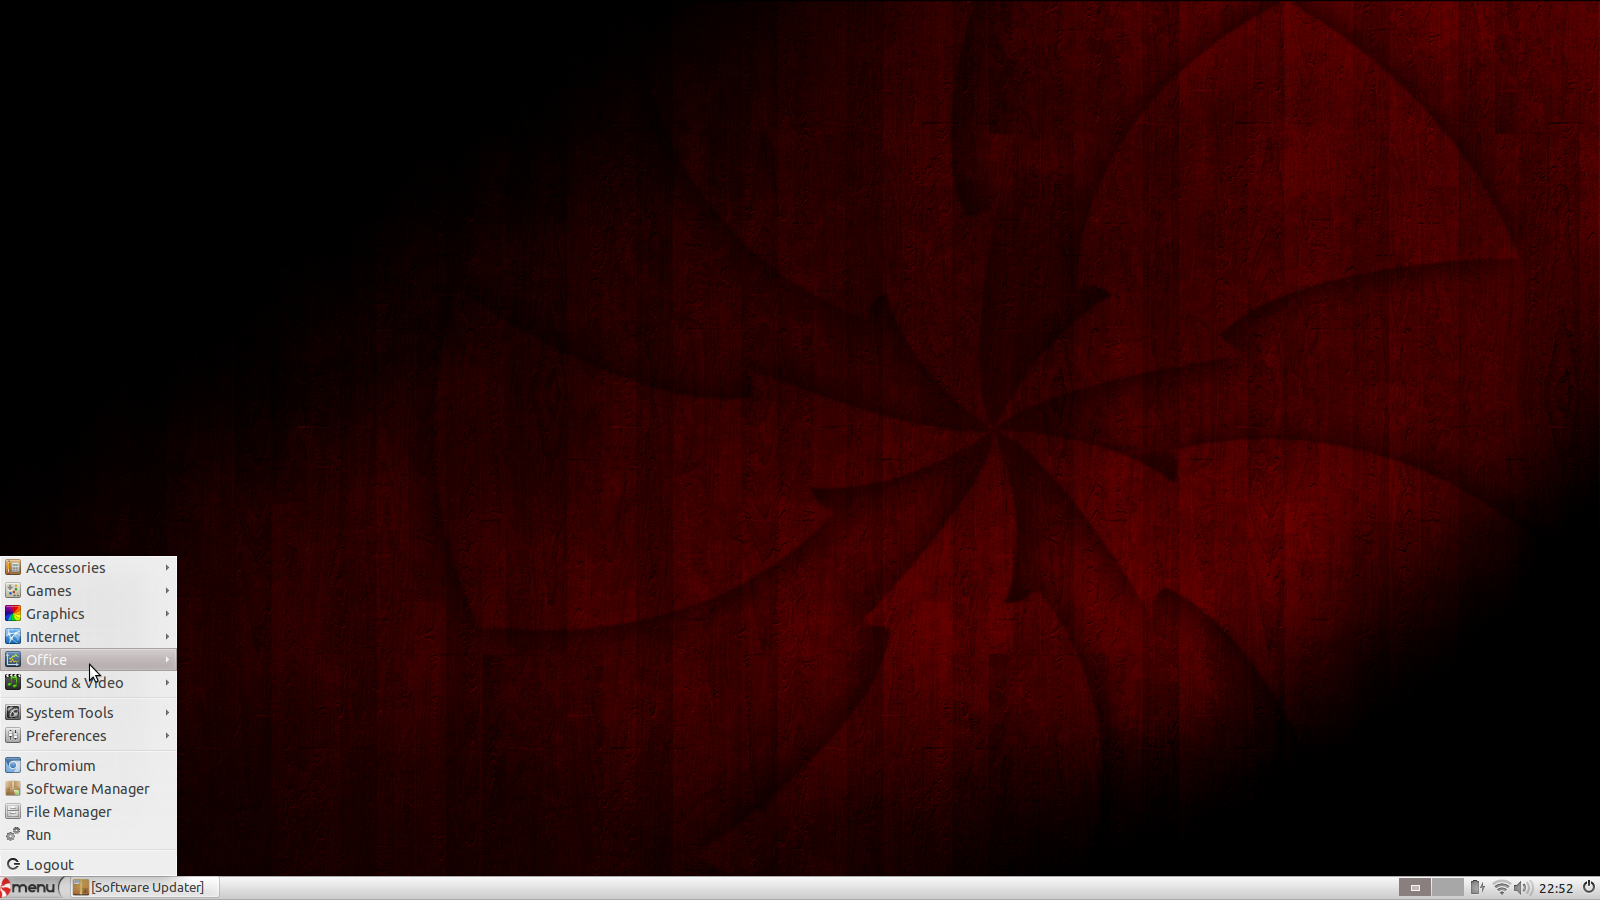
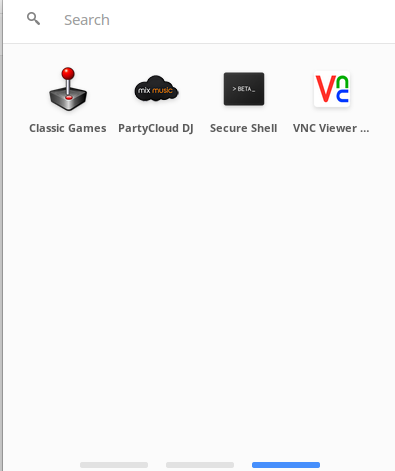
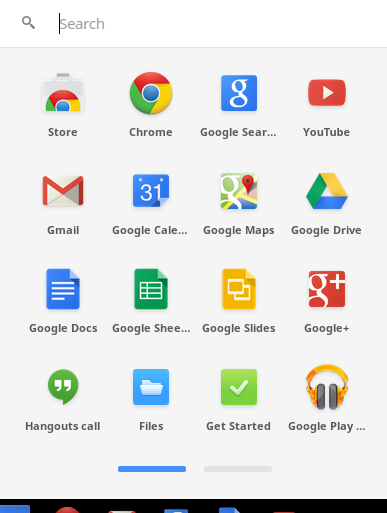
Clicking on the "App Launcher" brings up a list of applications currently installed. There are basically two tabs worth of applications installed by default.
What you should notice is that all the applications listed are web applications and if you click them they open in the browser.
Everything on a Chromebook is geared towards the internet or to use a buzz term, "The Cloud". There are very few applications that work locally. You can edit documents using Google Docs whilst offline.
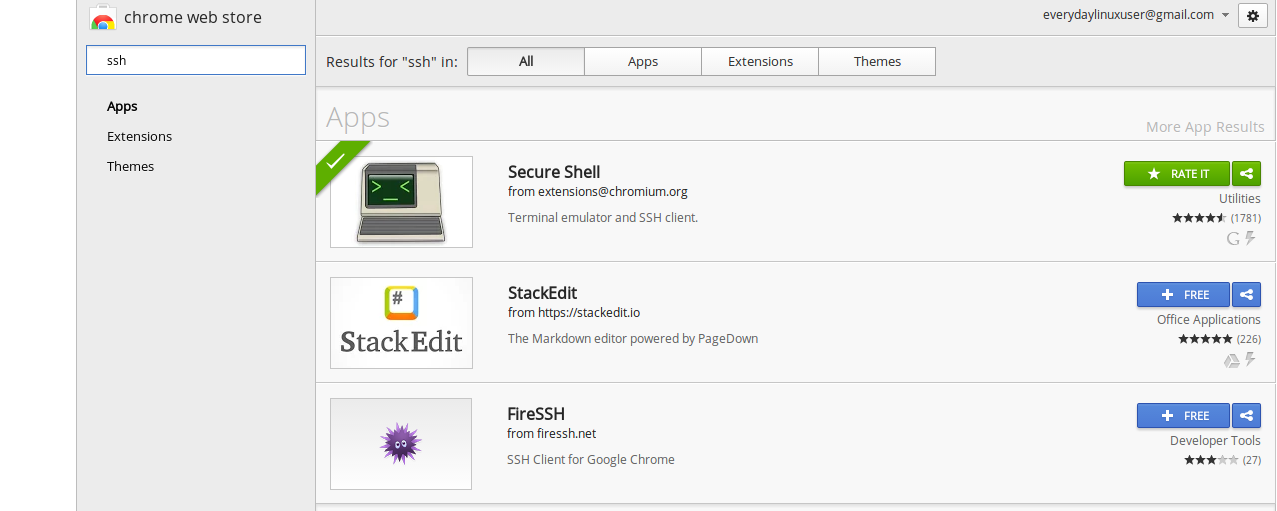
If you access the "store" you will find a large list of applications to install such as Spotify. Anything you install however will be another web application that will open in a browser.
Generally speaking the Chromebook is great for people who spend a lot of time on the internet. If you use your computer mainly for Facebook, Twitter, editing the odd document or writing a blog then the Chromebook is truly the device for you.
No more Antivirus software, no more 10 minute boot times, no huge updates that are forced upon you.
So now that I have sold the Chromebook to you what is the point of this article? Why bother installing Ubuntu?
There are just some things in life that can't be done on the web (or not easily anyway). Editing videos, creating fancy graphics and playing Minecraft are just a few instances.
This guide shows you how to install Ubuntu in the Everyday Linux User way, which is to use the simplest method available.
I don't believe in compiling Kernels to get a trackpad working. That is something I have no interest in doing. I don't want to partition the SSD if it isn't required.
Without further ado let's get going.
New Guides Now Available
If all you want to do is install the latest LTS version of Ubuntu then there are three new guides to help you.
1.
How to create recovery media for the HP Chromebook
2.
How to install Ubuntu on the HP Chromebook
3.
How to install Minecraft on the HP Chromebook
The difference between the new guides and this one is that they just show you the steps required to backup Chrome, install Ubuntu and install Minecraft. There are no explanation to the switches used on the command line.
The point of those articles is to get you to an installed version of Ubuntu as quickly as possible without confusing you with different options.
The new guides also show some new techniques not explained in this article.
For instance the Ubuntu installation guide shows how to install the Ubuntu Desktop package to get all the features you would expect and the Minecraft guide shows a new and easier method for installing Minecraft.
Create recovery media
One more great thing that I have noticed about the HP Chromebook is that it is fairly difficult to break. In the guide showing
how to dual boot Windows 8 and Ubuntu I made it very clear that the first step was to back up Windows and create recovery media.
With Windows 8 it is very hard to obtain recovery media if you haven't created it yourself and it will probably cost you money.
Fortunately Google aren't quite so evil and they make it very easy to create recovery media even if you haven't done it before destroying your machine. You would however need to get the recovery media by using another computer and if you don't have another computer that is a big deal.
I am assuming that if you are about to dual boot your Chromebook with Ubuntu that you haven't got another machine available to you. If you do have another machine available I would recommend leaving the Chromebook as a Chromebook with just plain old Chrome OS and install Ubuntu on the other machine.
I would still recommend creating recovery media before you start this process because it is not possible to do so on the Chromebook after you have installed Ubuntu because there is not enough residual space available to store the image and create the recovery drive.
Trust me, do it now. All you need is a blank 4 gigabyte USB drive and a bit of patience.
To create a recovery partition open up the Chrome browser and type the following into the address bar:-
chrome://imageburner
Note that there is no http. Copy the above text as it is and paste it into the address bar of Chrome.
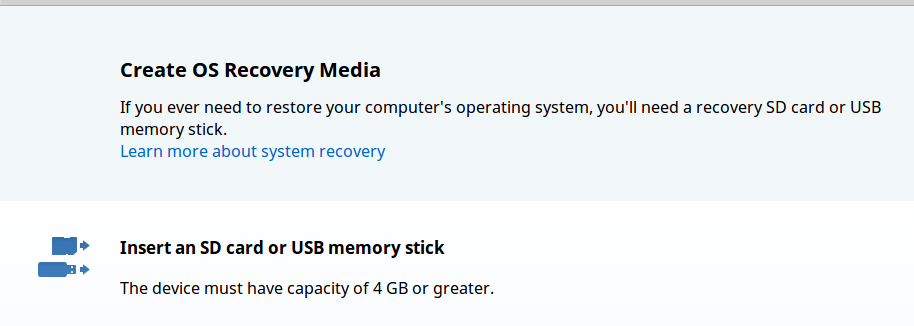
When you see the above screen insert the USB drive or if you prefer an SD card. The USB slots are on the left of the Chromebook and the SD card on the right towards the back of the machine.
As soon as you enter an SD card or USB drive an "OK" button should appear to start creating the recovery image.
Click "OK" to continue.
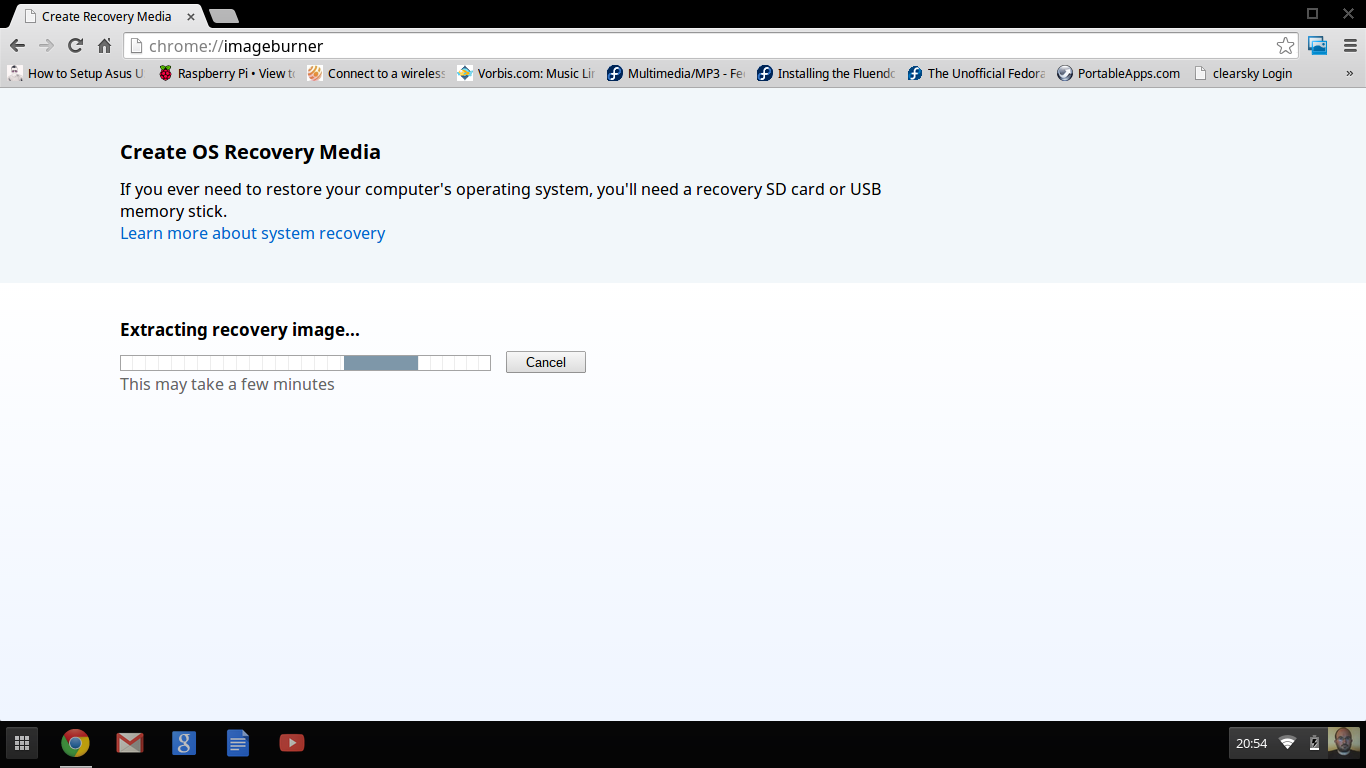
The image will begin to download (and if you have a rubbish internet connection like me it can take an hour. At this point I decided it would be a good idea to spend time with the family. My 12 year old son took a beating at FIFA 14 on the XBOX 360).
When the image has finished downloading it will be extracted and then copied to the SD card or USB drive.
The recovery image is currently 1.4 gigabytes in size. This is largely the reason you should create the recovery media as soon as possible. As you fill up your SSD there will be less and less space available for that image to be extracted to before it is copied to the recovery media.
When the process has finished you should see a success message as shown above. You can now remove the USB drive from the system. Put it somewhere safe and leave it there until you need it (which will hopefully be never).
Installing Ubuntu on the HP Chromebook
There are currently two methods used to install Ubuntu on a Chromebook.
One method does the traditional partitioning of the main drive (SSD) and then gets you to boot from a USB drive and install into the blank partition.
The other method is to use a script called Crouton which creates a chroot system within the base ChromeOS system.
The method I am going to show you is the Crouton method as I believe this is the preferred option for the Everyday Linux User.
The reason I think Crouton is the best method is that it is possible to easily switch between ChromeOS and Ubuntu with a simple key combination. In addition, the resources required to use the Chromebook will be made available to Ubuntu. The touchpad, audio settings and internet connection are all available without having any further setup.
Trying to install Ubuntu using the first method (known as Chrubuntu) will require several extra scripts and hacks to be performed to get the trackpad working.
The process of installing Ubuntu
There are several steps that are required to install Ubuntu using the Crouton method.
1. Switch to developer mode
2. Download Crouton
3. Run Crouton to install Ubuntu
4. Install extra packages
Warning: This process will clear all the current settings on your Chromebook. If you have downloaded anything into the downloads folder, copy it off now.
Switching to developer mode
Before switching to developer mode bookmark this page in your browser as you will need to get back to this page to continue with the guide. (Press CTRL and D to bookmark the page).
If you have access to another computer or a tablet to continue viewing this page then it would be beneficial as the next steps will take you offline for a short period of time. Alternatively print this section out.
To enter developer mode use the following ninja key combination:
ESC + REFRESH + POWER BUTTON.
(The escape button is in the top left corner, the refresh button is the 4th key on the top row and looks like a curly arrow. The power button is in the top right corner).
The screen that appears looks a little bit scary.
Press CTRL and D on the keyboard now and you will be warned that you are about to enter developer mode and that all warranties are void if you continue.
Press Enter to continue.
Your computer will now start to go into developer mode. Just let it do its thing. It takes between 15 and 20 minutes.
When the process has finished you will see the following screen:
From now on whenever you see this screen press CTRL and D. This boots your Chromebook into developer mode.
When the Chromebook boots up you will be back at the point where you have to set up the internet connection and enter your Google user details.
Download Crouton
Running Crouton
I am afraid that there is some command line stuff required to install Ubuntu on the Chromebook.
Do not worry too much. It isn't that tricky and it is fairly painless.
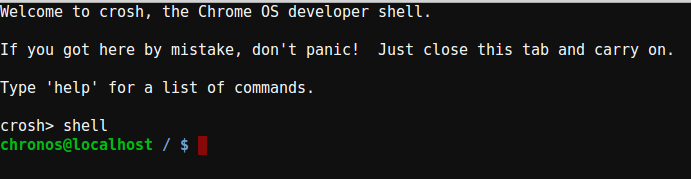
The first thing to do is open a terminal window by pressing the following key combination:
CTRL + ALT + T
Notice how the terminal window opens as a browser window. To get to a command shell type the following:
shell
By default the Crouton script installs Ubuntu 12.04 which is the current long term support release. It also defaults to the Unity desktop.
There are other options available. For instance the Linux distribution can be any one of the following:
- Debian (woody, sarge, etch, lenny, squeeze, wheezy, jessie, sid)
- Kali
- Ubuntu (warty, hoary, breezy, dapper, edgy, feisty, gutsy, hardy, intrepid, jaunty, karmic, lucid, maverick, natty, oneiric, precise, quantal, raring, saucy, trusty).
For support purposes only Debian wheezy, jessie and sid are supported and for Ubuntu only precise, quantal, raring and saucy are supported.
For those of you unaware of how the names match the versions here is a little guide:
- Trusty = 14.04
- Saucy = 13.10
- Raring = 13.04
- Quantal = 12.10
- Precise = 12.04 (LTS)
Really the only ones you should be considering are Precise (if you prefer long term support), Saucy as it is the latest release and Trusty (if you want to try 14.04 out).
As well as being able to determine the distribution you wish to install you can also decide on the desktop that you want to install.
The options are as follows:
- Cinnamon
- e17
- gnome
- kde
- lxde
- unity
- xfce
There are loads of options available for Crouton and if you wish to see them all type the following into the terminal window:
sudo sh -e ~/Downloads/crouton --help
The two flags that we are most interested in are -r and -t. The -r flag lets you choose the release (distribution to install). The -t flag lets you choose what is installed to the target system.
To install Ubuntu Saucy with the Cinnamon desktop you would type the following:
sudo sh -e ~/Downloads/crouton -r saucy -t cinnamon
If you fail to specify the -r flag then the default distribution will be installed and that is Precise. (Ubuntu 12.04).
If you fail to specify the -t flag then the Unity desktop will be installed.
Incidentally the -e flag encrypts the system to make it a little bit more secure.
As well as the desktop choice there are other targets that can be installed with the -t flag as follows:
- audio (for audio playback)
- chrome (installs the Chrome browser in the installed system)
- chromium (installs the chromium browser)
- cli-extra (includes tools such as ssh)
- core (performs core system configuration)
- extension (enables clipboard sharing with ChromeOS)
- gtk-extra (includes gksu, gdebi and a simple browser)
- keyboard (adds keyboard support for Chromebook's special keys)
- touch (provides touch screen support, not much use on the HP Chromebook)
- xbmc (installs xbmc media player)
Imagine that you wanted to install Debian Wheezy with the Gnome desktop and include Chromium and audio playback support. You would need to type the following:
sudo sh -e ~/Downloads/crouton -r wheezy -t gnome,gtk-extra,core,chromium,audio -e
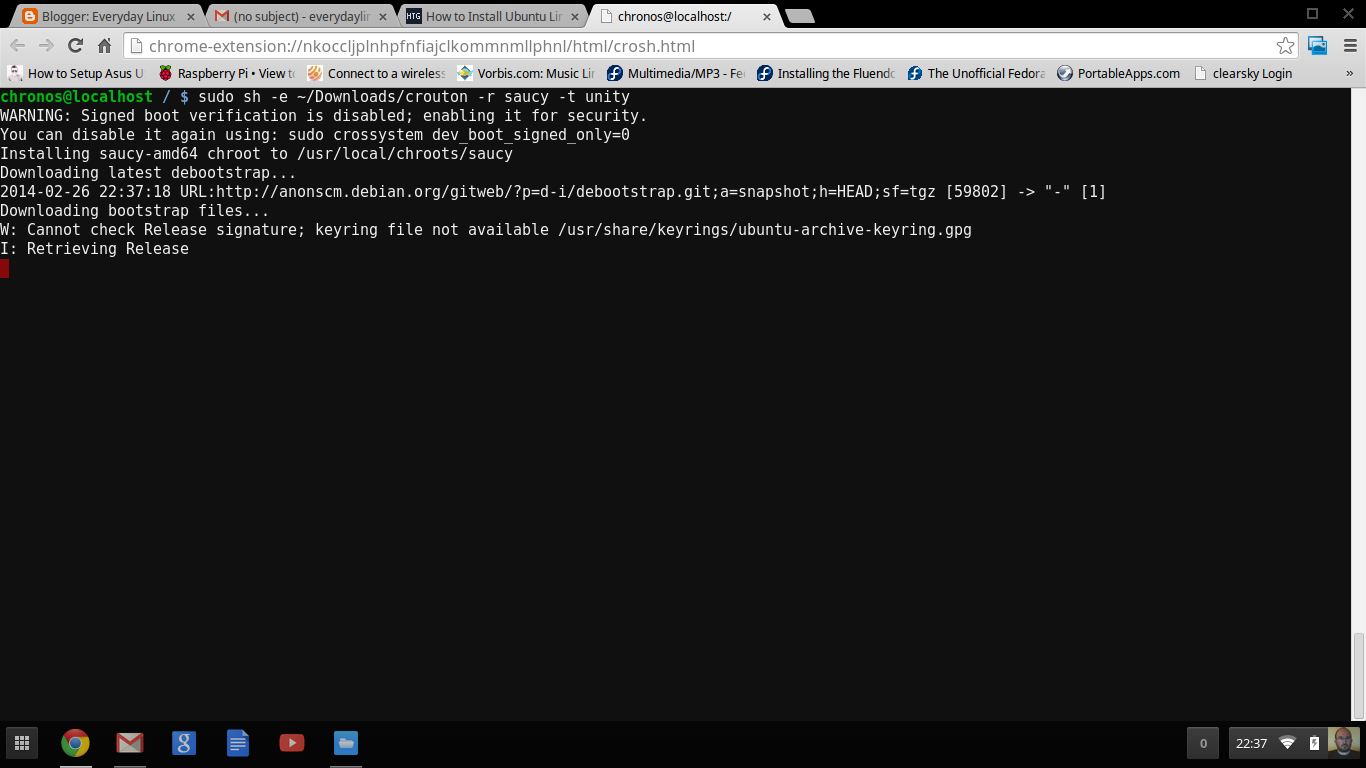
In this guide I am just going to show you how to install Ubuntu with the Unity desktop and you can do that easily by just typing the following:
sudo sh -e ~/Downloads/crouton -r saucy -t unity -e
By choosing saucy you will get the latest Ubuntu release (13.10).
If you want to install the 12.04 LTS release you could instead type the following:
sudo sh -e ~/Downloads/crouton -t unity -e
Now is a good time to go and spend time with the family, beat them at FIFA 14 on the XBOX and if necessary take a comfort break. The process takes around 30 minutes.
When the script is near the end you will be asked to create a user. Enter the name of a user and then enter a password.
Before you do this note that to get back to Chrome OS you will need to press the following keystroke:
CTRL + ALT + LEFT ARROW
Ubuntu will now be loaded.
Install extra packages
The version of Ubuntu that is installed isn't the same as the version of Ubuntu that is installed from the ISO from the Ubuntu website.
You will have a very bare bones system with just the minimum of applications.
First things first. If you click on the files icon on the launch bar you will see that there is a downloads folder under your username. This is the same downloads folder that is used by ChromeOS. You can therefore share files easily between ChromeOS and Ubuntu by placing files in the downloads folder.
So what applications do you need? In theory that is entirely up to you. I don't recommend installing another browser.
You can switch to ChromeOS at any time by pressing CTRL + ALT and the LEFT arrow next to the escape button. You can switch back to Ubuntu by pressing CTRL + ALT and the RIGHT button and then CTRL + ALT and REFRESH (the curly arrow next to the right arrow).
I don't think you need to install another browser. Getting to the Chrome browser in ChromeOS is just a key combination away. If you need to download files from the internet use the Chrome browser and download files to the Downloads folder which can easily be accessed using Ubuntu.
Installing Synaptic
The first program that I recommend is Synaptic. This gives you a graphical application installer.
To install Synaptic switch to Ubuntu by pressing CTRL + ALT + RIGHT and then CTRL + ALT + REFRESH.
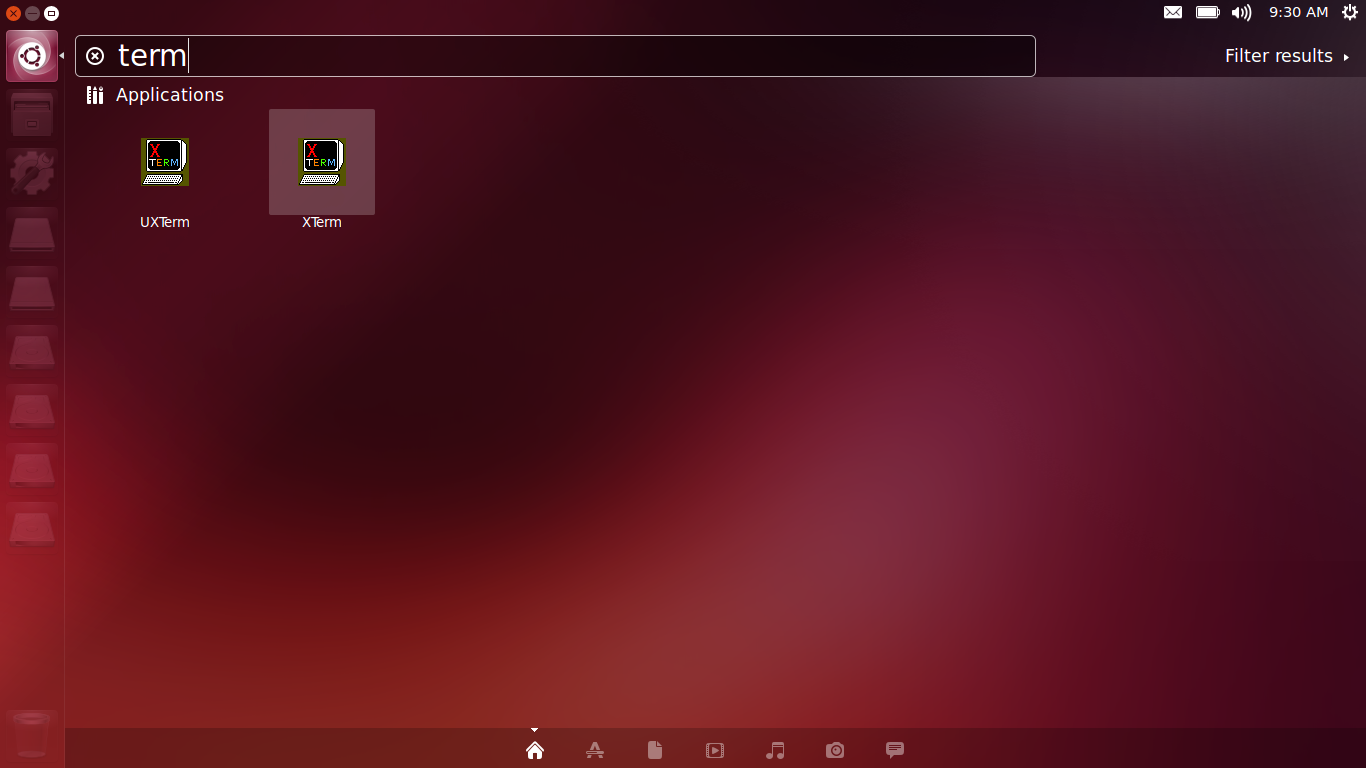
When you are in Ubuntu click on the button in the top left corner of the launcher and when the Dash appears start typing "TERM".
When the terminal window opens type the following to install Synaptic:
sudo apt-get install synaptic
To run Synaptic, type the following in the terminal window:
sudo synaptic
Synaptic is fairly easy to use and provides a good visual representation of the software repositories. To find a piece of software click on the search button and start typing either the name or the type of software you require.
When you have found the software you require click on the checkbox next to the software title. This marks the software for installation.
To install the software click "Apply".
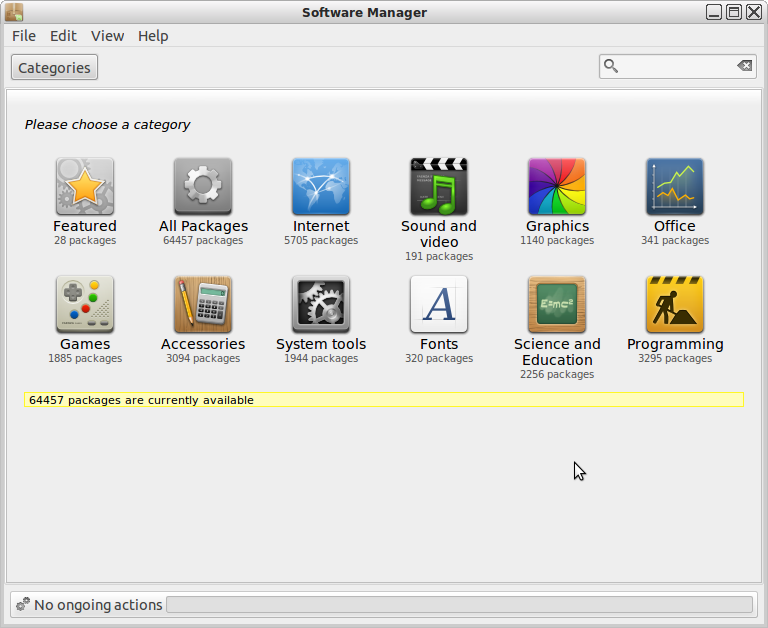
Ubuntu Software Centre
If you have used Ubuntu before then you will probably be more familiar with the Ubuntu Software Centre. This isn't installed by default.
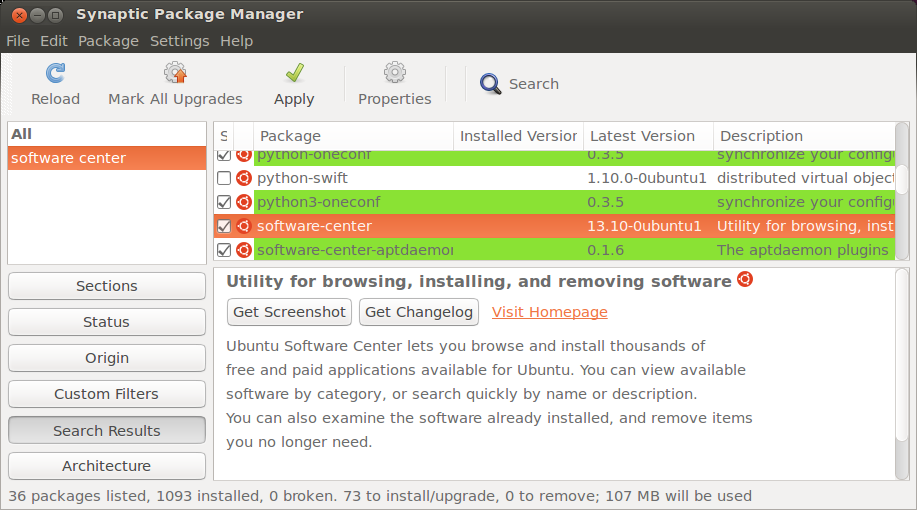
To install the software centre open Synaptic and search for "Software Center".
You will need to scroll down to find the software centre. Check the box next to "Software Center". Note that this will mark other dependant applications as well.
Click on "Apply" to install the "Software Centre".
To run the "Software Centre" press the icon in the top left corner of the launcher and when the Dash appears start typing "term". Open a terminal window and type the following:
gksu software-center
Now that you have Synaptic and the Software Centre installed you can now install any other application you desire.
Minecraft
Now you might wonder why I am making a specific point about Minecraft. My son is a huge Minecraft fan. The thought occurs that if you want to install Ubuntu on a Chromebook then you probably haven't got access to another computer.
If you have access to another computer then I would leave the Chromebook to be a Chromebook.
If you don't have access to another computer then it may be that you received the Chromebook as a gift or you are a young person who received it from your parents to do school work on. All your friends are playing Minecraft on their laptops and you want to play Minecraft as well.
There are three basic steps for installing Minecraft.
1. Install OpenJDK
2. Download the launcher
3. Run the launcher.
Install OpenJDK
Open up the Ubuntu Software Centre. (Open a terminal and type sudo software-center)
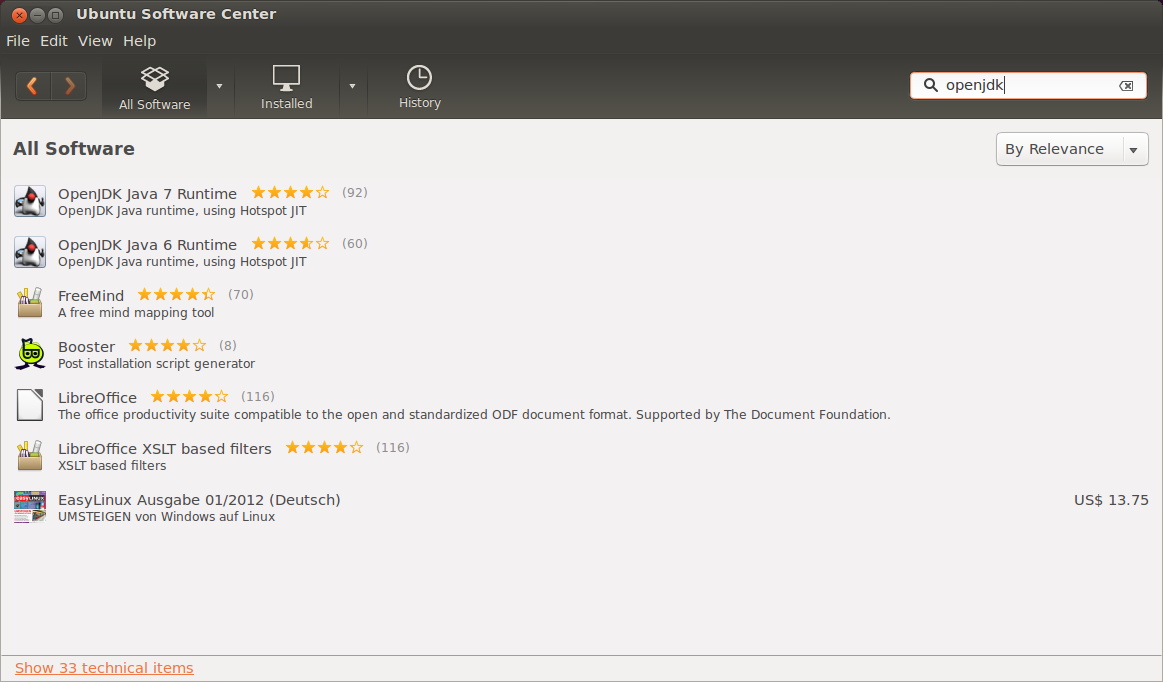
Search for OpenJDK.
Click on "OpenJDK Java 7 Runtime" and then click "Install".
Download the Minecraft Launcher
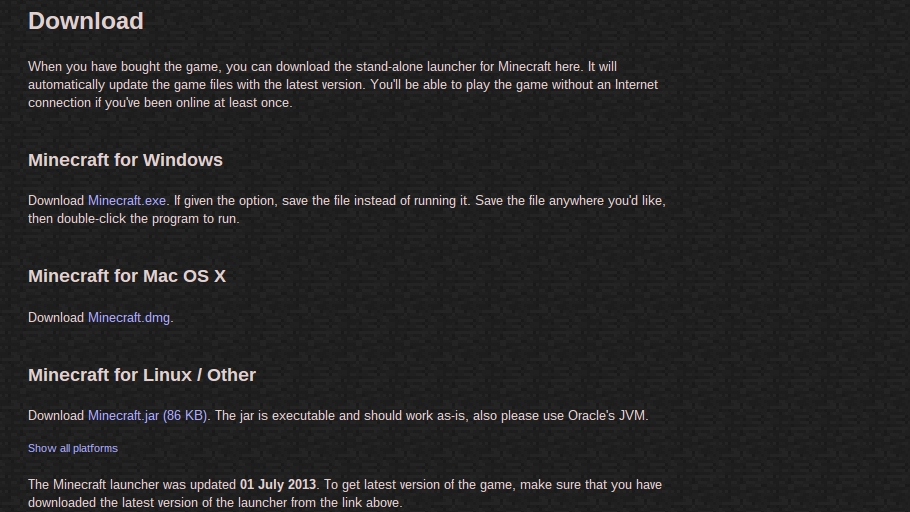
Scroll down to the Minecraft for Linux / Other and click on the Minecraft.jar link. The file will be downloaded to your downloads folder which is accessible by ChromeOS and Ubuntu.
Switch back to Ubuntu (CTRL + ALT + RIGHT ARROW and CTRL + ALT + REFRESH).
Open up the file manager (2nd icon on the launcher). Navigate to the download folder and find the Minecraft.jar file.
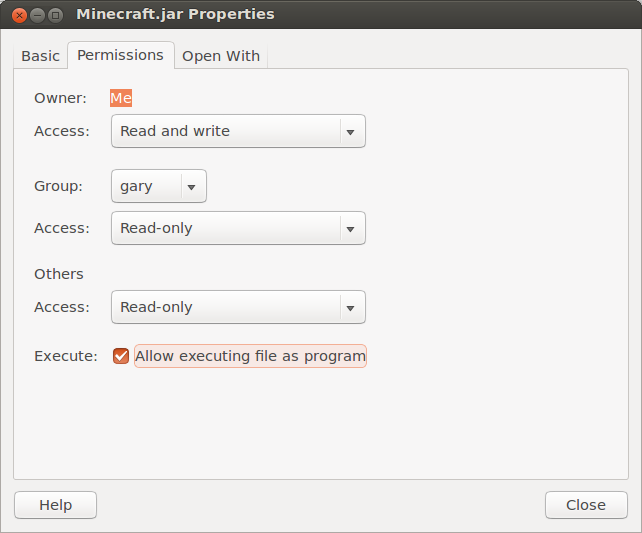
Right click on the file and choose properties. Click on the "Permissions" tab.
Check the "Allow executing file as program" box. Click "Close".
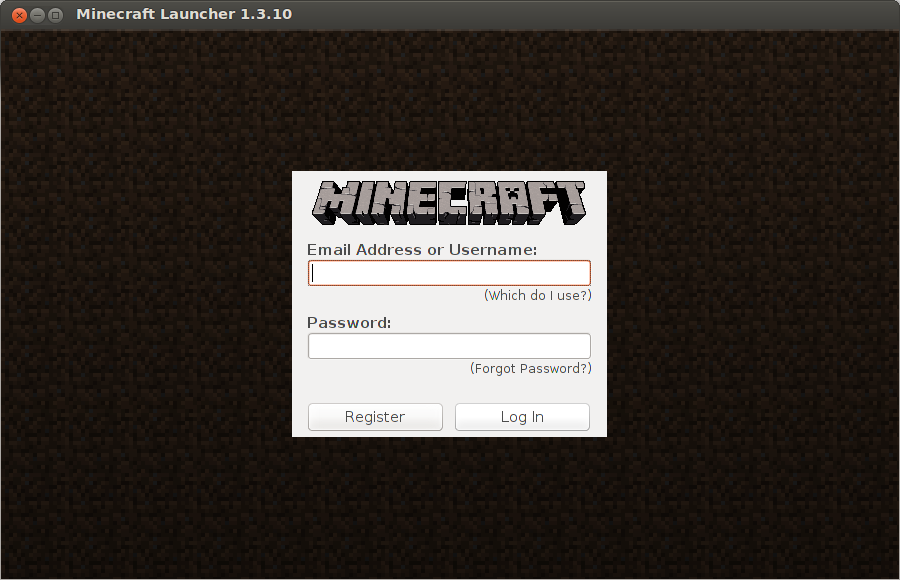
To run Minecraft double click on the Minecraft.jar file.
Additional Information
It is possible to make your Chromebook boot from USB drive. To do this open up a terminal within ChromeOS. (CTRL + ALT +T)
Enter the shell by typing shell
Now enter the following:
sudo crossystem dev_boot_usb=1 dev_legacy_boot=1
You will now be able to boot other live Linux operating systems. This actually works very well when using something like SLAX. You can also boot using the Android x86 live image.
To boot from a USB drive when you first boot instead of pressing CTRL and D to enter developer mode press CTRL and L.
Note though that trying to run an installed version of Android on a USB drive provides many problems. The live version works well but doesn't store any changes.
Summary
The experience you get from the installed Ubuntu isn't as good as the experience of Ubuntu on a normal computer. There are many challenges.
For instance, the software centre for Saucy only seems to run when you start it as sudo. Virtual box requires an upgrade to the kernel which involves a lot of extra steps.
Personally my recommendation is as follows. If you have another computer available to you then install Linux on that computer and leave the Chromebook to run ChromeOS.
ChromeOS is perfect for what it is created for and the HP Chromebook is perfect for running ChromeOS. Everything else feels like a hack.
Thankyou for reading.
Now switch to Ubuntu by clicking CTRL + ALT + RIGHT and then CTRL + ALT + REFRESH.
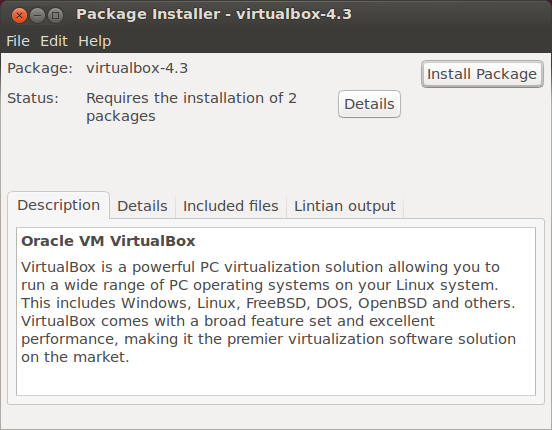
Open up the file manager and navigate to the download folder. Right click on the downloaded VirtualBox package and open with GDEBI package installer.
The above window will appear. Click "Install Package".
Introduction
Google Chromebooks are becoming increasingly popular and this week I managed to get my hands on a HP Chromebook from
Argos.
With a 14 inch HD display, 16 gigabytes of SSD storage, 4 gigabytes of RAM and an Intel Celeron dual core processor this really is a fantastic bit of kit.
The device oozes class and the Google Chrome operating system is just amazingly stylish, simple and quick.
Chrome OS is excellent and really takes Linux up a level.
Everything about Chrome OS looks and feels incredibly professional. The boot up time is virtually instant, the performance of the applications is stunning and the look and feel is crisp and clean.
Setting up the Chromebook takes about 2 minutes. First of all you are asked to select your wireless network and enter the security key.
The second screen provides information about Chrome OS and the third screen asks you to log in with your Google credentials.
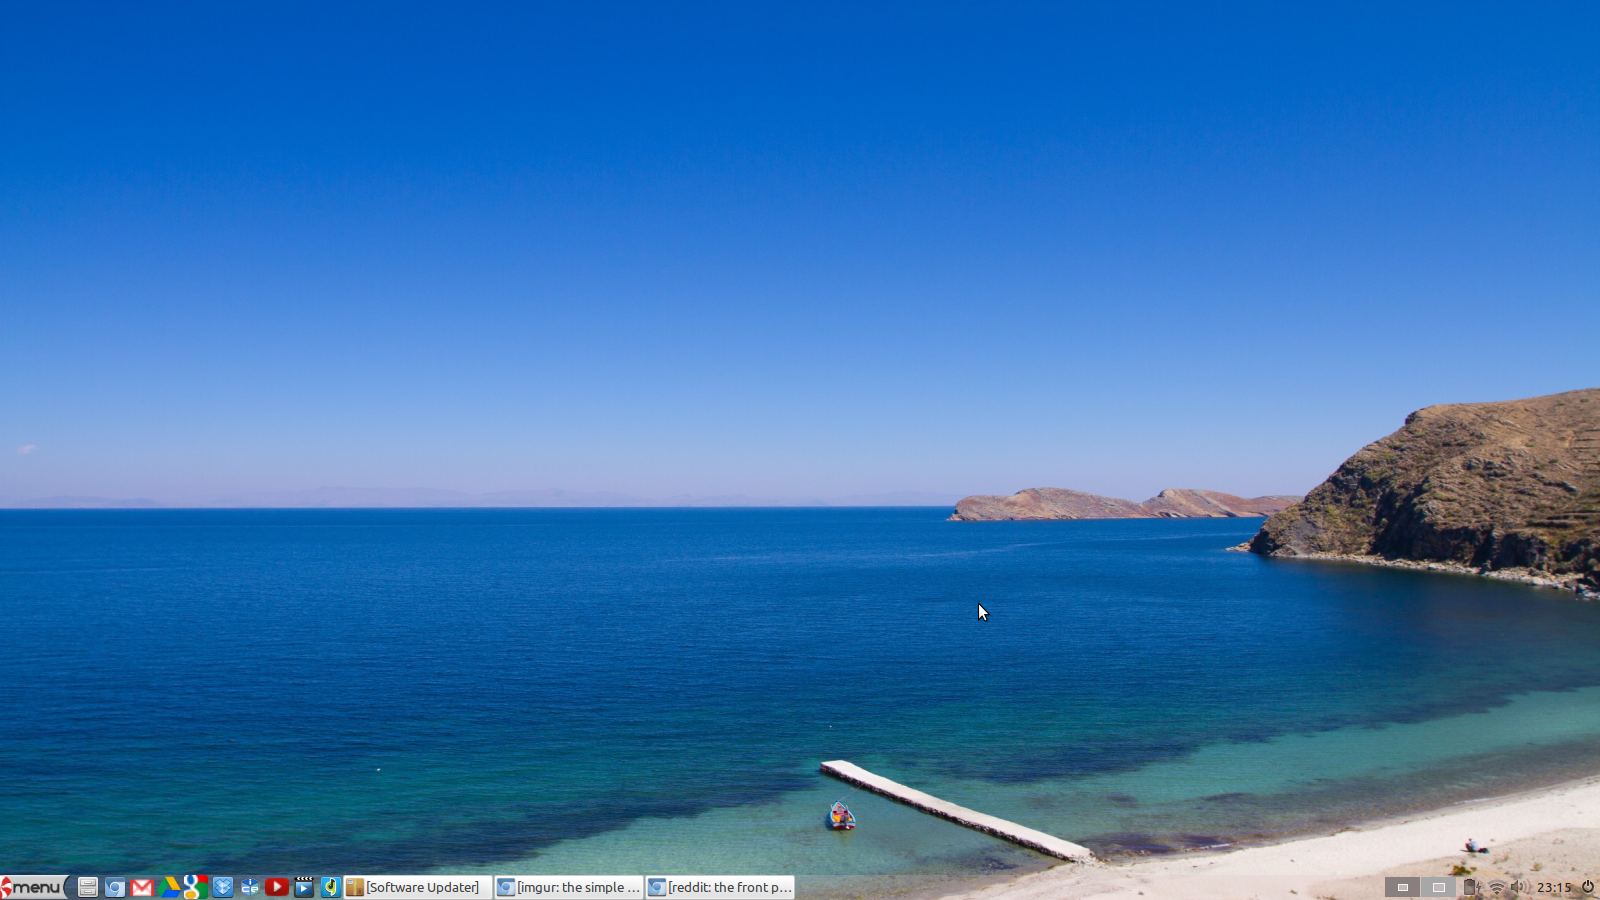
The Chrome OS desktop is very simple and most users will be able to get to grips with it in no time as all.
In the bottom left corner is the "app launcher". (The icon that looks like the face of a Rubik's cube. What do you mean you don't know what a Rubik's cube is?).
Next to the "app launcher" are icons for the applications Google expects you to use most. From left to right these include:
- Chrome web browser
- GMail
- Google Search
- Google Docs
- Youtube
In the bottom right corner are information icons and settings icons. From left to right the icons include:
- Notifications
- Clock
- Updates
- Wireless
- Power Settings
- User Account
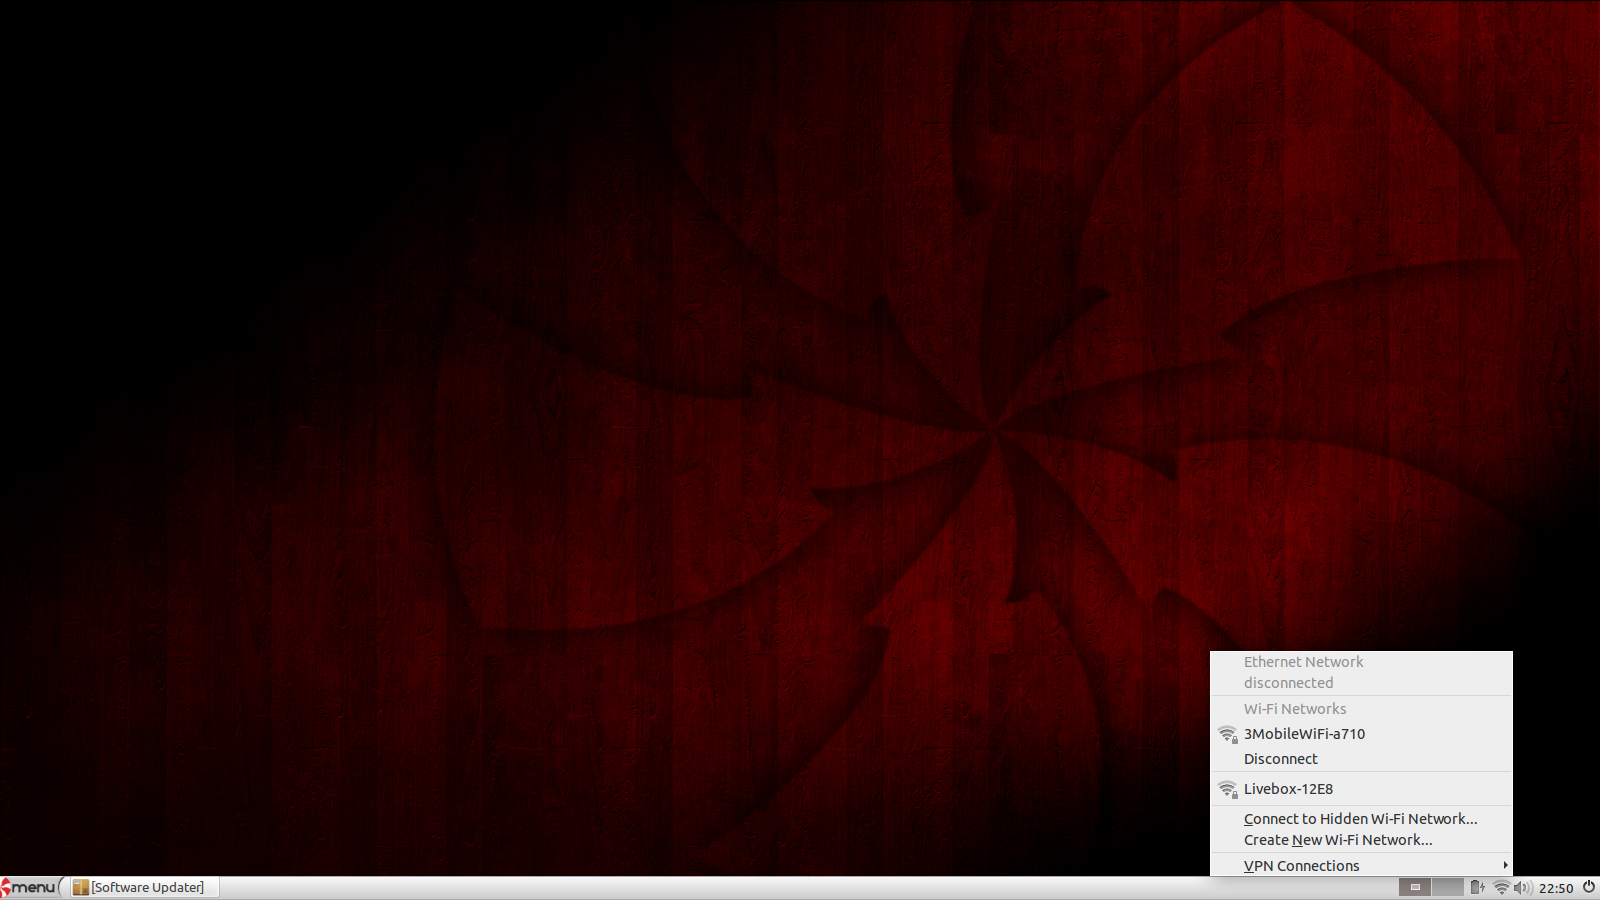
Clicking anywhere in the bottom right corner brings up the settings screen.
From the settings screen you can change the wireless connection, enable Bluetooth, adjust the volume, edit settings and if there are updates you can restart the Chromebook to install the updates. You can also sign out of Google.
From the settings page you can choose to set the wallpaper, change themes, adjust the touchpad and choose the search engine.
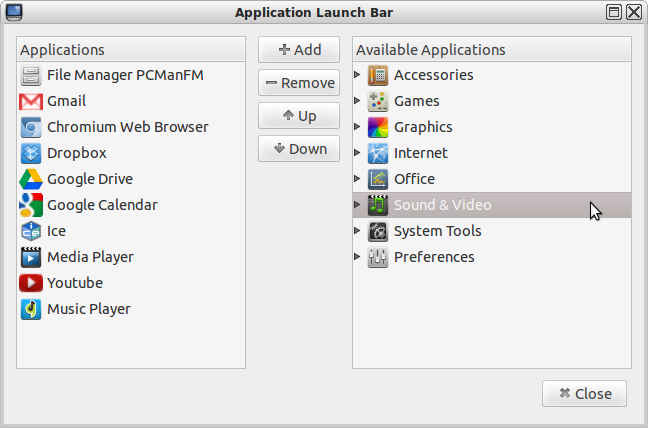
Clicking on the "App Launcher" brings up a list of applications currently installed. There are basically two tabs worth of applications installed by default.
What you should notice is that all the applications listed are web applications and if you click them they open in the browser.
Everything on a Chromebook is geared towards the internet or to use a buzz term, "The Cloud". There are very few applications that work locally. You can edit documents using Google Docs whilst offline.
If you access the "store" you will find a large list of applications to install such as Spotify. Anything you install however will be another web application that will open in a browser.
Generally speaking the Chromebook is great for people who spend a lot of time on the internet. If you use your computer mainly for Facebook, Twitter, editing the odd document or writing a blog then the Chromebook is truly the device for you.
No more Antivirus software, no more 10 minute boot times, no huge updates that are forced upon you.
So now that I have sold the Chromebook to you what is the point of this article? Why bother installing Ubuntu?
There are just some things in life that can't be done on the web (or not easily anyway). Editing videos, creating fancy graphics and playing Minecraft are just a few instances.
This guide shows you how to install Ubuntu in the Everyday Linux User way, which is to use the simplest method available.
I don't believe in compiling Kernels to get a trackpad working. That is something I have no interest in doing. I don't want to partition the SSD if it isn't required.
Without further ado let's get going.
New Guides Now Available
If all you want to do is install the latest LTS version of Ubuntu then there are three new guides to help you.
1.
How to create recovery media for the HP Chromebook
2.
How to install Ubuntu on the HP Chromebook
3.
How to install Minecraft on the HP Chromebook
The difference between the new guides and this one is that they just show you the steps required to backup Chrome, install Ubuntu and install Minecraft. There are no explanation to the switches used on the command line.
The point of those articles is to get you to an installed version of Ubuntu as quickly as possible without confusing you with different options.
The new guides also show some new techniques not explained in this article.
For instance the Ubuntu installation guide shows how to install the Ubuntu Desktop package to get all the features you would expect and the Minecraft guide shows a new and easier method for installing Minecraft.
Create recovery media
One more great thing that I have noticed about the HP Chromebook is that it is fairly difficult to break. In the guide showing
how to dual boot Windows 8 and Ubuntu I made it very clear that the first step was to back up Windows and create recovery media.
With Windows 8 it is very hard to obtain recovery media if you haven't created it yourself and it will probably cost you money.
Fortunately Google aren't quite so evil and they make it very easy to create recovery media even if you haven't done it before destroying your machine. You would however need to get the recovery media by using another computer and if you don't have another computer that is a big deal.
I am assuming that if you are about to dual boot your Chromebook with Ubuntu that you haven't got another machine available to you. If you do have another machine available I would recommend leaving the Chromebook as a Chromebook with just plain old Chrome OS and install Ubuntu on the other machine.
I would still recommend creating recovery media before you start this process because it is not possible to do so on the Chromebook after you have installed Ubuntu because there is not enough residual space available to store the image and create the recovery drive.
Trust me, do it now. All you need is a blank 4 gigabyte USB drive and a bit of patience.
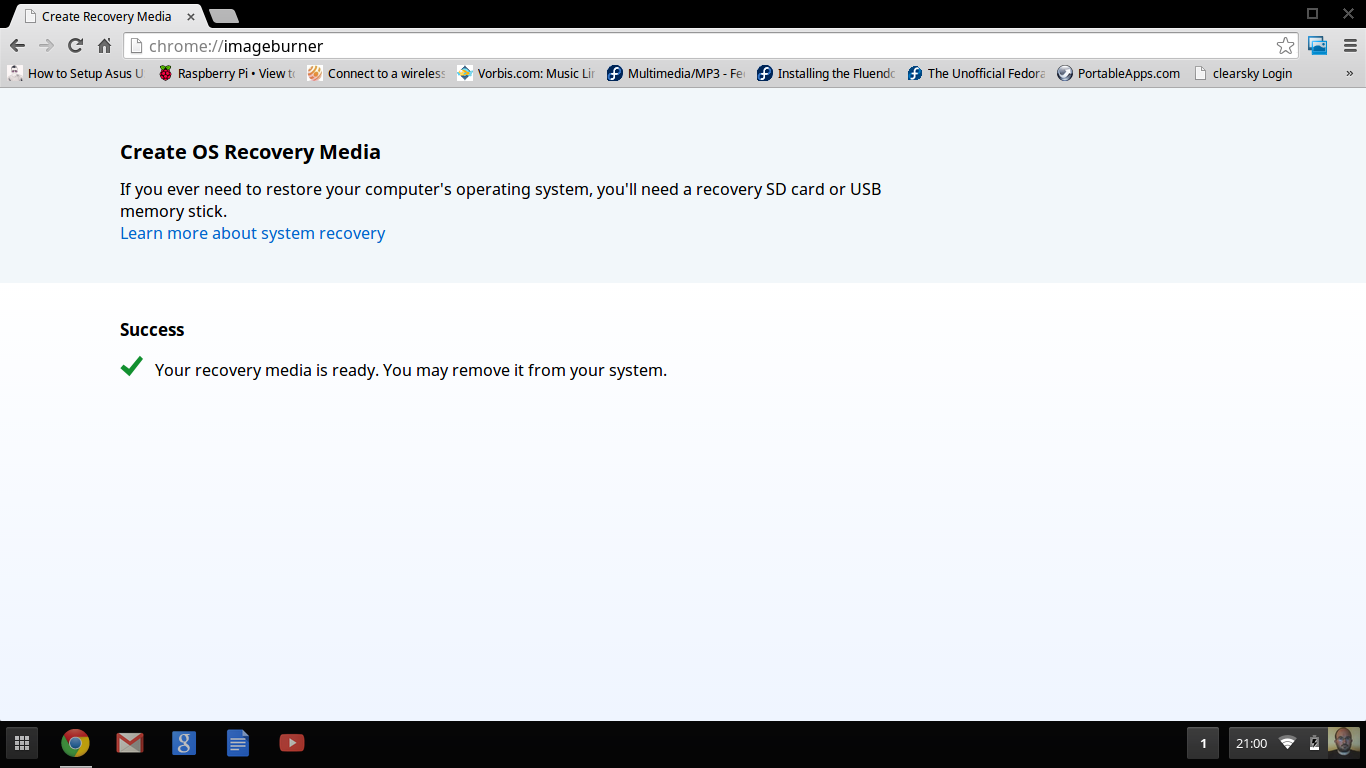
To create a recovery partition open up the Chrome browser and type the following into the address bar:-
chrome://imageburner
Note that there is no http. Copy the above text as it is and paste it into the address bar of Chrome.
When you see the above screen insert the USB drive or if you prefer an SD card. The USB slots are on the left of the Chromebook and the SD card on the right towards the back of the machine.
As soon as you enter an SD card or USB drive an "OK" button should appear to start creating the recovery image.
Click "OK" to continue.
The image will begin to download (and if you have a rubbish internet connection like me it can take an hour. At this point I decided it would be a good idea to spend time with the family. My 12 year old son took a beating at FIFA 14 on the XBOX 360).
When the image has finished downloading it will be extracted and then copied to the SD card or USB drive.
The recovery image is currently 1.4 gigabytes in size. This is largely the reason you should create the recovery media as soon as possible. As you fill up your SSD there will be less and less space available for that image to be extracted to before it is copied to the recovery media.
When the process has finished you should see a success message as shown above. You can now remove the USB drive from the system. Put it somewhere safe and leave it there until you need it (which will hopefully be never).
Installing Ubuntu on the HP Chromebook
There are currently two methods used to install Ubuntu on a Chromebook.
One method does the traditional partitioning of the main drive (SSD) and then gets you to boot from a USB drive and install into the blank partition.
The other method is to use a script called Crouton which creates a chroot system within the base ChromeOS system.
The method I am going to show you is the Crouton method as I believe this is the preferred option for the Everyday Linux User.
The reason I think Crouton is the best method is that it is possible to easily switch between ChromeOS and Ubuntu with a simple key combination. In addition, the resources required to use the Chromebook will be made available to Ubuntu. The touchpad, audio settings and internet connection are all available without having any further setup.
Trying to install Ubuntu using the first method (known as Chrubuntu) will require several extra scripts and hacks to be performed to get the trackpad working.
The process of installing Ubuntu
There are several steps that are required to install Ubuntu using the Crouton method.
1. Switch to developer mode
2. Download Crouton
3. Run Crouton to install Ubuntu
4. Install extra packages
Warning: This process will clear all the current settings on your Chromebook. If you have downloaded anything into the downloads folder, copy it off now.
Switching to developer mode
Before switching to developer mode bookmark this page in your browser as you will need to get back to this page to continue with the guide. (Press CTRL and D to bookmark the page).
If you have access to another computer or a tablet to continue viewing this page then it would be beneficial as the next steps will take you offline for a short period of time. Alternatively print this section out.
To enter developer mode use the following ninja key combination:
ESC + REFRESH + POWER BUTTON.
(The escape button is in the top left corner, the refresh button is the 4th key on the top row and looks like a curly arrow. The power button is in the top right corner).
The screen that appears looks a little bit scary.
Press CTRL and D on the keyboard now and you will be warned that you are about to enter developer mode and that all warranties are void if you continue.
Press Enter to continue.
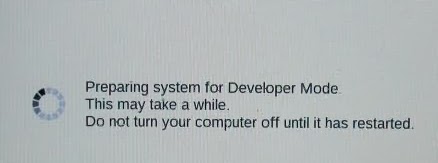
Your computer will now start to go into developer mode. Just let it do its thing. It takes between 15 and 20 minutes.
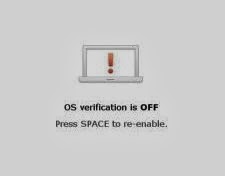
When the process has finished you will see the following screen:
From now on whenever you see this screen press CTRL and D. This boots your Chromebook into developer mode.
When the Chromebook boots up you will be back at the point where you have to set up the internet connection and enter your Google user details.
Download Crouton
Running Crouton
I am afraid that there is some command line stuff required to install Ubuntu on the Chromebook.
Do not worry too much. It isn't that tricky and it is fairly painless.
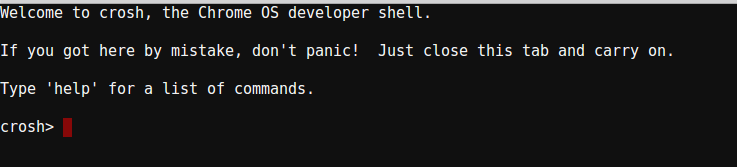
The first thing to do is open a terminal window by pressing the following key combination:
CTRL + ALT + T
Notice how the terminal window opens as a browser window. To get to a command shell type the following:
shell
By default the Crouton script installs Ubuntu 12.04 which is the current long term support release. It also defaults to the Unity desktop.
There are other options available. For instance the Linux distribution can be any one of the following:
- Debian (woody, sarge, etch, lenny, squeeze, wheezy, jessie, sid)
- Kali
- Ubuntu (warty, hoary, breezy, dapper, edgy, feisty, gutsy, hardy, intrepid, jaunty, karmic, lucid, maverick, natty, oneiric, precise, quantal, raring, saucy, trusty).
For support purposes only Debian wheezy, jessie and sid are supported and for Ubuntu only precise, quantal, raring and saucy are supported.
For those of you unaware of how the names match the versions here is a little guide:
- Trusty = 14.04
- Saucy = 13.10
- Raring = 13.04
- Quantal = 12.10
- Precise = 12.04 (LTS)
Really the only ones you should be considering are Precise (if you prefer long term support), Saucy as it is the latest release and Trusty (if you want to try 14.04 out).
As well as being able to determine the distribution you wish to install you can also decide on the desktop that you want to install.
The options are as follows:
- Cinnamon
- e17
- gnome
- kde
- lxde
- unity
- xfce
There are loads of options available for Crouton and if you wish to see them all type the following into the terminal window:
sudo sh -e ~/Downloads/crouton --help
The two flags that we are most interested in are -r and -t. The -r flag lets you choose the release (distribution to install). The -t flag lets you choose what is installed to the target system.
To install Ubuntu Saucy with the Cinnamon desktop you would type the following:
sudo sh -e ~/Downloads/crouton -r saucy -t cinnamon
If you fail to specify the -r flag then the default distribution will be installed and that is Precise. (Ubuntu 12.04).
If you fail to specify the -t flag then the Unity desktop will be installed.
Incidentally the -e flag encrypts the system to make it a little bit more secure.
As well as the desktop choice there are other targets that can be installed with the -t flag as follows:
- audio (for audio playback)
- chrome (installs the Chrome browser in the installed system)
- chromium (installs the chromium browser)
- cli-extra (includes tools such as ssh)
- core (performs core system configuration)
- extension (enables clipboard sharing with ChromeOS)
- gtk-extra (includes gksu, gdebi and a simple browser)
- keyboard (adds keyboard support for Chromebook's special keys)
- touch (provides touch screen support, not much use on the HP Chromebook)
- xbmc (installs xbmc media player)
Imagine that you wanted to install Debian Wheezy with the Gnome desktop and include Chromium and audio playback support. You would need to type the following:
sudo sh -e ~/Downloads/crouton -r wheezy -t gnome,gtk-extra,core,chromium,audio -e
In this guide I am just going to show you how to install Ubuntu with the Unity desktop and you can do that easily by just typing the following:
sudo sh -e ~/Downloads/crouton -r saucy -t unity -e
By choosing saucy you will get the latest Ubuntu release (13.10).
If you want to install the 12.04 LTS release you could instead type the following:
sudo sh -e ~/Downloads/crouton -t unity -e
Now is a good time to go and spend time with the family, beat them at FIFA 14 on the XBOX and if necessary take a comfort break. The process takes around 30 minutes.
When the script is near the end you will be asked to create a user. Enter the name of a user and then enter a password.
Before you do this note that to get back to Chrome OS you will need to press the following keystroke:
CTRL + ALT + LEFT ARROW
Ubuntu will now be loaded.
Install extra packages
The version of Ubuntu that is installed isn't the same as the version of Ubuntu that is installed from the ISO from the Ubuntu website.
You will have a very bare bones system with just the minimum of applications.
First things first. If you click on the files icon on the launch bar you will see that there is a downloads folder under your username. This is the same downloads folder that is used by ChromeOS. You can therefore share files easily between ChromeOS and Ubuntu by placing files in the downloads folder.
So what applications do you need? In theory that is entirely up to you. I don't recommend installing another browser.
You can switch to ChromeOS at any time by pressing CTRL + ALT and the LEFT arrow next to the escape button. You can switch back to Ubuntu by pressing CTRL + ALT and the RIGHT button and then CTRL + ALT and REFRESH (the curly arrow next to the right arrow).
I don't think you need to install another browser. Getting to the Chrome browser in ChromeOS is just a key combination away. If you need to download files from the internet use the Chrome browser and download files to the Downloads folder which can easily be accessed using Ubuntu.
Installing Synaptic
The first program that I recommend is Synaptic. This gives you a graphical application installer.
To install Synaptic switch to Ubuntu by pressing CTRL + ALT + RIGHT and then CTRL + ALT + REFRESH.
When you are in Ubuntu click on the button in the top left corner of the launcher and when the Dash appears start typing "TERM".
When the terminal window opens type the following to install Synaptic:
sudo apt-get install synaptic
To run Synaptic, type the following in the terminal window:
sudo synaptic
Synaptic is fairly easy to use and provides a good visual representation of the software repositories. To find a piece of software click on the search button and start typing either the name or the type of software you require.
When you have found the software you require click on the checkbox next to the software title. This marks the software for installation.
To install the software click "Apply".
Ubuntu Software Centre
If you have used Ubuntu before then you will probably be more familiar with the Ubuntu Software Centre. This isn't installed by default.
To install the software centre open Synaptic and search for "Software Center".
You will need to scroll down to find the software centre. Check the box next to "Software Center". Note that this will mark other dependant applications as well.
Click on "Apply" to install the "Software Centre".
To run the "Software Centre" press the icon in the top left corner of the launcher and when the Dash appears start typing "term". Open a terminal window and type the following:
gksu software-center
Now that you have Synaptic and the Software Centre installed you can now install any other application you desire.
Minecraft
Now you might wonder why I am making a specific point about Minecraft. My son is a huge Minecraft fan. The thought occurs that if you want to install Ubuntu on a Chromebook then you probably haven't got access to another computer.
If you have access to another computer then I would leave the Chromebook to be a Chromebook.
If you don't have access to another computer then it may be that you received the Chromebook as a gift or you are a young person who received it from your parents to do school work on. All your friends are playing Minecraft on their laptops and you want to play Minecraft as well.
There are three basic steps for installing Minecraft.
1. Install OpenJDK
2. Download the launcher
3. Run the launcher.
Install OpenJDK
Open up the Ubuntu Software Centre. (Open a terminal and type sudo software-center)
Search for OpenJDK.
Click on "OpenJDK Java 7 Runtime" and then click "Install".
Download the Minecraft Launcher
Scroll down to the Minecraft for Linux / Other and click on the Minecraft.jar link. The file will be downloaded to your downloads folder which is accessible by ChromeOS and Ubuntu.
Switch back to Ubuntu (CTRL + ALT + RIGHT ARROW and CTRL + ALT + REFRESH).
Open up the file manager (2nd icon on the launcher). Navigate to the download folder and find the Minecraft.jar file.
Right click on the file and choose properties. Click on the "Permissions" tab.
Check the "Allow executing file as program" box. Click "Close".
To run Minecraft double click on the Minecraft.jar file.
Additional Information
It is possible to make your Chromebook boot from USB drive. To do this open up a terminal within ChromeOS. (CTRL + ALT +T)
Enter the shell by typing shell
Now enter the following:
sudo crossystem dev_boot_usb=1 dev_legacy_boot=1
You will now be able to boot other live Linux operating systems. This actually works very well when using something like SLAX. You can also boot using the Android x86 live image.
To boot from a USB drive when you first boot instead of pressing CTRL and D to enter developer mode press CTRL and L.
Note though that trying to run an installed version of Android on a USB drive provides many problems. The live version works well but doesn't store any changes.
Summary
The experience you get from the installed Ubuntu isn't as good as the experience of Ubuntu on a normal computer. There are many challenges.
For instance, the software centre for Saucy only seems to run when you start it as sudo. Virtual box requires an upgrade to the kernel which involves a lot of extra steps.
Personally my recommendation is as follows. If you have another computer available to you then install Linux on that computer and leave the Chromebook to run ChromeOS.
ChromeOS is perfect for what it is created for and the HP Chromebook is perfect for running ChromeOS. Everything else feels like a hack.
Thankyou for reading.
Now switch to Ubuntu by clicking CTRL + ALT + RIGHT and then CTRL + ALT + REFRESH.
Open up the file manager and navigate to the download folder. Right click on the downloaded VirtualBox package and open with GDEBI package installer.
The above window will appear. Click "Install Package".
Posted at 20:30 | by
Gary Newell