
Introduction
This is the latest article in the series that shows you how to install Linux for Windows Vista users.In the first article I showed you how to create a bootable Linux DVD. I also showed how to create a bootable Linux USB drive in case you don't have a DVD drive.
After that I showed how to backup your files to DVDs, USB drives, external hard drives and Dropbox so that you can copy it back to the Linux partition at a later stage. I also demonstrated how to create a system image and recovery media.
This article is all about preparing your drive to install Windows Vista alongside Linux. It will guide you through cleaning your disk, defragmenting your disk and shrinking your disk.
Disk Cleanup
Firstly press "Alt" and "E" together to bring up an explorer window.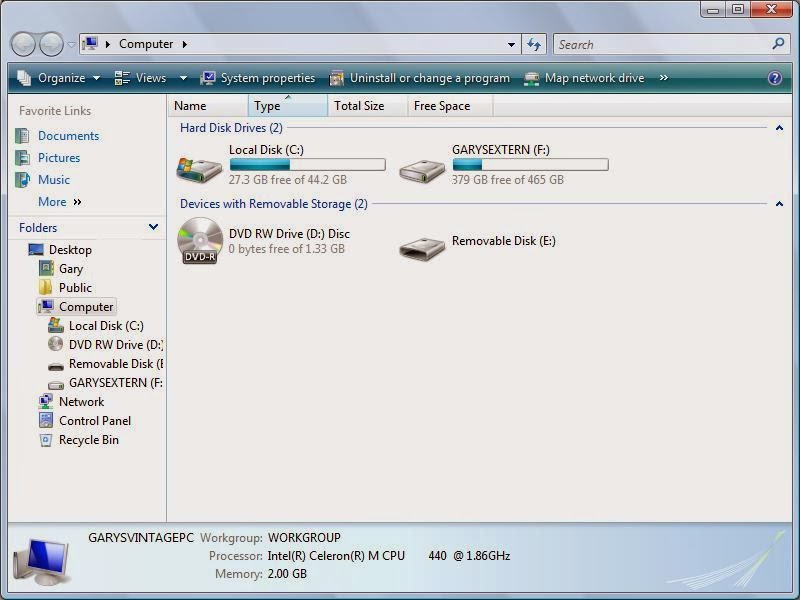
Right click on the drive called "Local Disk (C:)" and choose "Properties".
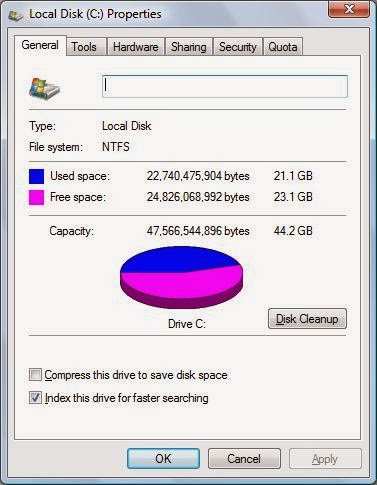
This screen shows you useful information about your drive such as how big the drive is and how much free space there is.
Click on "Disk Cleanup".
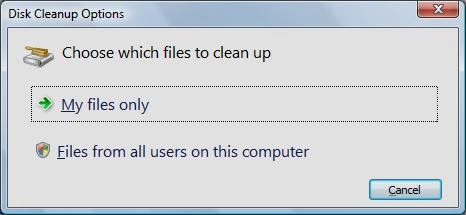
A message will appear asking whether you want to clean all files or just your files. Note that if you aren't an administrator your options will be different. You should therefore log in as an administrator.
Click on the option "Files from all users on this computer".
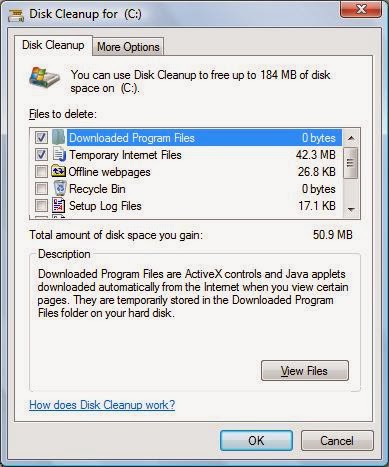
After a short while after your disk has been analysed the above screen will be displayed.
You will notice that there is a label that says "Total amount of disk space you will gain". If you accept the default options you can reclaim the amount of space shown.
You can claim more space though by checking the boxes of other items as well.
So what are they?
- Downloaded program files
- Temporary Internet Files - When you open a webpage the page is copied from the server to your local disk including images. These are all temporary internet files. After a while this can take a fair amount of space. You can delete these files because to get them again all you have to do is visit the sites again.
- Offline webpages - Pages downloaded from the internet so that they can be viewed without an internet connection.
- Recycle bin - Files that you have deleted and placed in the recycle bin which can still be restored.
- Setup log files - Files created by Windows
- Temporary files - When applications run they quite often create a temporary file to store information in as they go. Not all applications clean up after themselves and so leave a temporary file behind.
- Thumbnails - A small picture of all pictures on your computer. This gives you a quick previous when viewing a folder full of images.
- System queued Windows Error Reporting - Files used for error reporting.
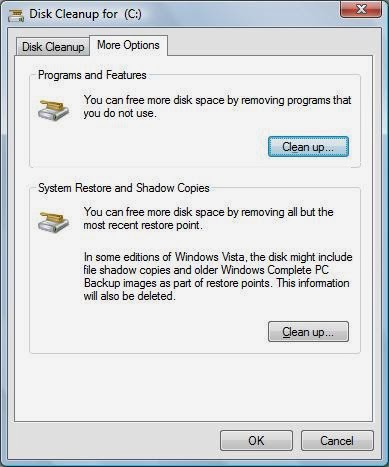
The "More Options" tab gives you further ways of cleaning up your disk.
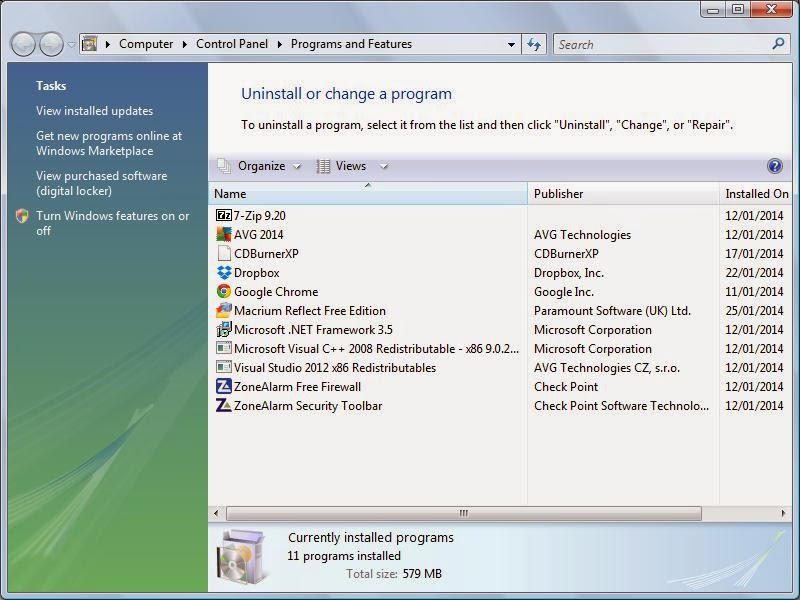
If there are applications you don't use remove them.
The other disk cleanup option to look is the system restore points.
If you are happy with the way the system is currently running then by cleaning up the restore points you delete all the restore points except for the current one.
This means you won't be able to restore from anything except for the current point in time but it does recover a lot of space.
The amount of cleaning up you do is up to you but it will recover space if you are limited.
Defragmenting your hard drive
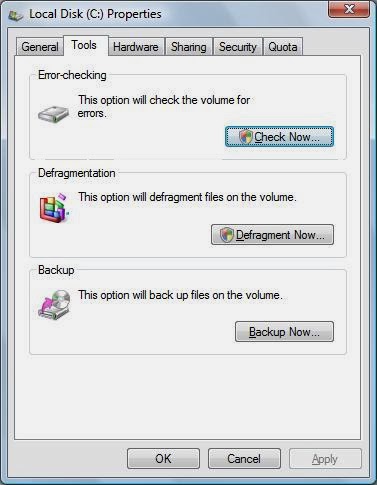
There are three options available:
- Check Now
- Defragment Now
- Backup Now
Note: This can take a large amount of time.
To check the disk click "Check Now".
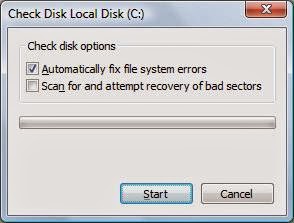
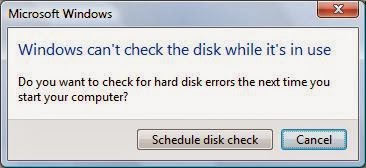
If you see the message above it is recommended that you click "Yes" and then reboot your computer.
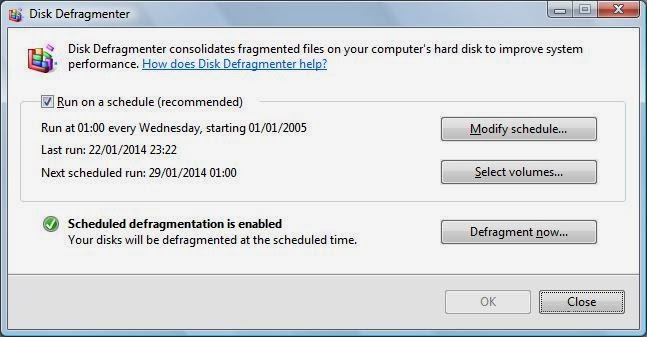
You can schedule your disk to defrag on regular occasions which if you have the time is a good idea. Simply set the date and time and select the disks to defrag and make sure your computer is on at the time the defrag is supposed to take place.
For this article though you will want to press the "Defragment now" button.
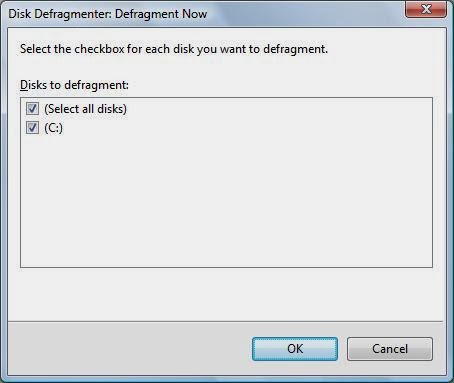
Select the disks you want to defragment and click "OK".
This process can take a large amount of time depending on the size of the disks and the amount of fragmentation.
Shrinking the Windows partition
When you installed Windows (or more than likely when you bought your computer with Windows pre-installed), it will have been set up to use the entire hard drive.If you only have one disk in your computer you will need to make space for installing Linux.
By running the file cleanup utilities above, you will have freed up some disk space.
Now you will want to make disk space available for other operating systems.
To shrink the amount of space Windows Vista uses press the "Start" button and start typing "Computer Management" into the search bar.
When you see "Computer Management" appear as an icon click on it.
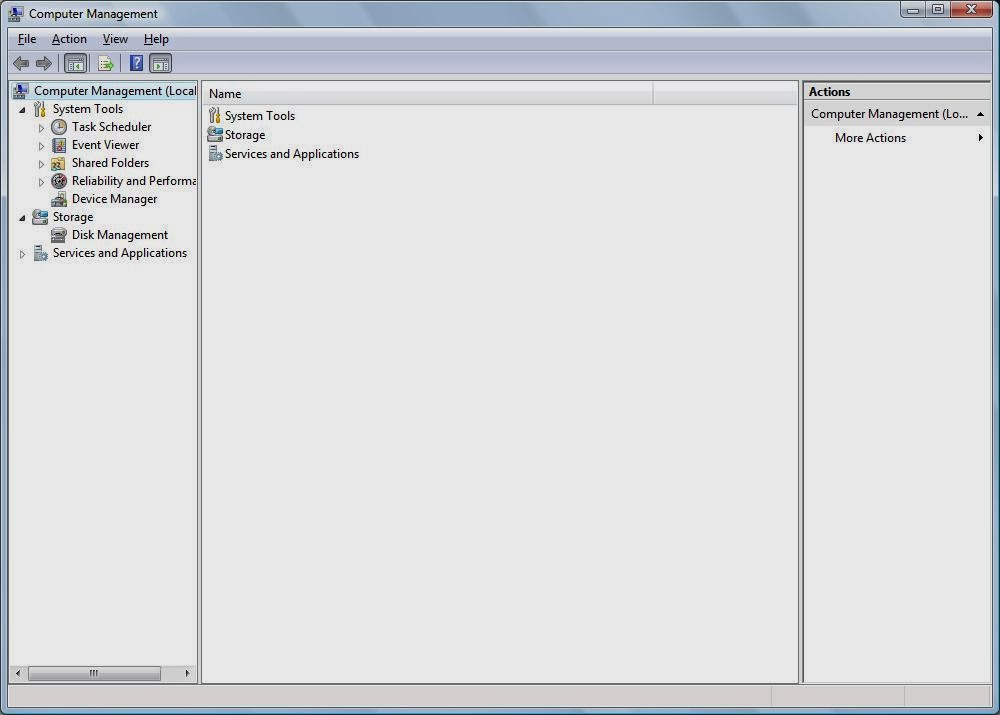
On the left hand side there is an option called "Storage" and under that there is "Disk Management". Select this option.
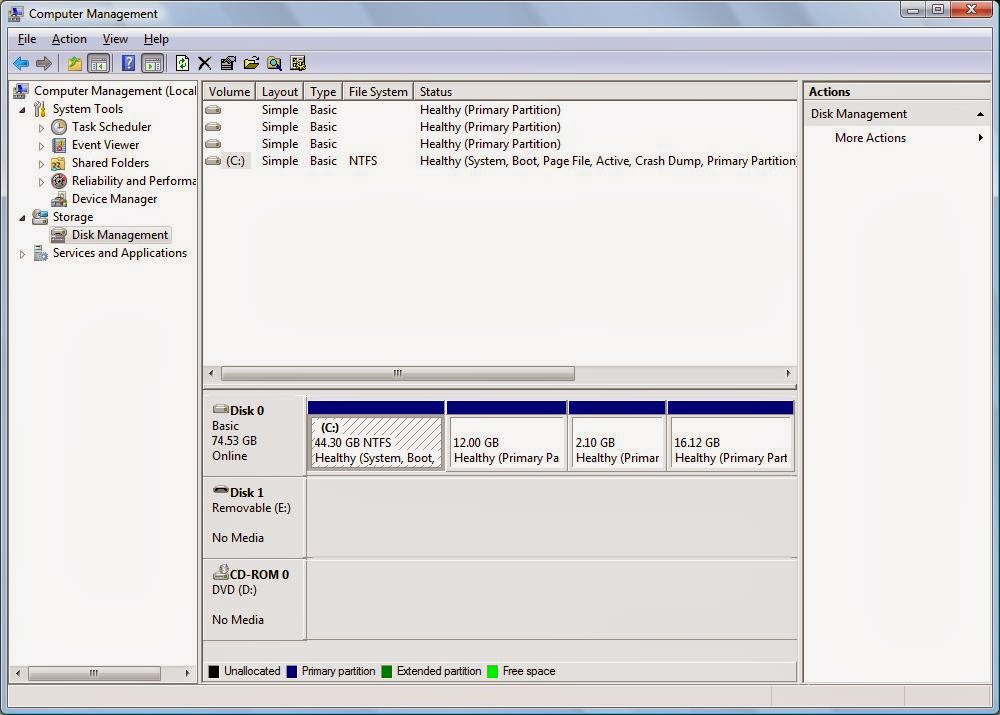
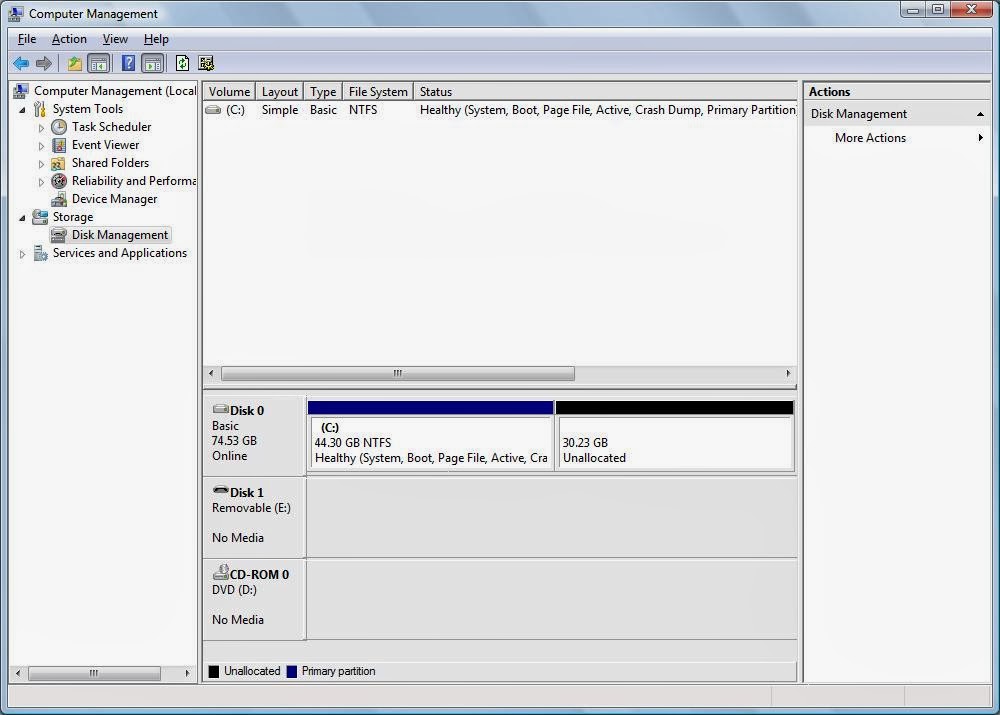
You will see an overview of the disks on your computer. In the image above I have already reduced the size of the C drive.
To shrink your C drive right click on the C drive (in either pane, top or bottom) and choose "Shrink Volume".
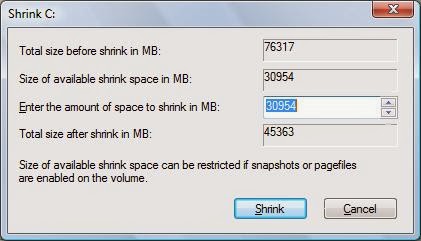
Enter the size that you want the Windows partition to be in MegaBytes. Take into account how much disk space is currently being used by Windows and factor in any amount you think it might need to grow.
Click "Shrink" to begin shrinking the disk.
Summary
You are now in a position to install Linux alongside Windows Vista. This will be covered in a future tutorial.
Thankyou for reading.

How do I now find that space and how to put Linux in it?
ReplyDelete